Swiftのちょっとしたコードを試せるPlaygound。
私はまだまだその真価を活かしきれないのかもしれません。
ちょっと便利になるPlaygroundのTipsを紹介したいと思います。
独自フレームワークをインポートする
自分で作ったフレームワークをインポートしたい時ありますよね?
ありますよね?
作りましょう。
Playgoundでフレームワークインポート
- アプリケーションプロジェクトを作成
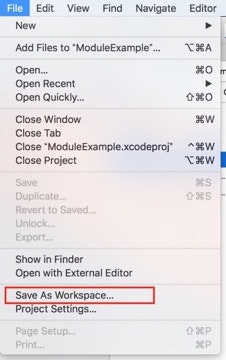
- プロジェクトをワークスペースとして保存。
- そのアプリケーションプロジェクトの中にPlaygoundを作成
- ワークスペースにフレームワークプロジェクトを追加
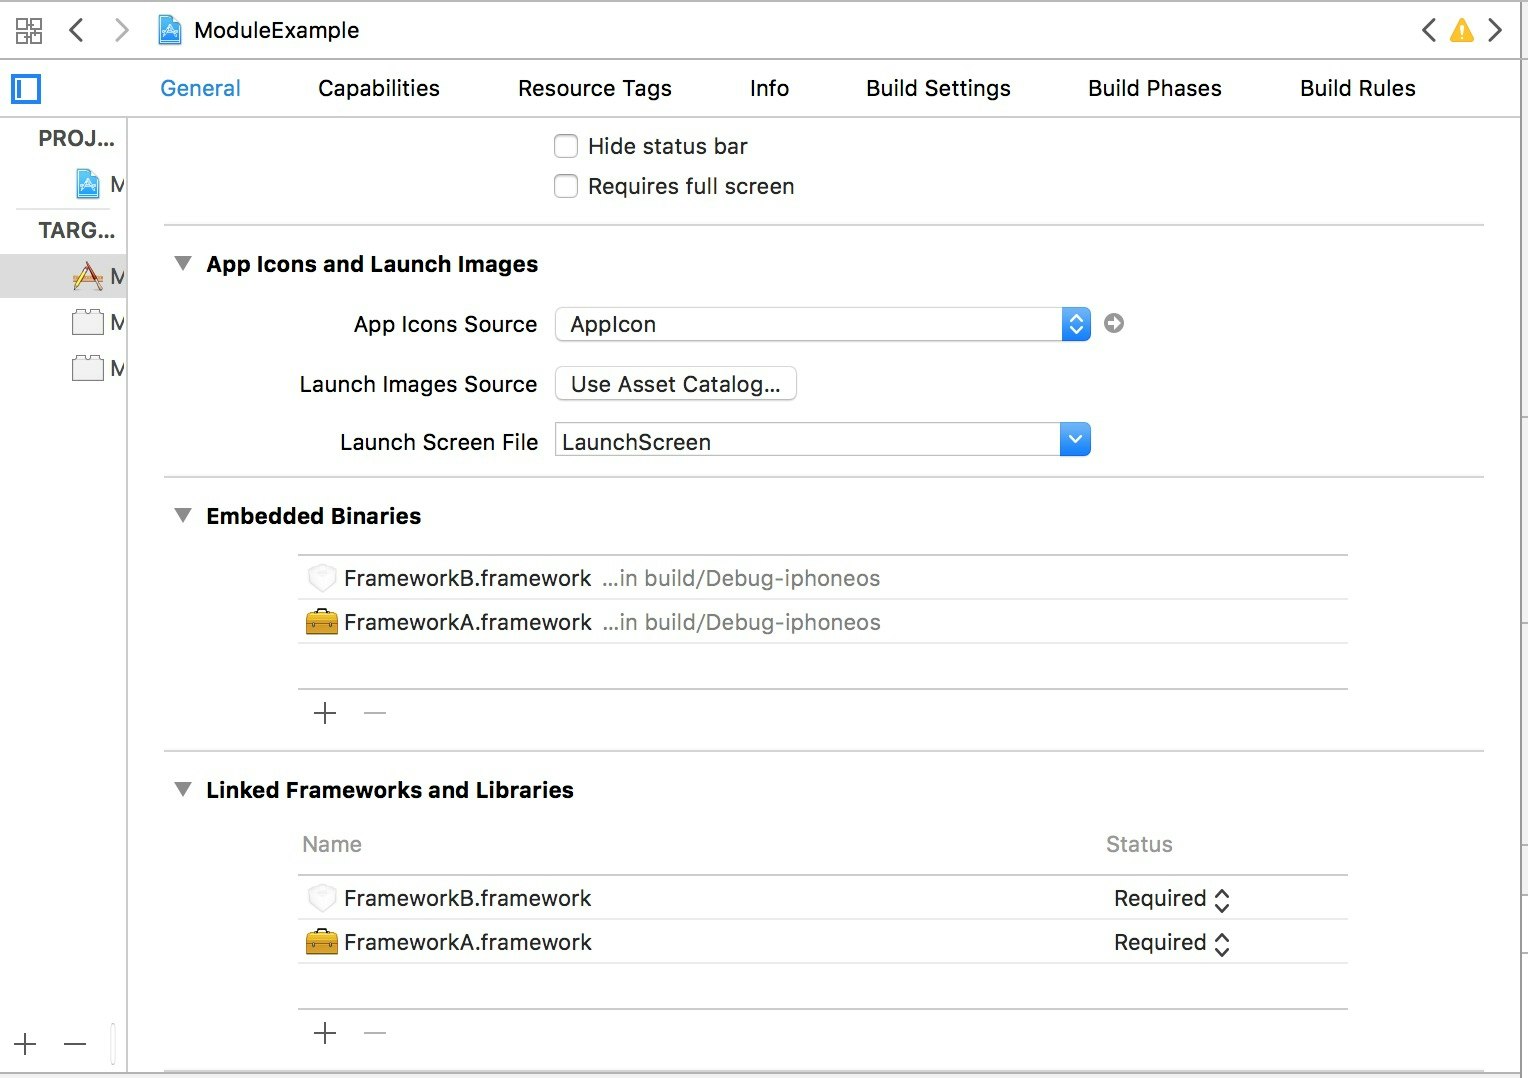
- ApplicationのGeneralのEmbedded BinariesとLinked Frameworks and Librariesに該当フレームワークをインポートする
アプリケーションプロジェクトを作成
プロジェクトをワークスペースとして保存。
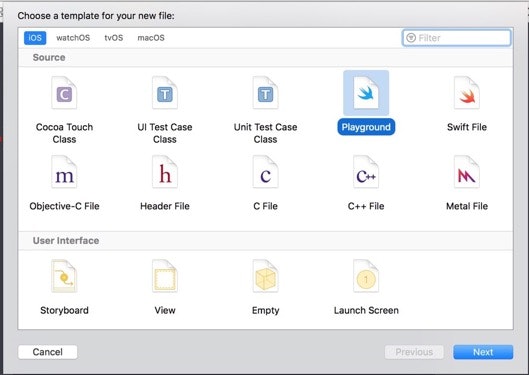
そのアプリケーションプロジェクトの中にPlaygoundを作成
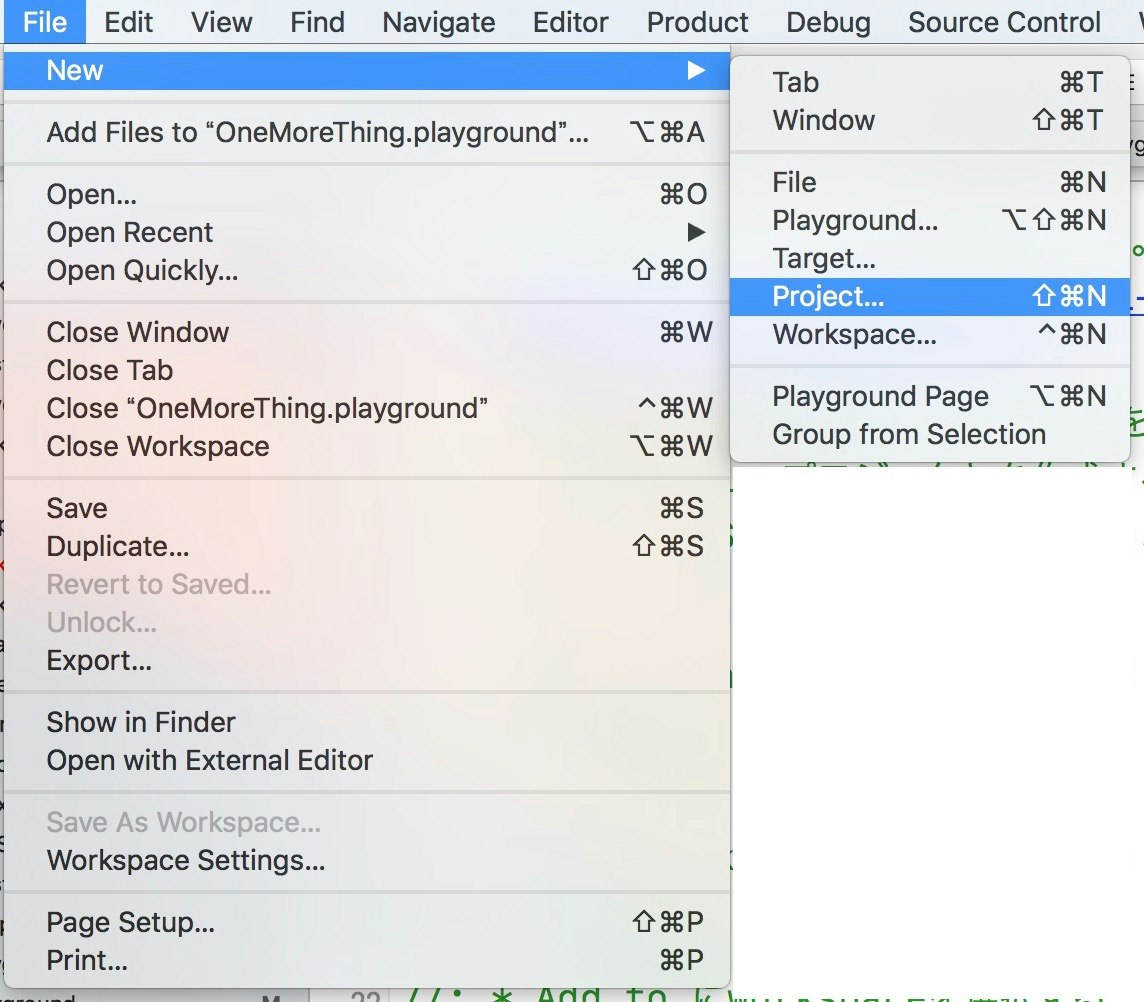
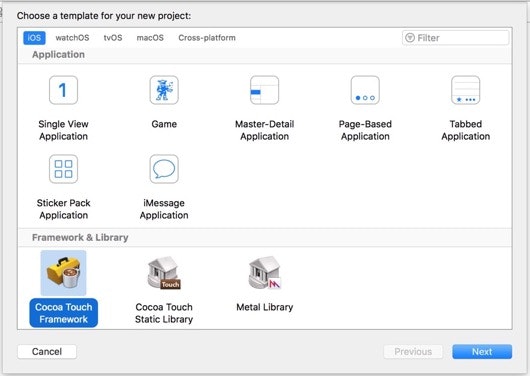
File -> New -> File...からPlaygroundを選択
- File -> New -> Playground だとプロジェクトに紐付かないプレイグランドが作成されるので注意
そのアプリケーションプロジェクトの中にPlaygoundを作成
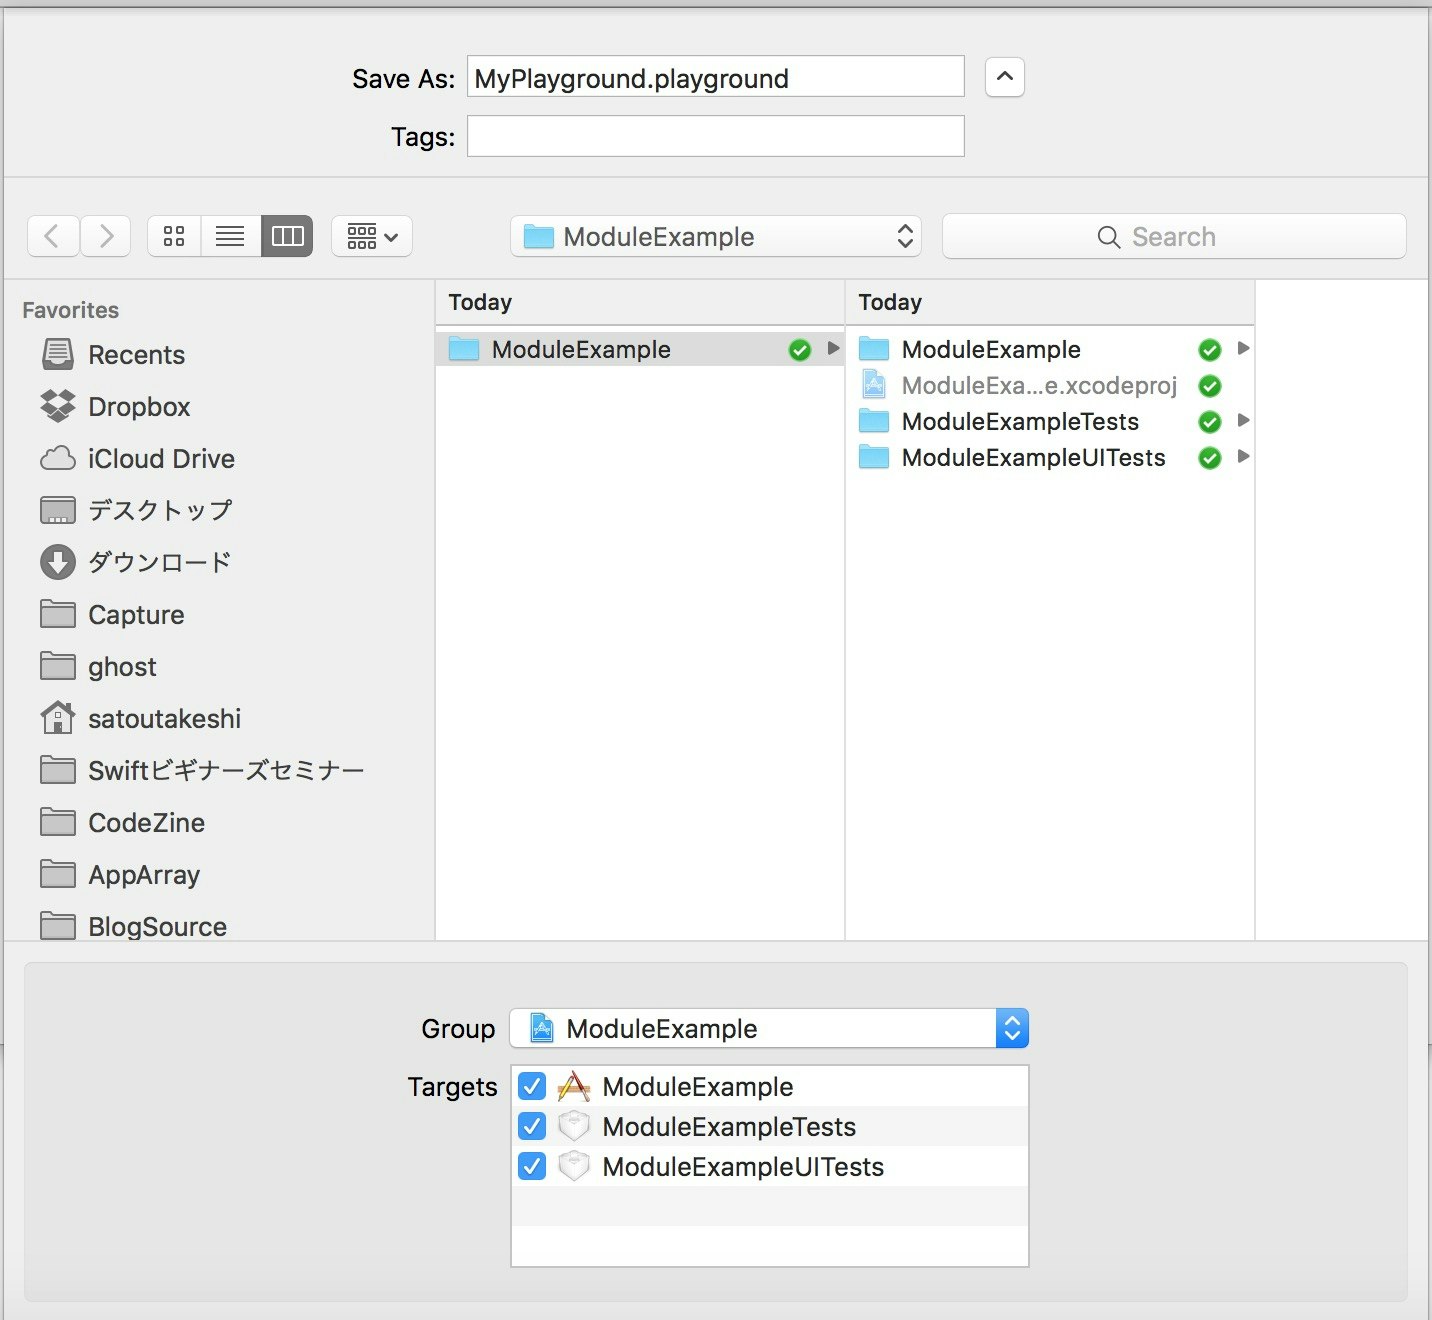
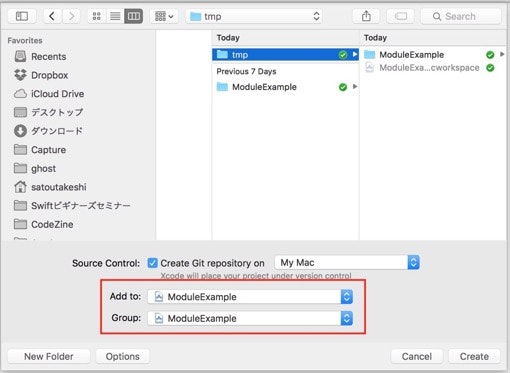
ワークスペースにフレームワークプロジェクトを追加
ワークスペースにフレームワークプロジェクトを追加
Add to にワークスペースを指定する
ApplicationのGeneralのEmbedded BinariesとLinked Frameworks and Librariesに該当フレームワークをインポートする
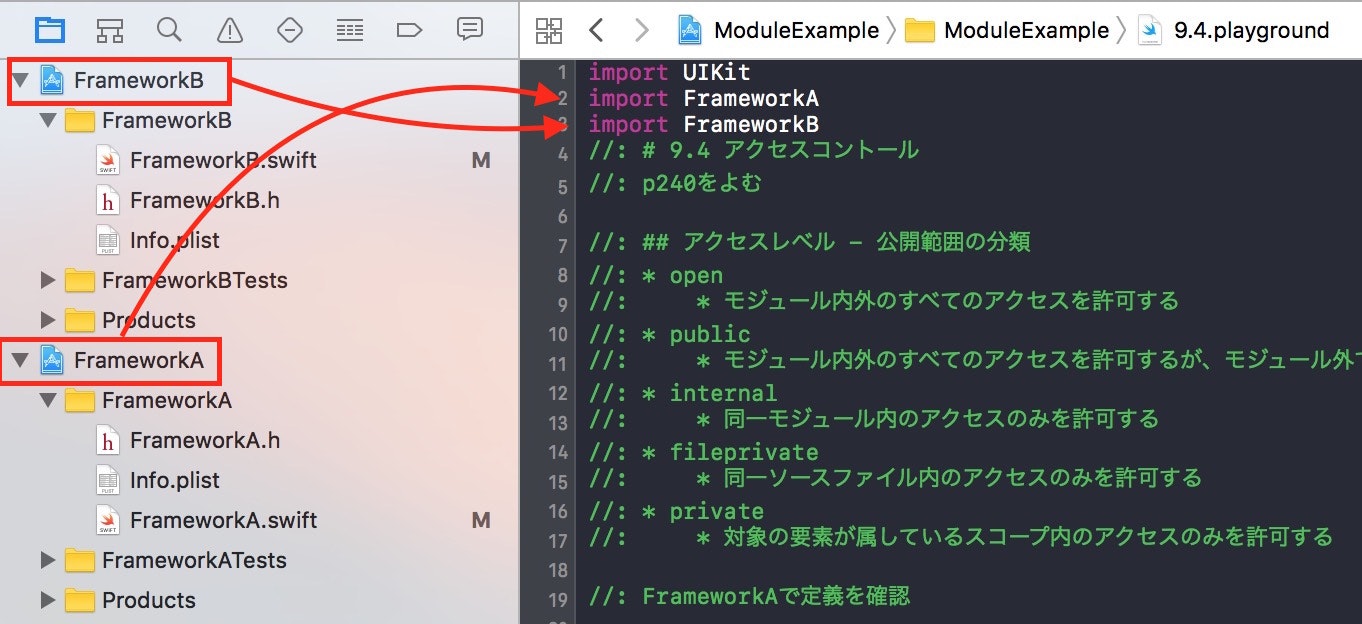
インポートできた!
アプリケーション側でビルドが必要
PlaygoundでUITableView
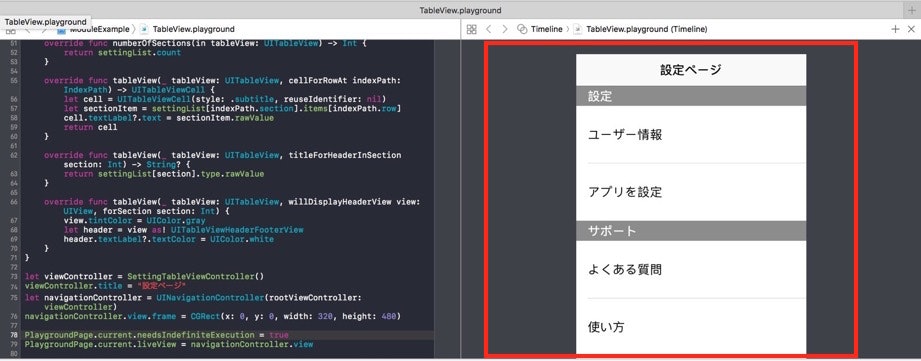
PlaygoundでもUITableViewを表示できます!
PlaygoundでUITableView
- PlaygroundSupportをインポート
- TableViewのモデルを作る
- TableViewを作成
- PlaygroundのLiveViewにTableViewを代入
PlaygroundSupportをインポート
import PlaygroundSupport
TableViewのモデルを作る
アプリの設定ページを想定してます
enum Section: String {
    case settiong = "設定"
    case support = "サポート"
    case info = "製品情報"

}

enum Row: String {
    case userSettiong = "ユーザー情報"
    case config = "アプリを設定"
    case faq = "よくある質問"
    case howToUse = "使い方"
    case site = "公式サイト"
    case privacyPoricy = "プライバシーポリシー"
    case term = "利用規約"
    case contact = "お問い合わせ"
}

struct SectionList {
    var type: Section
    var items: [Row]
}

let settingList = [
    SectionList.init(type: .settiong, items: [.userSettiong, .config]),
    SectionList.init(type: .support, items: [.faq, .howToUse, .site]),
    SectionList.init(type: .info, items: [.privacyPoricy, .term, .contact])
]
TableViewを作成
UITabieViewControllerのサブクラスを作成。
overrideでテーブルの設定をしていきます。
final class SettingTableViewController: UITableViewController {
    override func viewDidLoad() {
        super.viewDidLoad()
        self.view.backgroundColor = UIColor.white
    }

    override func tableView(_ tableView: UITableView, numberOfRowsInSection section: Int) -> Int {
        return settingList[section].items.count
    }

    override func tableView(_ tableView: UITableView, heightForRowAt indexPath: IndexPath) -> CGFloat {
        return 80.0
    }

    override func numberOfSections(in tableView: UITableView) -> Int {
        return settingList.count
    }

    override func tableView(_ tableView: UITableView, cellForRowAt indexPath: IndexPath) -> UITableViewCell {
        let cell = UITableViewCell(style: .subtitle, reuseIdentifier: nil)
        let sectionItem = settingList[indexPath.section].items[indexPath.row]
        cell.textLabel?.text = sectionItem.rawValue
        return cell
    }

    override func tableView(_ tableView: UITableView, titleForHeaderInSection section: Int) -> String? {
        return settingList[section].type.rawValue
    }

    override func tableView(_ tableView: UITableView, willDisplayHeaderView view: UIView, forSection section: Int) {
        view.tintColor = UIColor.gray
        let header = view as! UITableViewHeaderFooterView
        header.textLabel?.textColor = UIColor.white
    }
}
PlaygroundのLiveViewにTableViewを代入
needsIndefiniteExecutionをtrueにしてプレイグランドを無限に実行させる。
liveViewにTableViewを代入する
let viewController = SettingTableViewController()
viewController.title = "設定ページ"
let navigationController = UINavigationController(rootViewController: viewController)
navigationController.view.frame = CGRect(x: 0, y: 0, width: 320, height: 480)

PlaygroundPage.current.needsIndefiniteExecution = true
PlaygroundPage.current.liveView = navigationController.view
