devise とは
Rails でログイン認証管理を行う際のメジャーな Gem 。
以下の10個のモジュールからなる。
- Database Authenticatable:
- DB に保存するパスワードの暗号化。ほぼ必須のモジュール。
- POST リクエストや Basic 認証で使われる。
- Omniauthable:
- OmniAuth サポートのためのモジュール。
- Twitter などの外部サービスのアカウントでユーザー登録させたい場合に追加する。
- Confirmable:
- アカウント作成の際のメール認証モジュール。
- メール中のリンクをクリックしないとログインできないようにできる。
- Recoverable:
- パスワードリセットが可能になる。
- Registerable:
- サインアップ処理が可能になる。
- Rememberable:
- クッキーに保存されたトークンの生成・削除を行う。
- Trackable:
- ログイン時のデータ (サインイン回数・時刻・IPアドレス) をDBに保存する。
- Timeoutable:
- 一定時間でセッション情報を削除する。
- Validatable:
- メールアドレスとパスワードのバリデーションを行う(設定ファイルで変更可能)。
- Lockable:
- 規定回数以上ログインに失敗したらアカウントをロックする。
インストール
開発環境の準備
今回は Rails (4.2.0) と devise (3.4.1) 環境でテストする。
DBはSQLite3をそのまま利用する。
これらが動作する環境を準備しておく。
Rails アプリケーション作成
以下のコマンドを実行していく。
$ mkdir -p ~/projects/devise_rails_admin_app
$ cd ~/projects/devise_rails_admin_app
$ bundle init
作成されたGemfileを以下のように書き換える。
source 'https://rubygems.org'

gem 'rails', '4.2.0'
以下のコマンドを実行。
$ bundle install --path vendor/bundle
$ bundle exec rails new .
...
Overwrite /home/vagrant/projects/capistrano_sample/Gemfile? (enter "h" for help) [Ynaqdh] Y
...
Gemfile を下記のように書き換える。
source 'https://rubygems.org'

gem 'rails', '4.2.0'
gem 'sqlite3'
gem 'sass-rails', '~> 5.0'
gem 'uglifier', '>= 1.3.0'
gem 'coffee-rails', '~> 4.1.0'
gem 'therubyracer', platforms: :ruby
gem 'jquery-rails'
gem 'turbolinks'
gem 'jbuilder', '~> 2.0'
gem 'sdoc', '~> 0.4.0', group: :doc
gem 'bcrypt', '~> 3.1.7'
gem 'devise'
gem 'rails_admin'

group :development, :test do
  gem 'byebug'
  gem 'web-console', '~> 2.0'
  gem 'spring'
end
下記コマンドを実行。
$ bundle install --path vendor/bundle
devise のインストール
下記コマンドを実行。
$ bundle exec rails generate devise:install
      create config/initializers/devise.rb
      create config/locales/devise.en.yml
===============================================================================

Some setup you must do manually if you haven't yet:

1. Ensure you have defined default url options in your environments files. Here
   is an example of default_url_options appropriate for a development environment
   in config/environments/development.rb:

      config.action_mailer.default_url_options = { host: 'localhost', port: 3000 }

   In production, :host should be set to the actual host of your application.

2. Ensure you have defined root_url to *something* in your config/routes.rb.
   For example:

      root to: "home#index"

3. Ensure you have flash messages in app/views/layouts/application.html.erb.
   For example:

      <p class="notice"><%= notice %></p>
      <p class="alert"><%= alert %></p>

4. If you are deploying on Heroku with Rails 3.2 only, you may want to set:

      config.assets.initialize_on_precompile = false

   On config/application.rb forcing your application to not access the DB
   or load models when precompiling your assets.

5. You can copy Devise views (for customization) to your app by running:

    rails g devise:views

===============================================================================
このような出力が出る。
environments の設定
config.action_mailer.default_url_options の設定
config/environments/ 以下のファイル(development.rb、production.rb など) に下記の行を追加
(host や port は各環境に合わせる)。
config.action_mailer.default_url_options = { host: 'localhost', port: 3000 }
root ページの作成
下記コマンドで root ページ用の Controller を作成する。
$ bundle exec rails generate controller home index
ログイン・サインアップ画面へのリンク追加
views/home/index.html.erb にログイン画面とサインアップ画面へのリンク追加。
<h1>Home#index</h1>
<% if user_signed_in? %>
  Logged in as <strong><%= current_user.email %></strong>.
  <%= link_to "Settings", edit_user_registration_path, :class => "navbar-link" %> |
  <%= link_to "Logout", destroy_user_session_path, method: :delete, :class => "navbar-link" %>
<% else %>
  <%= link_to "Sign up", new_user_registration_path, :class => 'navbar-link' %> |
  <%= link_to "Login", new_user_session_path, :class => 'navbar-link' %>
<% end %>
<p>Find me in app/views/home/index.html.erb</p>
root_url の設定
config/routes.rb に root_url を記述する。
Rails.application.routes.draw do
  get 'home/index'
  root 'home#index'
end
ログイン情報の画面への出力
app/views/layouts/application.html.erb の設定
<%= yield =%> の行のすぐ上の部分に下記記述を追加。
<% if notice %>
  <p class="alert alert-success"><%= notice %></p>
<% end %>
<% if alert %>
  <p class="alert alert-danger"><%= alert %></p>
<% end %>
ログイン時のみ内容を確認できるように設定
app/controllers/application_controller.rb に before_action を追加。
class ApplicationController < ActionController::Base
  before_action :authenticate_user!
  protect_from_forgery with: :exception
end
今回は生成したモデルが user なので、authenticate_user! となる。
他のモデル名の場合、userの部分を書き換える。
User Model の生成
下記コマンドで devise を利用して User Model を生成する。
$ bundle exec rails generate devise user
$ bundle exec rake db:migrate
動作確認
下記コマンドでアプリケーションサーバ起動。
$ bundle exec rails server -b 0.0.0.0
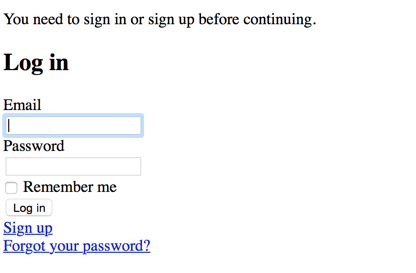
ブラウザからアクセスすると下記のような画面が見えるはず。
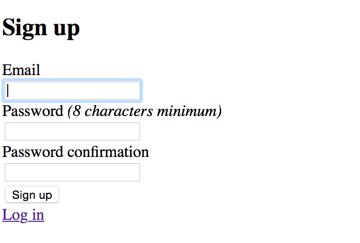
サインアップ画面はこんな感じ。
ログイン後の home/index.html

devise のカスタマイズ・情報取得
メール周り
このままだとパスワードリセット等の機能が正常に働かないためメーラー用の設定をする。
config/environments/development.rb に次のような設定を行う。
例として Gmail を利用する場合の記述を記載している。
config.action_mailer.default_url_options = { :host => 'localhost:3000' }
config.action_mailer.delivery_method = :smtp
config.action_mailer.smtp_settings = {
  :address => 'smtp.gmail.com',
  :port => 587,
  :authentication => :plain,
  :user_name => 'メールアドレス',
  :password => 'パスワード'
}
ユーザーがサインインしているかどうかの判定
# 戻り値が true ならサインイン済み。
user_signed_in?
# サインインしている全ユーザー取得
current_user
# ユーザーのセッション情報
user_session
devise の View をカスタマイズする
下記のコマンドで app/view/devise 以下に devise の View が作成される。
$ rails generate devise:views
対応関係は下記のようになっている。
- ログイン:
app/views/devise/sessions/new.html.erb - ユーザー登録:
app/views/devise/registrations/new.html.erb - ユーザ情報変更:
app/views/devise/registrations/edit.html.erb - パスワード変更:
app/views/devise/passwords/edit.html.erb - メール認証:
app/views/devise/confirmations/new.html.erb - パスワードリセット:
app/views/devise/passwords/new.html.erb - アカウントアンロック:
app/views/devise/unlocks/new.html.erb
devise で作成したモデルにカラム追加
bundel exec rails generate migration … で追加すれば良い。
$ bundle exec rails generate migration add_name_to_users name:string
index や unique 制約が必要な場合は db/migrate/[yyyymmddHHMMSS]_add_name_to_users.rb
にこのタイミングで追加してやる。
$ bundle exec rake db:migrate
仮に認証キーを email から name に変更する場合は
config/initializers/devise.rb の config.authentication_keys を変更すれば良い。
unique 制約等を追加した場合は Users Model に validate を追記する。
サインアップ時に追加したカラムも入力させたい場合は
app/views/devise/registrations/new.html.erb
にフィールドを追加する。
プロフィール画面に表示を追加したい場合は
app/views/devise/registrations/edit.html.erb
に追加する。
参考資料
devise README
Railsの一番人気のログイン認証gemのDeviseの導入方法
Railsの一番人気のログイン認証gemのDeviseのカスタマイズ方法
Rails4 にて Devise でユーザー登録・ログイン認証・認可の機能を追加