0
1

Delete article

Deleted articles cannot be recovered.

Draft of this article would be also deleted.

Are you sure you want to delete this article?

More than 5 years have passed since last update.

Ubuntu 18.04 LTS上のIntelliJ IDEAにDocker integrationプラグインを導入する方法

Last updated at Posted at 2017-02-14

Ubuntu 16.04 LTS上のIntelliJ IDEAにDocker integrationプラグインを導入する方法についてまとめます。

#Docker Remote API有効化

$ sudo sed -i -e "s/#ExecStart=\/usr\/bin\/dockerd -H fd:\/\//ExecStart=\/usr\/bin\/dockerd -H fd:\/\/ -H tcp:\/\/0.0.0.0:2376/g" /lib/systemd/system/docker.service
$ sudo systemctl daemon-reload
$ sudo systemctl restart docker

#Docker integrationプラグインインストール

  1. IntelliJ IDEAのSettings-Pluginsを開き、Install JetBrains plugin...を句クリックします。
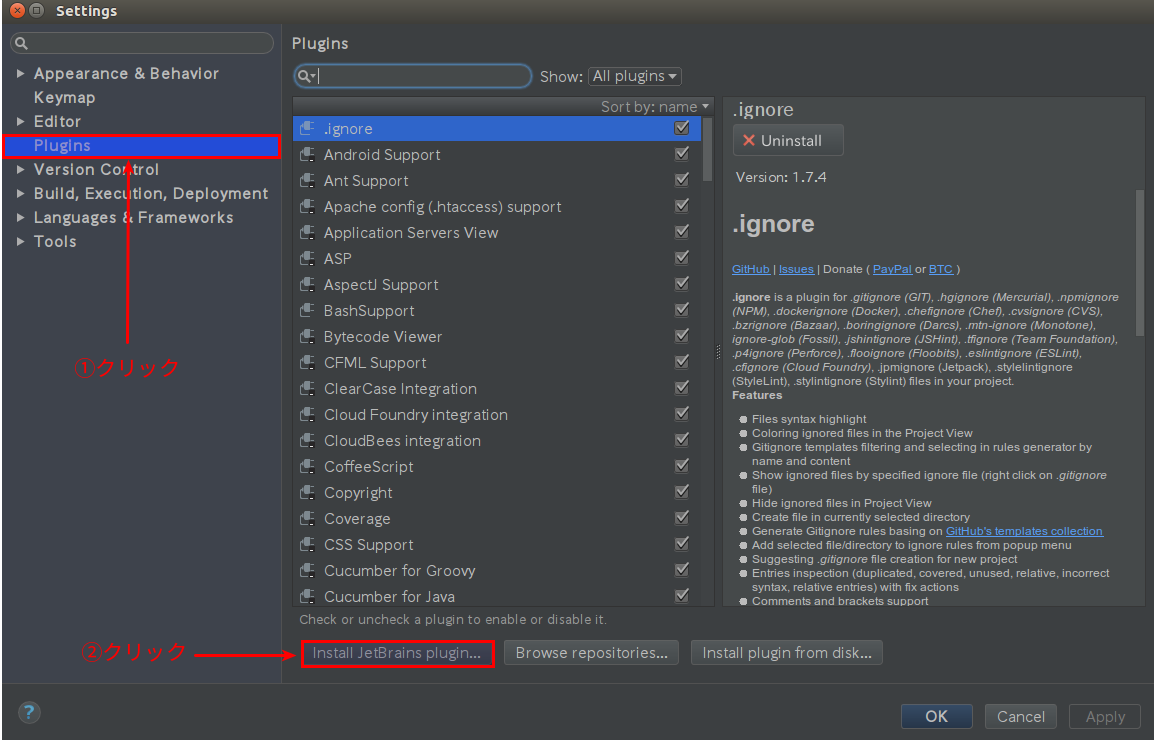
    Settings_013.png
  2. 検索窓にdockerと入力し、Docker integrationを選択し、Installボタンをクリックします。
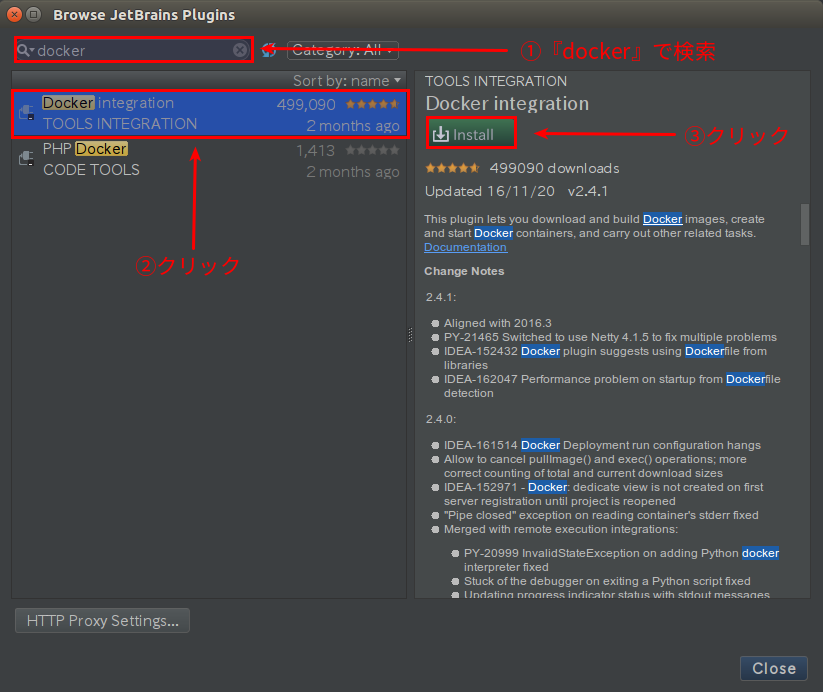
    Browse JetBrains Plugins _014.png
  3. プラグインのインストールが完了したら、Restart IntelliJ IDEAボタンをクリックし、IntelliJ IDEAを再起動します。
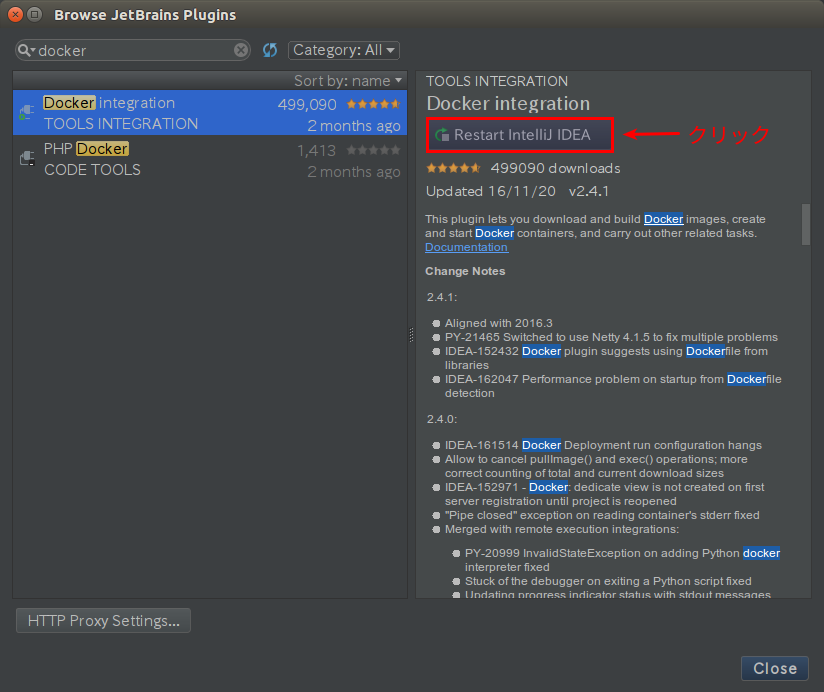
    Browse JetBrains Plugins _015.png

#Docker integrationプラグイン設定

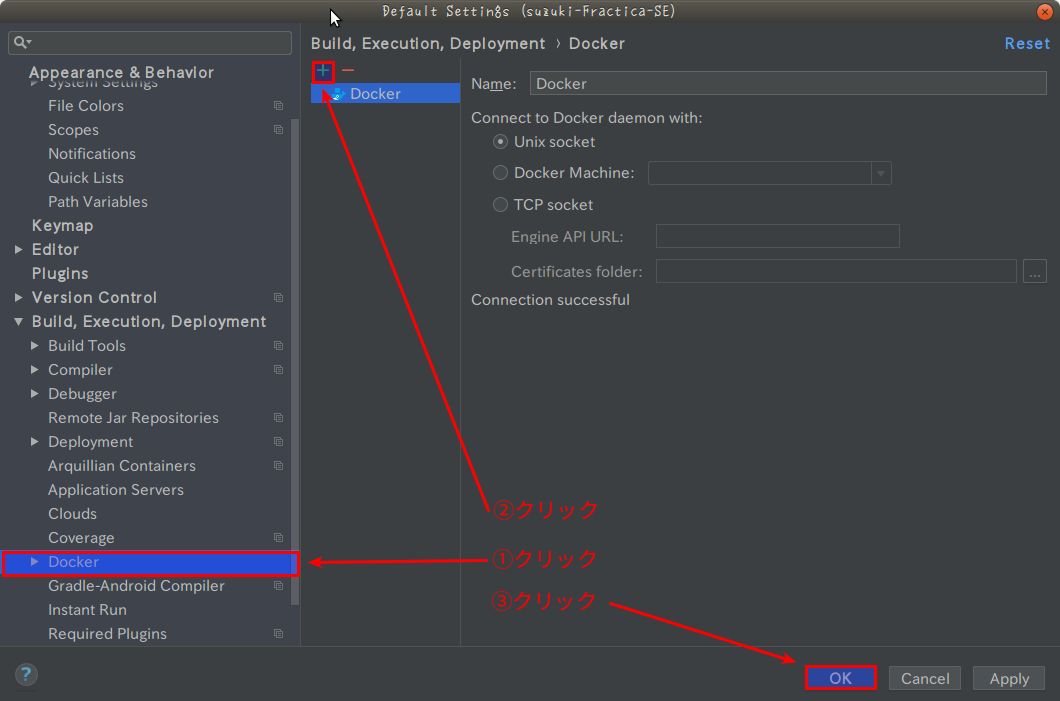
  1. IntelliJ IDEAのSettings-Build, Excution, Deployment-Dockerを開き、Settings_016_.png
    ボタンをクリックし、OKボタンをクリックします。
    Default Settings (suzuki-Fractica-SE)_063.png

関連記事

#参考文献

0
1
0

Register as a new user and use Qiita more conveniently

  1. You get articles that match your needs
  2. You can efficiently read back useful information
  3. You can use dark theme
What you can do with signing up
0
1

Delete article

Deleted articles cannot be recovered.

Draft of this article would be also deleted.

Are you sure you want to delete this article?