storyboardを使わずにコードのみで記述されている情報少ないなーと思い、
これからコードのみで書いていきたいという人(少数だとは思いますが)がいた時のための保存です。
コードのみでアプリを作ろうと思った理由
・AutoLayoutなんか難しそう
・複数人開発でstoryboard一緒にいじっちゃうと怖い
・storyboard内での設定を見落としてしまいがち
storyboard使い慣れてなくて、ただ単に「逃げ」です。
storyboardを使用する利点もかなりあると思っています。
collectionViewを生成
まずは、ViewControllerにcollectionViewを生成していきます。
(ここでは、簡易的にViewController内にcollectionViewなどを配置しますが、普段の開発ではViewController内にUIパーツを配置はあまりしていません。)
Cellはとりあえず生成。
//スクリーンサイズの取得
let screenSize: CGSize = CGSize(width: UIScreen.main.bounds.size.width, height: UIScreen.main.bounds.size.height)

final class ViewController: UIViewController {

    private let collectionView: UICollectionView = {
        //セルのレイアウト設計
        let layout: UICollectionViewFlowLayout = UICollectionViewFlowLayout()

        //各々の設計に合わせて調整
        layout.scrollDirection = .vertical
        layout.minimumInteritemSpacing = 0
        layout.minimumLineSpacing = 0

        let collectionView = UICollectionView( frame: CGRect(x: 0, y: 0, width: screenSize.width, height: screenSize.height ), collectionViewLayout: layout)
        collectionView.backgroundColor = UIColor.white
        //セルの登録
        collectionView.register(CollectionViewCell.self, forCellWithReuseIdentifier: "CollectionViewCell")
        return collectionView
    }()
}
final class CollectionViewCell: UICollectionViewCell {

    override init(frame: CGRect) {
        super.init(frame: frame)
    }

    required init?(coder aDecoder: NSCoder) {
        fatalError("init(coder:) has not been implemented")
    }

}
DataSource,Delegateの設定
DataSource,Delegateについて設定することで、cellの数、cellに与える情報などを指定していきます。
ただ単に表示してあげたいのであればこれで終わり。
結構簡単ですね!!
final class ViewController: UIViewController {

    fileprivate let fruits: [String] = ["apple", "grape", "lemon", "banana", "cherry", "strobery", "peach", "orange"]

    override func viewDidLoad() {
        super.viewDidLoad()

        //生成したcollectionViewのdataSourceとdelegteを紐づける
        collectionView.dataSource = self
        collectionView.delegate = self

        view.addSubview(collectionView)
  }
}


//cellに与える情報の設定
extension ViewController: UICollectionViewDataSource {

    //cellの個数設定
    func collectionView(_ collectionView: UICollectionView, numberOfItemsInSection section: Int) -> Int {
        return fruits.count
    }

    func collectionView(_ collectionView: UICollectionView, cellForItemAt indexPath: IndexPath) -> UICollectionViewCell {

        let cell = collectionView.dequeueReusableCell(withReuseIdentifier: "CollectionViewCell", for: indexPath) as! CollectionViewCell

        let cellText = fruits[indexPath.item]
        cell.setupContents(textName: cellText)

        return cell
    }
}

//イベントの設定(何もなければ記述の必要なし)
extension ViewController: UICollectionViewDelegate {

}

//cellのサイズの設定
extension ViewController: UICollectionViewDelegateFlowLayout {

  func collectionView(_ collectionView: UICollectionView, layout collectionViewLayout: UICollectionViewLayout, sizeForItemAt indexPath: IndexPath) -> CGSize {

      //ここでは画面の横サイズの半分の大きさのcellサイズを指定
      return CGSize(width: screenSize.width / 2.0, height: screenSize.width / 2.0)
  }
}
cellには配列に持たせたStringを表示させるLabelを配置。
final class CollectionViewCell: UICollectionViewCell {

    private let fruitsNameLabel: UILabel = {
        let label = UILabel()
        label.frame = CGRect(x: 0, y: 0, width: screenSize.width / 2.0, height: screenSize.width / 2.0)
        label.textColor = UIColor.gray
        label.textAlignment = .center
        return label
    }()

    override init(frame: CGRect) {
        super.init(frame: frame)
        setup()
    }

    required init?(coder aDecoder: NSCoder) {
        fatalError("init(coder:) has not been implemented")
    }


    private func setup() {
        layer.borderColor = UIColor.darkGray.cgColor
        layer.borderWidth = 3.0

        contentView.addSubview(fruitsNameLabel)
    }

    func setupContents(textName: String) {
        fruitsNameLabel.text = textName
    }
}
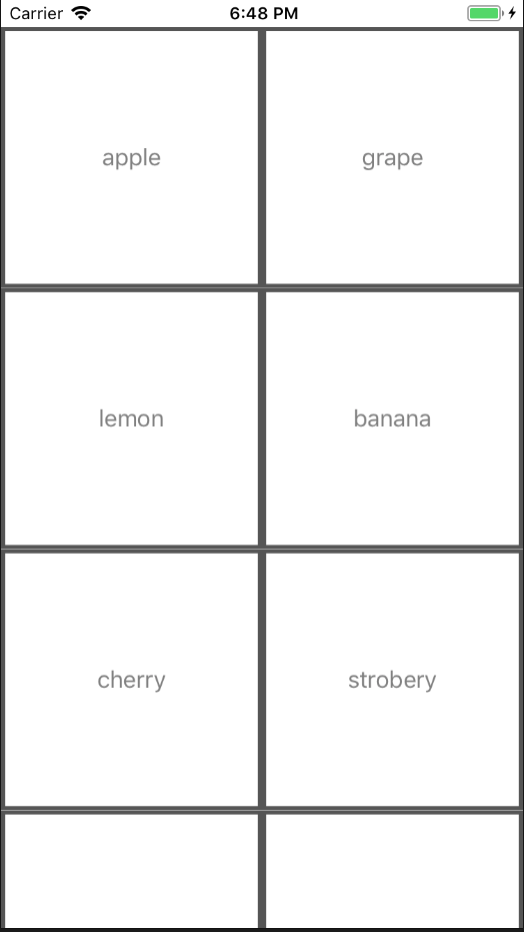
これだけの記述でこのようなViewが簡単に作成できます。
viewControllerの移動(データの受け渡し)
タップされたcellのStringのデータをNextViewControllerに引き渡したし、NextViewControllerをpresentしたいとおもいます。
NextViewControllerもstoryboardは使いません。
final class NextViewController: UIViewController {

    private let nameLabel: UILabel = {
        let label = UILabel()
        label.frame = CGRect(x: 0, y: 0, width: screenSize.width, height: 100)
        label.layer.position = CGPoint(x: screenSize.width / 2.0, y: screenSize.height / 2.0)
        label.textAlignment = .center
        return label
    }()

    //初期値にStringを受け取る
    init(name: String) {
        //受け取ったデータをnameLabelのテキストにする
        nameLabel.text = name
        super.init(nibName: nil, bundle: nil)
    }

    required init?(coder aDecoder: NSCoder) {
        fatalError("init(coder:) has not been implemented")
    }

    override func viewDidLoad() {
        super.viewDidLoad()
        view.backgroundColor = UIColor.white
        view.addSubview(nameLabel)
    }

}
viewController内でのNextViewControllerへの移動の記述
final class ViewController: UIViewController {

    //selectされたindexPathを受け取り、NextViewControllerに伝える
    fileprivate func moveNextVC(indexPath: IndexPath) {
        let itemName = fruits[indexPath.item]
        let nextVC = NextViewController(name: itemName)
        present(nextVC, animated: true, completion: nil)
    }
}

extension ViewController: UICollectionViewDelegate {

    func collectionView(_ collectionView: UICollectionView, didSelectItemAt indexPath: IndexPath) {
        moveNextVC(indexPath: indexPath)
    }
}
おわりに
巷の技術書などではstoryboardを使って説明しているが、コードのみでも簡単にUIパーツを配置したり、ViewController間の移動も行うことができる。
storyboard使わないと、safeAreaとか、パーツの幅や高さの計算とか色々ありますが、結構楽にかけたりするものです。
AutoLayoutに悩ませている方々、コードのみもかなり楽です。