この記事はこちらの記事を参考にしています。
1.ゲームに必要な画像準備して読み込む
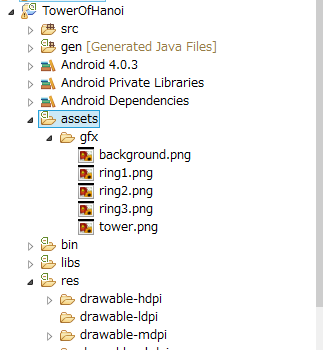
このゲームに必要な画像はここからダウンロードできます。
このzipファイルには4つの画像ファイルが含まれます。
プロジェクト内のassetsフォルダ内にgfxという名前のフォルダを作成し、これらの画像をコピーしてください。
このような状態になります。
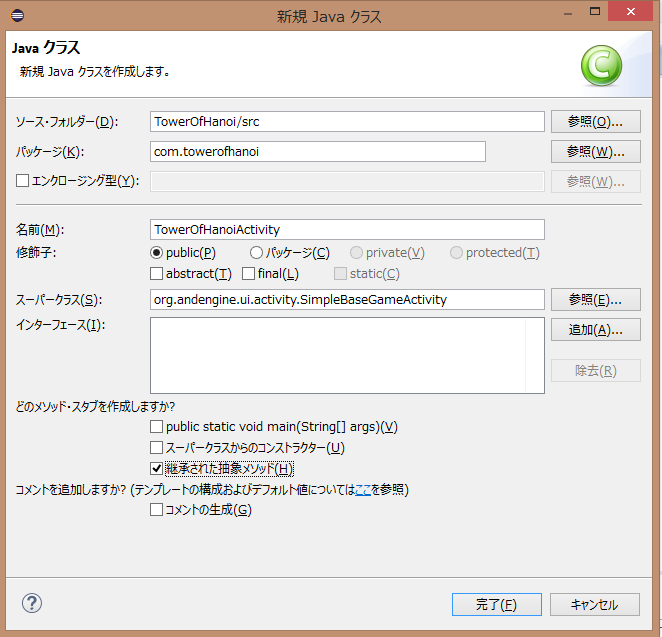
2.SimpleBaseGameActivityクラスを継承したクラスを作る
まずは基本となるクラスを作成します。
プロジェクトのsrcフォルダを右クリックし、[新規]-[クラス]を選択します。
次の画面で、下記を入力し、完了をクリックします。
パッケージ名:com.towerofhanoi
名前:TowerOfHanoiActivity
スーパークラス:org.andengine.ui.activity.SimpleBaseGameActivity
継承された抽象メソッドにチェック
下記の内容のファイルTowerOfHanoiActivity.javaがsrcフォルダに作成されます。
package com.towerofhanoi;

import org.andengine.engine.options.EngineOptions;
import org.andengine.entity.scene.Scene;
import org.andengine.ui.activity.SimpleBaseGameActivity;

public class TowerOfHanoiActivity extends SimpleBaseGameActivity {

	@Override
	public EngineOptions onCreateEngineOptions() {
		// TODO 自動生成されたメソッド・スタブ
		return null;
	}

	@Override
	protected void onCreateResources() {
		// TODO 自動生成されたメソッド・スタブ

	}

	@Override
	protected Scene onCreateScene() {
		// TODO 自動生成されたメソッド・スタブ
		return null;
	}

}
それぞれのメソッドの解説です
onCreateEngineOptions
andEngineのインスタンスを作成します。
Activityライフサイクルの中で実行されます。
onCreateResources
このメソッド内に、読み込みする画像や音声などを記述します。
onCreateScene
上記2つのメソッドが実行された後に実行されます。
ここで読み込んだ画像をテクスチャにして使います。
上記3つのメソッドを実装しますが、その前にゲームの画面サイズを定義しておきます。
private static int CAMERA_WIDTH = 800;
private static int CAMERA_HEIGHT = 480;
3.onCreateEngineOptionを実装する
次にonCreateEngineOptionを実装します。
必要な下記クラスをインポートしておきます。
import org.andengine.engine.camera.Camera;
import org.andengine.engine.options.ScreenOrientation;
import org.andengine.engine.options.resolutionpolicy.RatioResolutionPolicy;
onCreateEngineOptionでは、EngineOptionsのインスタンスを作成して返します。
final Camera camera = new Camera(0, 0, CAMERA_WIDTH, CAMERA_HEIGHT);
return new EngineOptions(true, ScreenOrientation.LANDSCAPE_FIXED,
    new RatioResolutionPolicy(CAMERA_WIDTH, CAMERA_HEIGHT), camera);
EngineOptionsの引数の意味はこんな感じ
第一引数:フルスクリーンにするかどうか。trueならフルスクリーン
第二引数:画面の向き。上記では横向、固定です。
第三引数:端末の画像サイズに合わせてどのようにスケール(拡大縮小)するかを決める
第四引数:画像サイズを定義
4.onCreateResourcesを実装する
これらの画像を上記で説明したonCreateResourcesメソッド内で読み込みします。
その前に必要なクラスをインポートしておきます。
import org.andengine.opengl.texture.ITexture;
import org.andengine.opengl.texture.bitmap.BitmapTexture;
import org.andengine.util.adt.io.in.IInputStreamOpener;
import org.andengine.util.debug.Debug;
import org.andengine.opengl.texture.region.ITextureRegion;
import org.andengine.opengl.texture.region.TextureRegionFactory;
import java.io.IOException;
import java.io.InputStream;
下記クラス変数を定義しておきます。
private ITextureRegion mBackgroundTextureRegion, mTowerTextureRegion, mRing1, mRing2, mRing3;
onCreateResourcesを実装します。
	@Override
	protected void onCreateResources() {
		try {
		    // 1 - Set up bitmap textures
		    ITexture backgroundTexture = new BitmapTexture(this.getTextureManager(), new IInputStreamOpener() {
		        @Override
		        public InputStream open() throws IOException {
		            return getAssets().open("gfx/background.png");
		        }
		    });
		    ITexture towerTexture = new BitmapTexture(this.getTextureManager(), new IInputStreamOpener() {
		        @Override
		        public InputStream open() throws IOException {
		            return getAssets().open("gfx/tower.png");
		        }
		    });
		    ITexture ring1 = new BitmapTexture(this.getTextureManager(), new IInputStreamOpener() {
		        @Override
		        public InputStream open() throws IOException {
		            return getAssets().open("gfx/ring1.png");
		        }
		    });
		    ITexture ring2 = new BitmapTexture(this.getTextureManager(), new IInputStreamOpener() {
		        @Override
		        public InputStream open() throws IOException {
		            return getAssets().open("gfx/ring2.png");
		        }
		    });
		    ITexture ring3 = new BitmapTexture(this.getTextureManager(), new IInputStreamOpener() {
		        @Override
		        public InputStream open() throws IOException {
		            return getAssets().open("gfx/ring3.png");
		        }
		    });
		    // 2 - Load bitmap textures into VRAM
		    backgroundTexture.load();
		    towerTexture.load();
		    ring1.load();
		    ring2.load();
		    ring3.load();
		    this.mBackgroundTextureRegion = TextureRegionFactory.extractFromTexture(backgroundTexture);
		    this.mTowerTextureRegion = TextureRegionFactory.extractFromTexture(towerTexture);
		    this.mRing1 = TextureRegionFactory.extractFromTexture(ring1);
		    this.mRing2 = TextureRegionFactory.extractFromTexture(ring2);
		    this.mRing3 = TextureRegionFactory.extractFromTexture(ring3);
		} catch (IOException e) {
		    Debug.e(e);
		}

	}
それぞれの画像のテクスチャを作成して読み込んでいます。
5.onCreateSceneを実装する
次に**onCreateScene **メソッドを実装します。
必要なクラスをインポートします。
import org.andengine.entity.sprite.Sprite;
下記のようにメソッドを実装します
	@Override
	protected Scene onCreateScene() {
		final Scene scene = new Scene();
		Sprite backgroundSprite = new Sprite(0, 0, this.mBackgroundTextureRegion, getVertexBufferObjectManager());
		scene.attachChild(backgroundSprite);
		return scene;
	}
Spriteの引数は
第一引数:描画するテクスチャのx位置
第二引数:描画するテクスチャのy位置
第三引数:描画するテクスチャ
第四引数:難しいので説明省略
ここまでのコードで、実行背景が表示されるようになります。
その前に、AndEngine入門 1で作ったプロジェクトにはactivity_mainがないので、作成する必要があります。
プロジェクト内の[res]-[layout]にactivity_main.xmlを作成し、下記内容にしておきます。
<RelativeLayout xmlns:android="http://schemas.android.com/apk/res/android"
    xmlns:tools="http://schemas.android.com/tools"
    android:layout_width="match_parent"
    android:layout_height="match_parent"
    tools:context=".TowerOfHanoiActivity" >

</RelativeLayout>
また、マニフェストも下記のようにしておきます。
<manifest xmlns:android="http://schemas.android.com/apk/res/android"
    package="com.towerofhanoi"
    android:versionCode="1"
    android:versionName="1.0" >

    <uses-sdk
        android:minSdkVersion="15"
        android:targetSdkVersion="17" />

    <application
        android:allowBackup="true"
        android:label="@string/app_name"
        android:theme="@style/AppTheme" >
        <uses-library />
        <activity
            android:name=".TowerOfHanoiActivity"
            android:label="@string/app_name" >
            <intent-filter>
                <category android:name="android.intent.category.LAUNCHER"/>
                <action android:name="android.intent.action.MAIN"/>
            </intent-filter>

        </activity>
    </application>

</manifest>
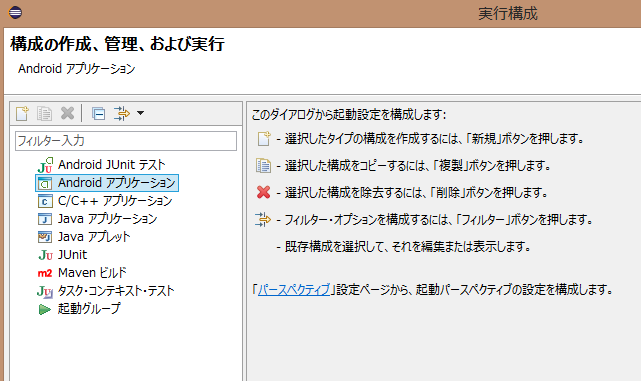
さらに実行構成を作成します。
メニューから、[実行]-[実行構成]を選択します。
下記画面のAndroidアプリケーションをダブルクリックします。
次に今回作成したプロジェクトを[参照]ボタンから選択します。
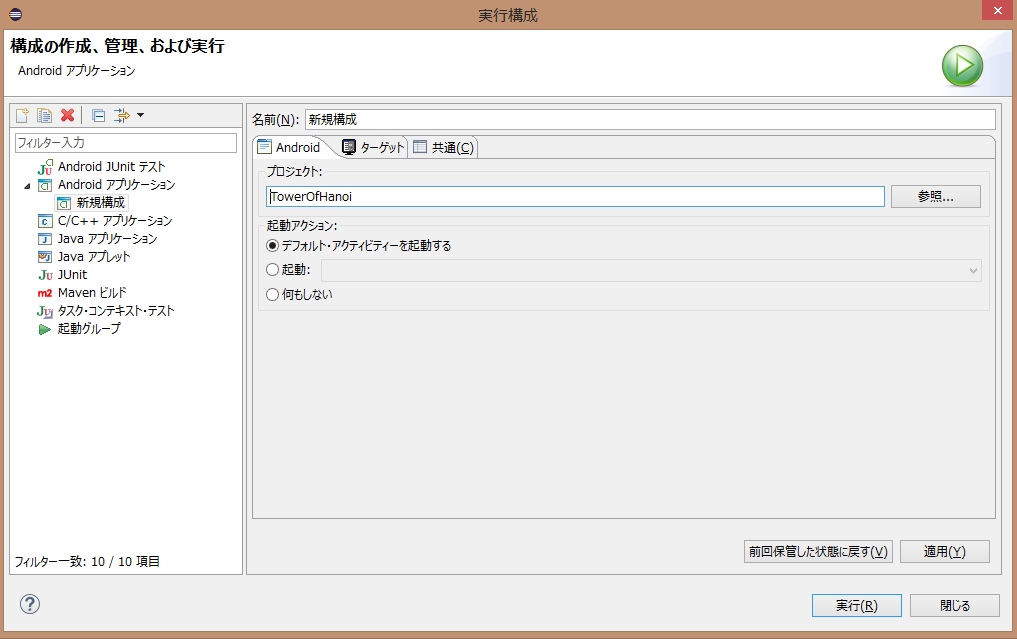
次にターゲットタブを選択し、実行する端末を指定します。
私は実機で実行しているので、[デバイスを選択するときに常にプロンプトを表示」にしてありますが、特定のAVDがインストールされており、それを使用するなら、2番目を使います。
さて、これで実行ボタンをクリックすると下記のような結果になるはずです

背景画像が表示されました。
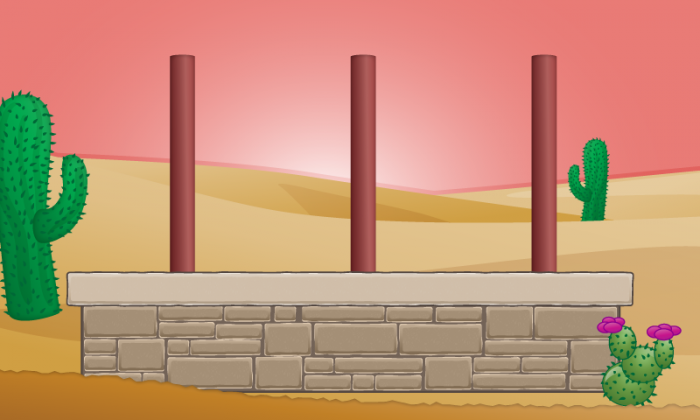
さらにタワーを表示させましょう。
やることは背景の表示と同じです。
タワー画像のテクスチャ用のクラス変数を定義しておきます。
private Sprite mTower1, mTower2, mTower3;
onCreateSceneメソッドのreturn の前に下記を追記します。
// 2 - Add the towers
mTower1 = new Sprite(192, 63, this.mTowerTextureRegion, getVertexBufferObjectManager());
mTower2 = new Sprite(400, 63, this.mTowerTextureRegion, getVertexBufferObjectManager());
mTower3 = new Sprite(604, 63, this.mTowerTextureRegion, getVertexBufferObjectManager());
scene.attachChild(mTower1);
scene.attachChild(mTower2);
scene.attachChild(mTower3);
これで実行するとこのようになります。
さらに浮き輪のようなもの(以降、リングと呼びます)を表示させてドラッグで動かせるように実装しますが、
長くなりましたので、別記事に投稿します。
ここまでのメインクラスのコードをすべて掲載しますので参考にしてください。
※importは順不同になっています。
package com.towerofhanoi;

import org.andengine.engine.camera.Camera;
import org.andengine.engine.options.ScreenOrientation;
import org.andengine.engine.options.resolutionpolicy.RatioResolutionPolicy;
import org.andengine.engine.options.EngineOptions;
import org.andengine.entity.scene.Scene;
import org.andengine.entity.sprite.Sprite;
import org.andengine.ui.activity.SimpleBaseGameActivity;
import org.andengine.opengl.texture.ITexture;
import org.andengine.opengl.texture.bitmap.BitmapTexture;
import org.andengine.util.adt.io.in.IInputStreamOpener;
import org.andengine.opengl.texture.region.ITextureRegion;
import org.andengine.opengl.texture.region.TextureRegionFactory;
import org.andengine.util.debug.Debug;
 import java.io.IOException;
import java.io.InputStream;

public class TowerOfHanoiActivity extends SimpleBaseGameActivity {
	private static int CAMERA_WIDTH = 800;
	private static int CAMERA_HEIGHT = 480;
	private ITextureRegion mBackgroundTextureRegion, mTowerTextureRegion, mRing1, mRing2, mRing3;
	private Sprite mTower1, mTower2, mTower3;

	@Override
	public EngineOptions onCreateEngineOptions() {
		final Camera camera = new Camera(0, 0, CAMERA_WIDTH, CAMERA_HEIGHT);
		return new EngineOptions(true, ScreenOrientation.LANDSCAPE_FIXED,
		    new RatioResolutionPolicy(CAMERA_WIDTH, CAMERA_HEIGHT), camera);
	}

	@Override
	protected void onCreateResources() {
		try {
		    // 1 - Set up bitmap textures
		    ITexture backgroundTexture = new BitmapTexture(this.getTextureManager(), new IInputStreamOpener() {
		        @Override
		        public InputStream open() throws IOException {
		            return getAssets().open("gfx/background.png");
		        }
		    });
		    ITexture towerTexture = new BitmapTexture(this.getTextureManager(), new IInputStreamOpener() {
		        @Override
		        public InputStream open() throws IOException {
		            return getAssets().open("gfx/tower.png");
		        }
		    });
		    ITexture ring1 = new BitmapTexture(this.getTextureManager(), new IInputStreamOpener() {
		        @Override
		        public InputStream open() throws IOException {
		            return getAssets().open("gfx/ring1.png");
		        }
		    });
		    ITexture ring2 = new BitmapTexture(this.getTextureManager(), new IInputStreamOpener() {
		        @Override
		        public InputStream open() throws IOException {
		            return getAssets().open("gfx/ring2.png");
		        }
		    });
		    ITexture ring3 = new BitmapTexture(this.getTextureManager(), new IInputStreamOpener() {
		        @Override
		        public InputStream open() throws IOException {
		            return getAssets().open("gfx/ring3.png");
		        }
		    });
		    // 2 - Load bitmap textures into VRAM
		    backgroundTexture.load();
		    towerTexture.load();
		    ring1.load();
		    ring2.load();
		    ring3.load();
		    this.mBackgroundTextureRegion = TextureRegionFactory.extractFromTexture(backgroundTexture);
		    this.mTowerTextureRegion = TextureRegionFactory.extractFromTexture(towerTexture);
		    this.mRing1 = TextureRegionFactory.extractFromTexture(ring1);
		    this.mRing2 = TextureRegionFactory.extractFromTexture(ring2);
		    this.mRing3 = TextureRegionFactory.extractFromTexture(ring3);
		} catch (IOException e) {
		    Debug.e(e);
		}

	}

	@Override
	protected Scene onCreateScene() {
		final Scene scene = new Scene();
		Sprite backgroundSprite = new Sprite(0, 0, this.mBackgroundTextureRegion, getVertexBufferObjectManager());
		scene.attachChild(backgroundSprite);

		mTower1 = new Sprite(192, 63, this.mTowerTextureRegion, getVertexBufferObjectManager());
		mTower2 = new Sprite(400, 63, this.mTowerTextureRegion, getVertexBufferObjectManager());
		mTower3 = new Sprite(604, 63, this.mTowerTextureRegion, getVertexBufferObjectManager());
		scene.attachChild(mTower1);
		scene.attachChild(mTower2);
		scene.attachChild(mTower3);
		return scene;
	}

}