AppleWatchでの標準ダイアログ表示がwatchOS2から可能になりました。
これまでwatchOS 1.xでは標準ダイアログ表示がなかったため、
WKInterfaceLabelを使用して自作ダイアログを作成するしかありませんでした。
AppleWatchアプリでのシステム標準ダイアログ表示の仕方を紹介します。

(本記事の内容は一般公開されている情報に基づいています。
スクリーンショットの画面はwatch OS1.0で作成しているため、
実際の画面とは異なる場合があります。)
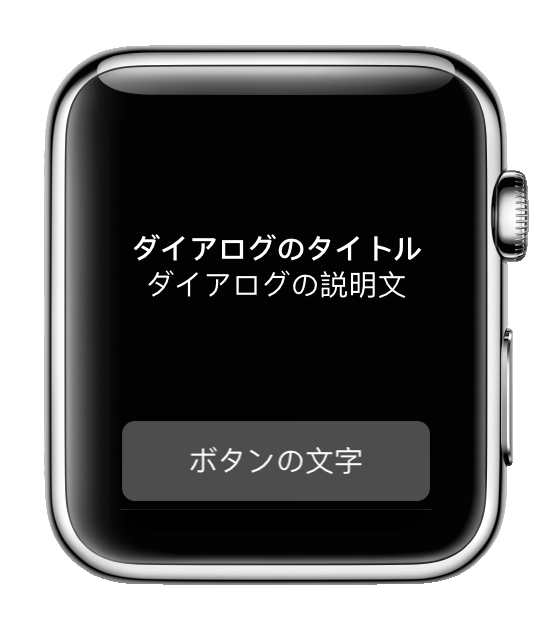
watchOS2でのダイアログ表示
ダイアログにボタンを1つだけ表示させます。
標準ダイアログはWatchKit Extension内のWKInterfaceController内でpresentAlertControllerWithTitleを呼ぶことで表示できます。
Objective-C サンプルコード
WKAlertAction *alertButtonAction = [WKAlertAction actionWithTitle:@"ボタンに表示する文字"
                                                            style:WKAlertActionStyleDefault
                                                          handler:^{
                                                                  // ボタンが押された時の処理
                                                                  }];

[self presentAlertControllerWithTitle:@"ダイアログのタイトル"
                              message:@"ダイアログの説明文"
                       preferredStyle:WKAlertControllerStyleAlert
                              actions:@[alertButtonAction]];
Swift サンプルコード
let buttonAction = WKAlertAction(title:"ボタンの文字", style: .Default) { () -> Void in
    // ボタンが押された時の処理
}

presentAlertControllerWithTitle("ダイアログのタイトル", message:"ダイアログの説明文", preferredStyle: .Alert, actions: [buttonAction]);
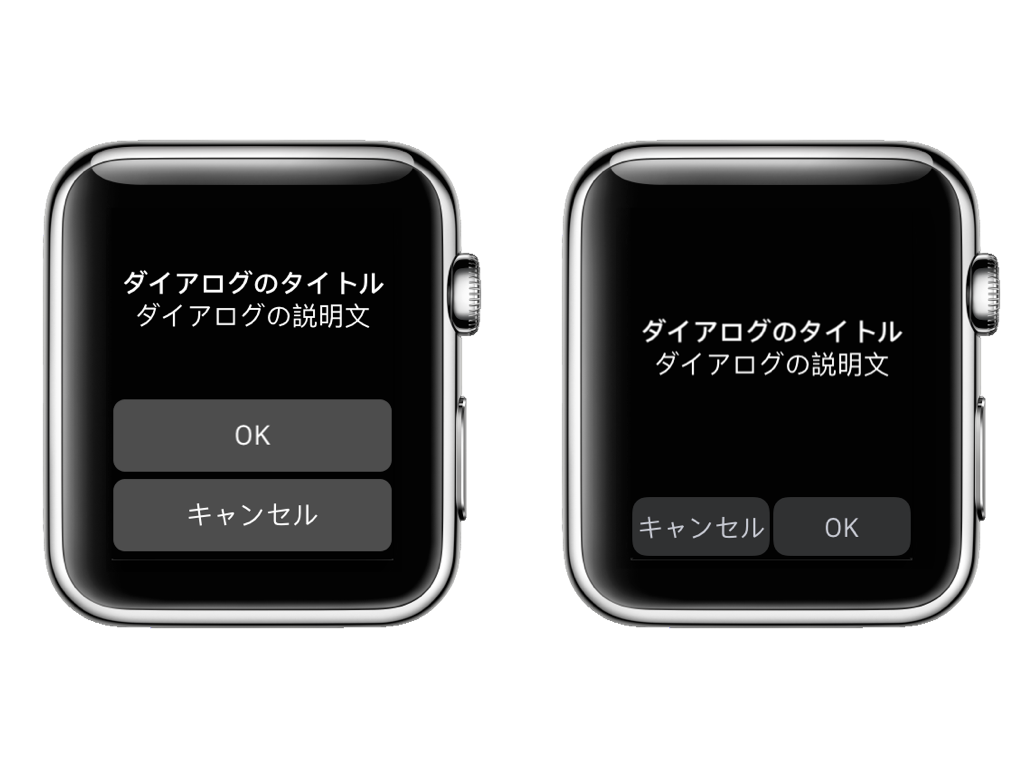
watchOS2でのダイアログ表示(複数ボタン)
ダイアログのボタンを複数表示したい場合は、
presentAlertControllerWithTitle のactionsのパラメータに
配置したいボタンの数だけWKAlertActionを渡します。
WKAlertControllerStyleを指定することで、
複数のボタンを縦並びにするのか、横並びにするのかを選択できます。
| style | 表示 |
|---|---|
| Alert | 縦並び |
| SideBySideButtonsAlert | 横並び |
Objective-C サンプルコード
WKAlertAction *okButtonAction = [WKAlertAction actionWithTitle:@"OK"
                                                         style:WKAlertActionStyleDefault
                                                       handler:^{
                                                               // OKボタンが押された時の処理
                                                               }];

WKAlertAction *cancelButtonAction = [WKAlertAction actionWithTitle:@"キャンセル"
                                                             style:WKAlertActionStyleCancel
                                                           handler:^{
                                                                   // キャンセルボタンが押された時の処理
                                                                   }];

[self presentAlertControllerWithTitle:@"ダイアログのタイトル"
                              message:@"ダイアログの説明文"
                       preferredStyle:WKAlertControllerStyleSideBySideButtonsAlert // ボタンの並びが縦か横か
                              actions:@[okButtonAction, cancelButtonAction]];
Swift サンプルコード
let okButtonAction = WKAlertAction(title:"OK", style: .Default) { () -> Void in
    // OKボタンが押された時の処理
}

let cancelButtonAction = WKAlertAction(title:"キャンセル", style: .Default) { () -> Void in
    // キャンセルボタンが押された時の処理
}

// ボタンを縦並びにする
presentAlertControllerWithTitle("ダイアログのタイトル", message:"ダイアログの説明文", preferredStyle: .Alert, actions: [okButtonAction, cancelButtonAction]);

// ボタンを横並びにする
// presentAlertControllerWithTitle("ダイアログのタイトル", message:"ダイアログの説明文", preferredStyle: .SideBySideButtonsAlert, actions: [okButtonAction, cancelButtonAction]);
まとめ
watchOS2から実装されたAppleWatchでの標準ダイアログについてまとめました。
watchOS1.x時代にダイアログ表現を自作することに悩まされることから解放され、
AppleWatchアプリが作りやすくなりました。
参考
WatchKit.framework - WKInterfaceController
https://developer.apple.com/library/prerelease/watchos/documentation/WatchKit/Reference/WKInterfaceController_class/index.html#//apple_ref/occ/instm/WKInterfaceController/presentAlertControllerWithTitle:message:preferredStyle:actions: