ようやく、OpenCV の勉強を始め、Dlib と OpenCV を使用する環境を作ることにしたものの、anconda を使用する環境構築が非常に難航しました。
おおいにハマったため、今後の備忘録として手順をメモしておきます。
ハードウェア環境
CPU: AMD A10-7870K Radeon R7, 12 Compute Cores 4C+8G
M/B: ASUS A88-XM-Plus
Mem: 32GB
GPU: nVidia GeForce GTX 1080ti/nVidia GeForce GTX 1050
参考まで...
※作業では GeForce GTX 1080ti のみ使用。
※GeForce GTX 1050 は GPU Passthrough 専用。
※Radeon R7 は IOMMU のため BIOS レベル無効化。
ソフトウェア環境
Ubuntu 16.04 LTS (xenial)
nVidia-375
CUDA 8.0
CUDNN 5.1
目標
Anaconda で作業用の環境を作成する。その環境で、OpenCV+Dlib を使用できるようにする。
さらに、Jupyter Notebook からカーネル切り替えができるようにする。
Anaconda インストール
https://www.continuum.io/downloads
から、"Download for Linux" タブ | "Python 3.6 Version" を開き、 "64-BIT (X86) INSTALLER" をダウンロードしインストールを実行。
既定でインストールされるコンポーネントがわかるよう、あえてインストールログの内容をペーストしておきます:
kmori@kmori-ubuntu:~/Downloads$ bash Anaconda3-4.4.0-Linux-x86_64.sh

Welcome to Anaconda3 4.4.0 (by Continuum Analytics, Inc.)

In order to continue the installation process, please review the license
agreement.
Please, press ENTER to continue
>>>
===================================
Anaconda End User License Agreement
===================================

<<中略>>

Do you approve the license terms? [yes|no]
>>> yes

Anaconda3 will now be installed into this location:
/home/kmori/anaconda3

  - Press ENTER to confirm the location
  - Press CTRL-C to abort the installation
  - Or specify a different location below

[/home/kmori/anaconda3] >>>
PREFIX=/home/kmori/anaconda3
installing: python-3.6.1-2 ...
installing: _license-1.1-py36_1 ...
installing: alabaster-0.7.10-py36_0 ...
installing: anaconda-client-1.6.3-py36_0 ...
installing: anaconda-navigator-1.6.2-py36_0 ...
installing: anaconda-project-0.6.0-py36_0 ...
installing: asn1crypto-0.22.0-py36_0 ...
installing: astroid-1.4.9-py36_0 ...
installing: astropy-1.3.2-np112py36_0 ...
installing: babel-2.4.0-py36_0 ...
installing: backports-1.0-py36_0 ...
installing: beautifulsoup4-4.6.0-py36_0 ...
installing: bitarray-0.8.1-py36_0 ...
installing: blaze-0.10.1-py36_0 ...
installing: bleach-1.5.0-py36_0 ...
installing: bokeh-0.12.5-py36_1 ...
installing: boto-2.46.1-py36_0 ...
installing: bottleneck-1.2.1-np112py36_0 ...
installing: cairo-1.14.8-0 ...
installing: cffi-1.10.0-py36_0 ...
installing: chardet-3.0.3-py36_0 ...
installing: click-6.7-py36_0 ...
installing: cloudpickle-0.2.2-py36_0 ...
installing: clyent-1.2.2-py36_0 ...
installing: colorama-0.3.9-py36_0 ...
installing: contextlib2-0.5.5-py36_0 ...
installing: cryptography-1.8.1-py36_0 ...
installing: curl-7.52.1-0 ...
installing: cycler-0.10.0-py36_0 ...
installing: cython-0.25.2-py36_0 ...
installing: cytoolz-0.8.2-py36_0 ...
installing: dask-0.14.3-py36_1 ...
installing: datashape-0.5.4-py36_0 ...
installing: dbus-1.10.10-0 ...
installing: decorator-4.0.11-py36_0 ...
installing: distributed-1.16.3-py36_0 ...
installing: docutils-0.13.1-py36_0 ...
installing: entrypoints-0.2.2-py36_1 ...
installing: et_xmlfile-1.0.1-py36_0 ...
installing: expat-2.1.0-0 ...
installing: fastcache-1.0.2-py36_1 ...
installing: flask-0.12.2-py36_0 ...
installing: flask-cors-3.0.2-py36_0 ...
installing: fontconfig-2.12.1-3 ...
installing: freetype-2.5.5-2 ...
installing: get_terminal_size-1.0.0-py36_0 ...
installing: gevent-1.2.1-py36_0 ...
installing: glib-2.50.2-1 ...
installing: greenlet-0.4.12-py36_0 ...
installing: gst-plugins-base-1.8.0-0 ...
installing: gstreamer-1.8.0-0 ...
installing: h5py-2.7.0-np112py36_0 ...
installing: harfbuzz-0.9.39-2 ...
installing: hdf5-1.8.17-1 ...
installing: heapdict-1.0.0-py36_1 ...
installing: html5lib-0.999-py36_0 ...
installing: icu-54.1-0 ...
installing: idna-2.5-py36_0 ...
installing: imagesize-0.7.1-py36_0 ...
installing: ipykernel-4.6.1-py36_0 ...
installing: ipython-5.3.0-py36_0 ...
installing: ipython_genutils-0.2.0-py36_0 ...
installing: ipywidgets-6.0.0-py36_0 ...
installing: isort-4.2.5-py36_0 ...
installing: itsdangerous-0.24-py36_0 ...
installing: jbig-2.1-0 ...
installing: jdcal-1.3-py36_0 ...
installing: jedi-0.10.2-py36_2 ...
installing: jinja2-2.9.6-py36_0 ...
installing: jpeg-9b-0 ...
installing: jsonschema-2.6.0-py36_0 ...
installing: jupyter-1.0.0-py36_3 ...
installing: jupyter_client-5.0.1-py36_0 ...
installing: jupyter_console-5.1.0-py36_0 ...
installing: jupyter_core-4.3.0-py36_0 ...
installing: lazy-object-proxy-1.2.2-py36_0 ...
installing: libffi-3.2.1-1 ...
installing: libgcc-4.8.5-2 ...
installing: libgfortran-3.0.0-1 ...
installing: libiconv-1.14-0 ...
installing: libpng-1.6.27-0 ...
installing: libsodium-1.0.10-0 ...
installing: libtiff-4.0.6-3 ...
installing: libtool-2.4.2-0 ...
installing: libxcb-1.12-1 ...
installing: libxml2-2.9.4-0 ...
installing: libxslt-1.1.29-0 ...
installing: llvmlite-0.18.0-py36_0 ...
installing: locket-0.2.0-py36_1 ...
installing: lxml-3.7.3-py36_0 ...
installing: markupsafe-0.23-py36_2 ...
installing: matplotlib-2.0.2-np112py36_0 ...
installing: mistune-0.7.4-py36_0 ...
installing: mkl-2017.0.1-0 ...
installing: mkl-service-1.1.2-py36_3 ...
installing: mpmath-0.19-py36_1 ...
installing: msgpack-python-0.4.8-py36_0 ...
installing: multipledispatch-0.4.9-py36_0 ...
installing: navigator-updater-0.1.0-py36_0 ...
installing: nbconvert-5.1.1-py36_0 ...
installing: nbformat-4.3.0-py36_0 ...
installing: networkx-1.11-py36_0 ...
installing: nltk-3.2.3-py36_0 ...
installing: nose-1.3.7-py36_1 ...
installing: notebook-5.0.0-py36_0 ...
installing: numba-0.33.0-np112py36_0 ...
installing: numexpr-2.6.2-np112py36_0 ...
installing: numpy-1.12.1-py36_0 ...
installing: numpydoc-0.6.0-py36_0 ...
installing: odo-0.5.0-py36_1 ...
installing: olefile-0.44-py36_0 ...
installing: openpyxl-2.4.7-py36_0 ...
installing: openssl-1.0.2l-0 ...
installing: packaging-16.8-py36_0 ...
installing: pandas-0.20.1-np112py36_0 ...
installing: pandocfilters-1.4.1-py36_0 ...
installing: pango-1.40.3-1 ...
installing: partd-0.3.8-py36_0 ...
installing: path.py-10.3.1-py36_0 ...
installing: pathlib2-2.2.1-py36_0 ...
installing: patsy-0.4.1-py36_0 ...
installing: pcre-8.39-1 ...
installing: pep8-1.7.0-py36_0 ...
installing: pexpect-4.2.1-py36_0 ...
installing: pickleshare-0.7.4-py36_0 ...
installing: pillow-4.1.1-py36_0 ...
installing: pip-9.0.1-py36_1 ...
installing: pixman-0.34.0-0 ...
installing: ply-3.10-py36_0 ...
installing: prompt_toolkit-1.0.14-py36_0 ...
installing: psutil-5.2.2-py36_0 ...
installing: ptyprocess-0.5.1-py36_0 ...
installing: py-1.4.33-py36_0 ...
installing: pycosat-0.6.2-py36_0 ...
installing: pycparser-2.17-py36_0 ...
installing: pycrypto-2.6.1-py36_6 ...
installing: pycurl-7.43.0-py36_2 ...
installing: pyflakes-1.5.0-py36_0 ...
installing: pygments-2.2.0-py36_0 ...
installing: pylint-1.6.4-py36_1 ...
installing: pyodbc-4.0.16-py36_0 ...
installing: pyopenssl-17.0.0-py36_0 ...
installing: pyparsing-2.1.4-py36_0 ...
installing: pyqt-5.6.0-py36_2 ...
installing: pytables-3.3.0-np112py36_0 ...
installing: pytest-3.0.7-py36_0 ...
installing: python-dateutil-2.6.0-py36_0 ...
installing: pytz-2017.2-py36_0 ...
installing: pywavelets-0.5.2-np112py36_0 ...
installing: pyyaml-3.12-py36_0 ...
installing: pyzmq-16.0.2-py36_0 ...
installing: qt-5.6.2-4 ...
installing: qtawesome-0.4.4-py36_0 ...
installing: qtconsole-4.3.0-py36_0 ...
installing: qtpy-1.2.1-py36_0 ...
installing: readline-6.2-2 ...
installing: requests-2.14.2-py36_0 ...
installing: rope-0.9.4-py36_1 ...
installing: ruamel_yaml-0.11.14-py36_1 ...
installing: scikit-image-0.13.0-np112py36_0 ...
installing: scikit-learn-0.18.1-np112py36_1 ...
installing: scipy-0.19.0-np112py36_0 ...
installing: seaborn-0.7.1-py36_0 ...
installing: setuptools-27.2.0-py36_0 ...
installing: simplegeneric-0.8.1-py36_1 ...
installing: singledispatch-3.4.0.3-py36_0 ...
installing: sip-4.18-py36_0 ...
installing: six-1.10.0-py36_0 ...
installing: snowballstemmer-1.2.1-py36_0 ...
installing: sortedcollections-0.5.3-py36_0 ...
installing: sortedcontainers-1.5.7-py36_0 ...
installing: sphinx-1.5.6-py36_0 ...
installing: spyder-3.1.4-py36_0 ...
installing: sqlalchemy-1.1.9-py36_0 ...
installing: sqlite-3.13.0-0 ...
installing: statsmodels-0.8.0-np112py36_0 ...
installing: sympy-1.0-py36_0 ...
installing: tblib-1.3.2-py36_0 ...
installing: terminado-0.6-py36_0 ...
installing: testpath-0.3-py36_0 ...
installing: tk-8.5.18-0 ...
installing: toolz-0.8.2-py36_0 ...
installing: tornado-4.5.1-py36_0 ...
installing: traitlets-4.3.2-py36_0 ...
installing: unicodecsv-0.14.1-py36_0 ...
installing: unixodbc-2.3.4-0 ...
installing: wcwidth-0.1.7-py36_0 ...
installing: werkzeug-0.12.2-py36_0 ...
installing: wheel-0.29.0-py36_0 ...
installing: widgetsnbextension-2.0.0-py36_0 ...
installing: wrapt-1.10.10-py36_0 ...
installing: xlrd-1.0.0-py36_0 ...
installing: xlsxwriter-0.9.6-py36_0 ...
installing: xlwt-1.2.0-py36_0 ...
installing: xz-5.2.2-1 ...
installing: yaml-0.1.6-0 ...
installing: zeromq-4.1.5-0 ...
installing: zict-0.1.2-py36_0 ...
installing: zlib-1.2.8-3 ...
installing: anaconda-4.4.0-np112py36_0 ...
installing: conda-4.3.21-py36_0 ...
installing: conda-env-2.6.0-0 ...
Python 3.6.1 :: Continuum Analytics, Inc.
creating default environment...
installation finished.
Do you wish the installer to prepend the Anaconda3 install location
to PATH in your /home/kmori/.bashrc ? [yes|no]
[no] >>> yes

Prepending PATH=/home/kmori/anaconda3/bin to PATH in /home/kmori/.bashrc
A backup will be made to: /home/kmori/.bashrc-anaconda3.bak


For this change to become active, you have to open a new terminal.

Thank you for installing Anaconda3!

Share your notebooks and packages on Anaconda Cloud!
Sign up for free: https://anaconda.org
インストールが終わったら、".bashrc" を編集。Anaconda のパスを最後に持っていきます。こうしておかないと、Anaconda 環境を activate していない場合でも、Anaconda 環境のバイナリが実行されてしまうことがあります。
# added by Anaconda3 4.4.0 installer
export PATH="/home/kmori/anaconda3/bin:$PATH"
# added by Anaconda3 4.4.0 installer
export PATH="$PATH:/home/kmori/anaconda3/bin"
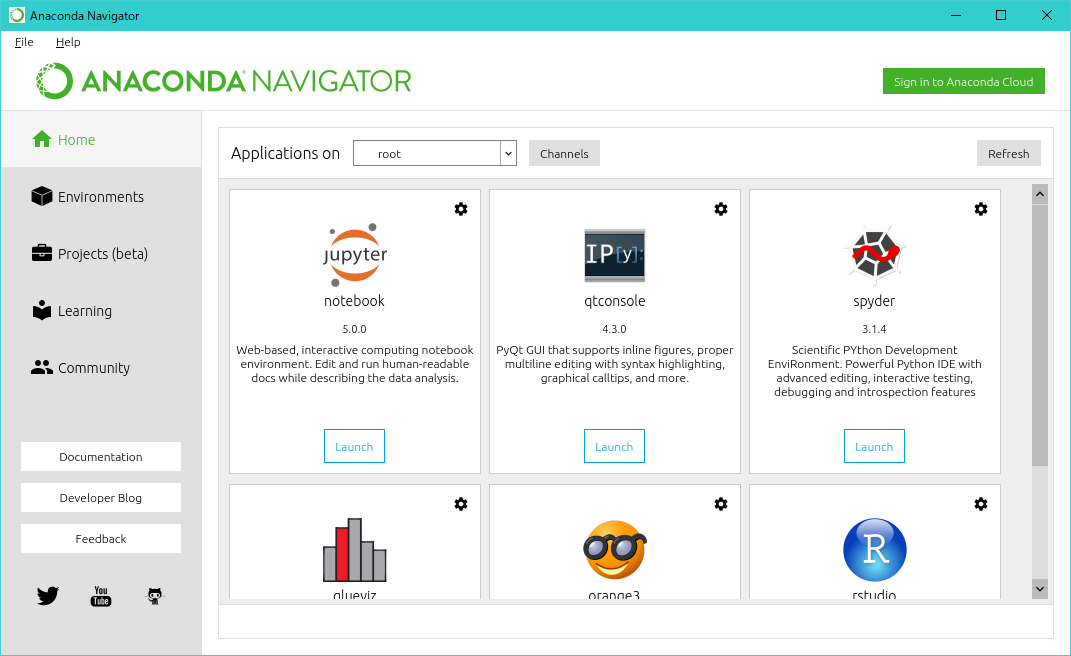
変更後、念のためログオフとログオンを行い、anaconda-navigator が正常に起動することを確認します。
Conda 作業環境の作成
Python の バージョンを 3.5.2 として新規の環境を作成します。
Ubuntu OS にインストールできるバージョンと同じ Python 3.5.2 を指定するのは、使用している xenial(16.04LTS) には Python 3.6 パッケージがなく、3.6 用の "Python*-dev" もないためです。1
kmori@kmori-ubuntu:~/Downloads$ conda create -n python352-ML python=3.5.2
Fetching package metadata .........
Solving package specifications: .

Package plan for installation in environment /home/kmori/anaconda3/envs/python352-ML:

The following NEW packages will be INSTALLED:

    openssl:    1.0.2l-0
    pip:        9.0.1-py35_1
    python:     3.5.2-0
    readline:   6.2-2
    setuptools: 27.2.0-py35_0
    sqlite:     3.13.0-0
    tk:         8.5.18-0
    wheel:      0.29.0-py35_0
    xz:         5.2.2-1
    zlib:       1.2.8-3

Proceed ([y]/n)?

python-3.5.2-0 100% |##########################################################| Time: 0:00:01  11.60 MB/s
#
# To activate this environment, use:
# > source activate python352-ML
#
# To deactivate this environment, use:
# > source deactivate python352-ML
#

kmori@kmori-ubuntu:~/Downloads$
作成したら、"etc/conda/{de,}activate.d/" に、環境固有設定(LD_LIBRARY_PATH) を設定するスクリプトを作成します。
具体的には、activate 時に現状の LD_LIBRARY_PATH を保存して Conda 環境のパスを追加、deactivate 時に LD_LIBRARY_PATH を戻します。
これをやらないと、Conda 環境下で OpenCV などを Build する際や、環境からホスト内のアプリケーションを実行する際に、ライブラリの依存関係で混乱が生じることがあります。
#!/bin/bash
export OLD_LD_LIBRARY_PATH="${LD_LIBRARY_PATH}"
export LD_LIBRARY_PATH="${CONDA_PREFIX}/lib:${CONDA_PREFIX}/lib64:${LD_LIBRARY_PATH}"
#!/bin/bash
export LD_LIBRARY_PATH="${OLD_LD_LIBRARY_PATH}"
unset OLD_LD_LIBRARY_PATH
完了したら、Activate と Deactivate を行い、LD_LIBRARY_PATH が正常に設定されることを確認し、問題なければ deactivate しておきます。この環境は OpenCV ビルド時まで使いません。
kmori@kmori-ubuntu:~$ echo $LD_LIBRARY_PATH
/usr/local/cuda-8.0/lib64:
kmori@kmori-ubuntu:~$ . activate python352-ML
(python352-ML) kmori@kmori-ubuntu:~$ echo $LD_LIBRARY_PATH
/usr/local/cuda-8.0/lib64::/home/kmori/anaconda3/envs/python352-ML/lib:/home/kmori/anaconda3/envs/python352-ML/lib64
(python352-ML) kmori@kmori-ubuntu:~$ . deactivate
kmori@kmori-ubuntu:~$ echo $LD_LIBRARY_PATH
/usr/local/cuda-8.0/lib64:
kmori@kmori-ubuntu:~$
OpenCV と Dlib の構成
Python-dev パッケージのインストール
Python パッケージのビルドに必要なコンポーネント。ヘッダファイル等が含まれます。
これを行っていないと、OpenCV ビルド時に、Python パッケージが作成されず、Python で "import cv2" がエラーになります。
ついでに python2.7 用も入れておきます。
kmori@kmori-ubuntu:~$ sudo apt install python2.7-dev python3.5-dev
その他必要なコンポーネントのインストール
http://docs.opencv.org/3.2.0/d7/d9f/tutorial_linux_install.html を参考にインストール。
kmori@kmori-ubuntu:~$ sudo apt install libswscale-dev libtbb2 libtbb-dev libdc1394-22-dev libjpeg-dev libpng12-dev libtiff5-dev libjasper-dev gcc cmake git build-essential libgtk2.0-dev pkg-config python-numpy libavcodec-dev libavformat-dev
また Conda 内で、ホストとは独立したバージョンが必要なコンポーネントも、Conda 環境にインストールします。
kmori@kmori-ubuntu:~$ conda install -n python352-ML curl numpy cmake
これらのインストールの要否は、アプリケーションを起動する際に発生する、以下のようなエラーで判断します。
/usr/bin/cmake: /home/kmori/anaconda3/envs/python352-ML/lib/libcurl.so.4: no version information available (required by /usr/bin/cmake)
このエラーは、Conda 内のライブラリとホスト側のアプリケーションのバージョン不一致を示しています。このエラーの場合、conda 環境内に cmake をインストールし、ホスト側のアプリケーションを環境内で使用しないようにすれば解決します。
ダウンロード
OpenCV 公式 GitHub からバージョン 3.2.0 の opencv と opencv-contrib をダウンロードし解凍。
kmori@kmori-ubuntu:~$ mkdir ~/opencv
kmori@kmori-ubuntu:~$ cd ~/opencv
kmori@kmori-ubuntu:~/opencv$ wget https://github.com/opencv/opencv/archive/3.2.0.zip
kmori@kmori-ubuntu:~/opencv$ mv 3.2.0.zip opencv-3.2.0.zip
kmori@kmori-ubuntu:~/opencv$ wget https://github.com/opencv/opencv_contrib/archive/3.2.0.zip
kmori@kmori-ubuntu:~/opencv$ mv 3.2.0.zip opencv-contrib-3.2.0.zip
kmori@kmori-ubuntu:~/opencv$ unzip opencv-3.2.0.zip
kmori@kmori-ubuntu:~/opencv$ unzip opencv-contrib-3.2.0.zip
OpenCV 3.2.0 のビルドとインストール
GPU 有効なものをビルドします。基本的な流れは、以下となります。
cmake
チェック
まけまけインストール
cmake
Conda 環境を Activate し、環境内で OpenCV のビルドを開始します。
(2017/08/06 OPENCV_EXTRA_MODUES_PATH に "/modules" がありませんでした。追記しました。)
kmori@kmori-ubuntu:~$ . activate python352-ML
(python352-ML) kmori@kmori-ubuntu:~$ cd ~/opencv/opencv-3.2.0/build/
(python352-ML) kmori@kmori-ubuntu:~/opencv/opencv-3.2.0/build$ cmake
-D CMAKE_BUILD_TYPE=RELEASE \
-D CMAKE_INSTALL_PREFIX=/usr/local \
-D BUILD_EXAMPLES=ON \
-D INSTALL_C_EXAMPLES=ON \
-D OPENCV_EXTRA_MODULES_PATH=~/opencv/opencv_contrib-3.2.0/modules \
-D BUILD_opencv_python3=ON \
-D PYTHON3_EXECUTABLE=~/anaconda3/envs/python352-ML/bin/python \
-D PYTHON_DEFAULT_EXECUTABLE=~/anaconda3/envs/python352-ML/bin/python \
-D INSTALL_PYTHON_EXAMPLES=ON \
-D WITH_CUDA=ON \
-D ENABLE_FAST_MATH=1 \
-D CUDA_FAST_MATH=1 \
-D WITH_CUBLAS=1 \
..
チェック
以下の内容で、cmake の出力をチェック。
# 1 GPU が認識され、有効になっているか
--   NVIDIA CUDA
--     Use CUFFT:                   YES
--     Use CUBLAS:                  YES
--     USE NVCUVID:                 NO
--     NVIDIA GPU arch:             20 30 35 37 50 52 60 61
--     NVIDIA PTX archs:
--     Use fast math:               YES
# 2 Python ライブラリがそれぞれ認識されているか
--   Python 2:
--     Interpreter:                 /usr/bin/python2.7 (ver 2.7.12)
--     Libraries:                   /usr/lib/x86_64-linux-gnu/libpython2.7.so (ver 2.7.12)
--     numpy:                       /usr/lib/python2.7/dist-packages/numpy/core/include (ver 1.11.0)
--     packages path:               lib/python2.7/dist-packages
--
--   Python 3:
--     Interpreter:                 /home/kmori/anaconda3/envs/python352-ML/bin/python (ver 3.5.2)
--     Libraries:                   /home/kmori/anaconda3/envs/python352-ML/lib/libpython3.5m.so (ver 3.5.2)
--     numpy:                       /home/kmori/anaconda3/envs/python352-ML/lib/python3.5/site-packages/numpy/core/include (ver 1.13.1)
--     packages path:               lib/python3.5/site-packages
--
--   Python (for build):            /home/kmori/anaconda3/envs/python352-ML/bin/python
まけまけいんすとーる
make と make install を実行します。
以下では、コア4つを使用してビルドを行い、make に成功したら、sudo make install しています。
(python352-ML) kmori@kmori-ubuntu:~/opencv/opencv-3.2.0/build$ make -j4
:
:
BUILD SUCCESSFUL
Total time: 1 second
[100%] Built target opencv_test_java
[100%] Linking CXX shared module ../../lib/cv2.so
[100%] Built target opencv_python2
[100%] Linking CXX shared module ../../lib/python3/cv2.cpython-35m-x86_64-linux-gnu.so
[100%] Built target opencv_python3
(python352-ML) kmori@kmori-ubuntu:~/opencv/opencv-3.2.0/build$ sudo make install
python モジュールの構成
このままの状態では、Python2 では cv2 がインポートできるが、Python3.5 では cv2 インポートができません。
(python352-ML) kmori@kmori-ubuntu:~/opencv/opencv-3.2.0/build$ python2
Python 2.7.12 (default, Nov 19 2016, 06:48:10)
[GCC 5.4.0 20160609] on linux2
Type "help", "copyright", "credits" or "license" for more information.
>>> import cv2
>>> cv2.__version__
'3.2.0'
>>> exit()
(python352-ML) kmori@kmori-ubuntu:~/opencv/opencv-3.2.0/build$
(python352-ML) kmori@kmori-ubuntu:~/opencv/opencv-3.2.0/build$
(python352-ML) kmori@kmori-ubuntu:~/opencv/opencv-3.2.0/build$ python
Python 3.5.2 |Continuum Analytics, Inc.| (default, Jul  2 2016, 17:53:06)
[GCC 4.4.7 20120313 (Red Hat 4.4.7-1)] on linux
Type "help", "copyright", "credits" or "license" for more information.
>>> import cv2
Traceback (most recent call last):
  File "<stdin>", line 1, in <module>
ImportError: No module named 'cv2'
>>>
>>>
>>> exit()
(python352-ML) kmori@kmori-ubuntu:~/opencv/opencv-3.2.0/build$
sudo make install 出力内で、Python の OpenCV モジュールのインストール時のログを確認しますと:
:
-- Installing: /usr/local/lib/python2.7/dist-packages/cv2.so
-- Set runtime path of "/usr/local/lib/python2.7/dist-packages/cv2.so" to "/usr/local/lib:/usr/lib/x86_64-linux-gnu"
-- Installing: /usr/local/lib/python3.5/site-packages/cv2.cpython-35m-x86_64-linux-gnu.so
-- Set runtime path of "/usr/local/lib/python3.5/site-packages/cv2.cpython-35m-x86_64-linux-gnu.so" to "/usr/local/lib:/usr/lib/x86_64-linux-gnu"
:
site-packages の内容が、Python 3.5 用には、"cv2.so" ではなく、"cv2.cpython-35m-x86_64-linux-gnu.so" になっています。
Conda 環境内の site-package にて、"/usr/local/lib/python3.5/site-packages/cv2.cpython-35m-x86_64-linux-gnu.so" に対してシンボリックリンクを作成します。
(python352-ML) kmori@kmori-ubuntu:~/opencv/opencv-3.2.0/build$ cd $CONDA_PREFIX/lib/python3.5/site-packages
(python352-ML) kmori@kmori-ubuntu:~/anaconda3/envs/python352-ML/lib/python3.5/site-packages$ ln -s /usr/local/lib/python3.5/site-packages/cv2.cpython-35m-x86_64-linux-gnu.so cv2.so
(python352-ML) kmori@kmori-ubuntu:~/anaconda3/envs/python352-ML/lib/python3.5/site-packages$
これで、インポートができました。
(python352-ML) kmori@kmori-ubuntu:~$ python
Python 3.5.2 |Continuum Analytics, Inc.| (default, Jul  2 2016, 17:53:06)
[GCC 4.4.7 20120313 (Red Hat 4.4.7-1)] on linux
Type "help", "copyright", "credits" or "license" for more information.
>>> import cv2
>>> cv2.__version__
'3.2.0'
>>>
>>> exit()
(python352-ML) kmori@kmori-ubuntu:~$
Dlib のインストール
Dlib については、Pip で最新のものがインストールされます。
今回は、将来同じバージョンを入れなおす可能性を考え、明示的に最新のバージョンを指定してインストールします。
(python352-ML) kmori@kmori-ubuntu:~$ pip install dlib==19.4
Collecting dlib==19.4
Installing collected packages: dlib
Successfully installed dlib-19.4.0
jupyter Notebook でのカーネル切り替えの構成
Conda のルート環境(何も . activate していない環境)で、Jupyter_Environment_Kernels をインストールします。
kmori@kmori-ubuntu:~$ pip install environment_kernels
Collecting environment_kernels
Installing collected packages: environment-kernels
Successfully installed environment-kernels-1.1
kmori@kmori-ubuntu:~$
Jupyter の設定ファイルを作成し、設定ファイルに、Environment Kernel の設定を追加します。
kmori@kmori-ubuntu:~$ jupyter notebook --generate-config
Writing default config to: /home/kmori/.jupyter/jupyter_notebook_config.py
kmori@kmori-ubuntu:~$ echo "# km: for Environment Kernel" >> .jupyter/jupyter_notebook_config.py
kmori@kmori-ubuntu:~$ echo "c.NotebookApp.kernel_spec_manager_class = 'environment_kernels.EnvironmentKernelSpecManager'" >> .jupyter/jupyter_notebook_config.py
kmori@kmori-ubuntu:~$ tail -4 .jupyter/jupyter_notebook_config.py
#  By default, all installed kernels are allowed.
#c.KernelSpecManager.whitelist = set()
# km: for Environment Kernel
c.NotebookApp.kernel_spec_manager_class = 'environment_kernels.EnvironmentKernelSpecManager'
kmori@kmori-ubuntu:~$
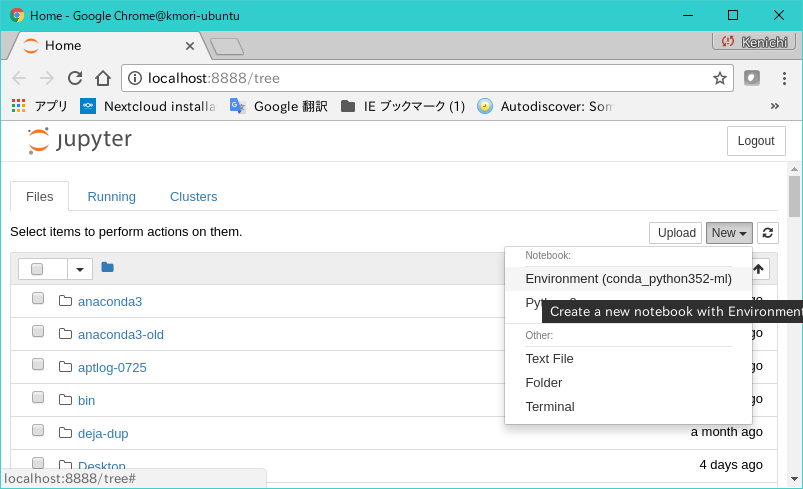
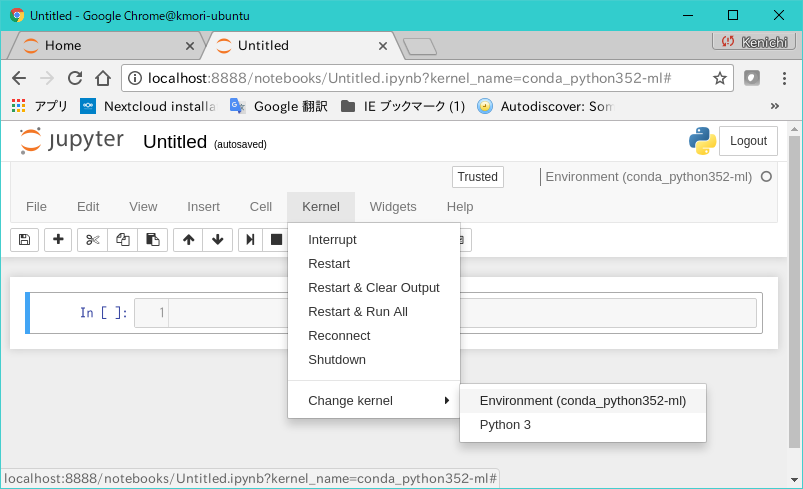
Jupyter Notebook を起動。
Conda で作成した環境が認識されること、および Notebook作成、カーネル切り替えができることを確認します。
kmori@kmori-ubuntu:~$ jupyter notebook
[I 11:25:18.567 NotebookApp] Using EnvironmentKernelSpecManager...
:
[I 11:25:18.873 NotebookApp] Starting initial scan of virtual environments...
[I 11:25:20.745 NotebookApp] Found new kernels in environments: conda_python352-ml
:
テスト
Jupyter Notebook 上で Dlib と OpenCV を使用したサンプルアプリケーションを実行してみます。
PyImageSearch から拝借した Facial Landmark を、Notebook 向けに変更して実行しました。2
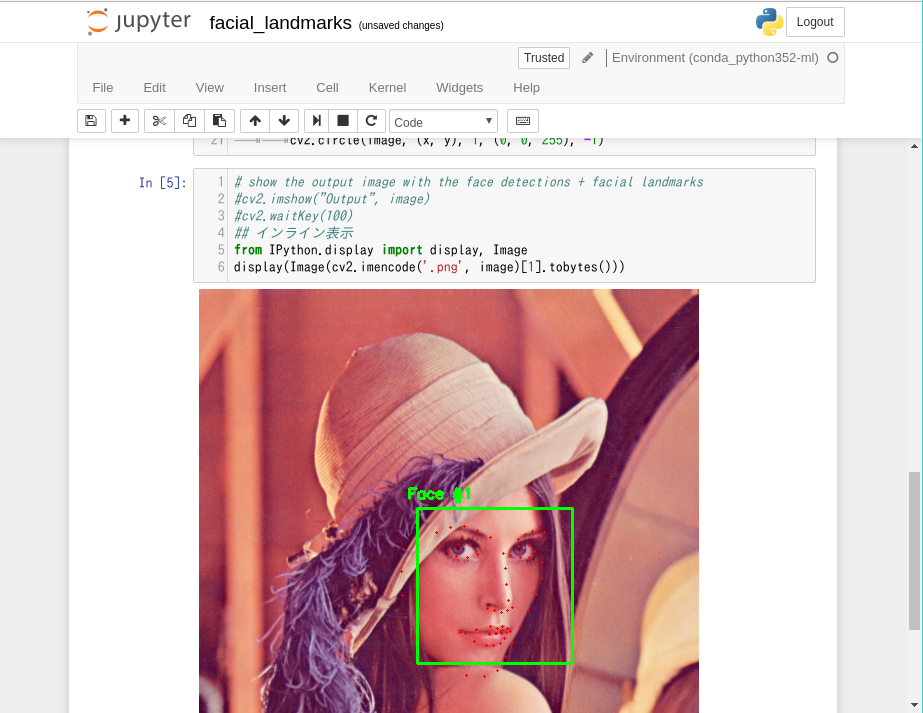
Notebook 実行時、並行して nvidia-smi を実行し、出力に Python があれば、GPU が使用されています。
Wed Jul 26 20:35:52 2017
+-----------------------------------------------------------------------------+
| NVIDIA-SMI 375.66                 Driver Version: 375.66                    |
|-------------------------------+----------------------+----------------------+
| GPU  Name        Persistence-M| Bus-Id        Disp.A | Volatile Uncorr. ECC |
| Fan  Temp  Perf  Pwr:Usage/Cap|         Memory-Usage | GPU-Util  Compute M. |
|===============================+======================+======================|
|   0  GeForce GTX 108...  Off  | 0000:01:00.0      On |                  N/A |
| 23%   45C    P2    59W / 250W |    224MiB / 11169MiB |      0%      Default |
+-------------------------------+----------------------+----------------------+

+-----------------------------------------------------------------------------+
| Processes:                                                       GPU Memory |
|  GPU       PID  Type  Process name                               Usage      |
|=============================================================================|
|    0      1334    G   /usr/lib/xorg/Xorg                              70MiB |
|    0      8379    C   ...ri/anaconda3/envs/python352-ML/bin/python   149MiB |
+-----------------------------------------------------------------------------+
以上で環境ができました。
参考:
Ubuntu 16.04: How to install OpenCV
http://www.pyimagesearch.com/2016/10/24/ubuntu-16-04-how-to-install-opencv/
How to install dlib
http://www.pyimagesearch.com/2017/03/27/how-to-install-dlib/
Facial landmarks with dlib, OpenCV, and Python
http://www.pyimagesearch.com/2017/04/03/facial-landmarks-dlib-opencv-python/
export Anaconda's OWN LD_LIBRARY_PATH whenever "source activate condaenv" ?
https://groups.google.com/a/continuum.io/forum/#!topic/anaconda/0IqjwrUvu2U
Condaで作ってる仮想環境の切り替えをJupyter上で簡単に行う方法
http://qiita.com/yoppe/items/38005f415a5b8b884c7d
JupyterでOpenCVの画像をインライン表示
http://uphy.hatenablog.com/entry/2016/12/11/110703