はじめに
こんにちは。
RSKImageCropperという画像トリミングのObjective-C製のライブラリがあり、今回はSNSのプロフィール画像の設定のような実装をSwiftで行いたかったので書いてみました。
至らぬ点など、コメントなど頂けたら幸いです。

導入について
実行環境はSwift3.1/Xcode8.3.3で、CocoaPodsを利用しました。
use_frameworks!

pod 'RSKImageCropper'
サンプルコード
MainViewController.swift
import UIKit
import RSKImageCropper

class MainViewController: UIViewController {

    @IBOutlet weak var imageView: UIImageView!

    override func viewDidLoad() {
        super.viewDidLoad()
    }

    @IBAction func buttonAction(_ sender: Any) {
        let image = UIImage(named: "img")!
        let imageCropVC = RSKImageCropViewController(image: image, cropMode: .circle)
        imageCropVC.moveAndScaleLabel.text = "切り取り範囲を選択"
        imageCropVC.cancelButton.setTitle("キャンセル", for: .normal)
        imageCropVC.chooseButton.setTitle("完了", for: .normal)
        imageCropVC.delegate = self
        present(imageCropVC, animated: true)
    }
}

extension MainViewController: RSKImageCropViewControllerDelegate {
    //キャンセルを押した時の処理
    func imageCropViewControllerDidCancelCrop(_ controller: RSKImageCropViewController) {
        dismiss(animated: true, completion: nil)
    }
    //完了を押した後の処理
    func imageCropViewController(_ controller: RSKImageCropViewController, didCropImage croppedImage: UIImage, usingCropRect cropRect: CGRect, rotationAngle: CGFloat) {
        dismiss(animated: true)
        imageView.image = croppedImage
    }
}
ライブラリのクラスについて
切り取り範囲を操作する(RSKImageCropViewController)
以下はRSKImageCropViewControllerのプロパティです。

| 名前 | 説明 |
|---|---|
| moveAndScaleLabel | 上側の説明文になる(UILabel) |
| cancelButton | 左側のキャンセルとなるボタン(UIButton) |
| chooseButton | 右側の選択完了となるボタン(UIButton) |
RSKImageCropViewControllerDelegateについて
MainViewController.swift
//キャンセルを押した時の処理
func imageCropViewControllerDidCancelCrop(_ controller: RSKImageCropViewController) {

}
//完了を押した瞬間の処理
func imageCropViewController(_ controller: RSKImageCropViewController, willCropImage originalImage: UIImage) {

}
//完了を押した後の処理
func imageCropViewController(_ controller: RSKImageCropViewController, didCropImage croppedImage: UIImage, usingCropRect cropRect: CGRect) {

}
//完了を押した後に切り取られた矩形や角度を利用する場合の処理
func imageCropViewController(_ controller: RSKImageCropViewController, didCropImage croppedImage: UIImage, usingCropRect cropRect: CGRect, rotationAngle: CGFloat) {

}
切り取りのモードについて
- RSKImageCropViewControllerのプロパティの
cropModeで指定します。 -
isRotationEnabledで回転するかどうかを指定します。

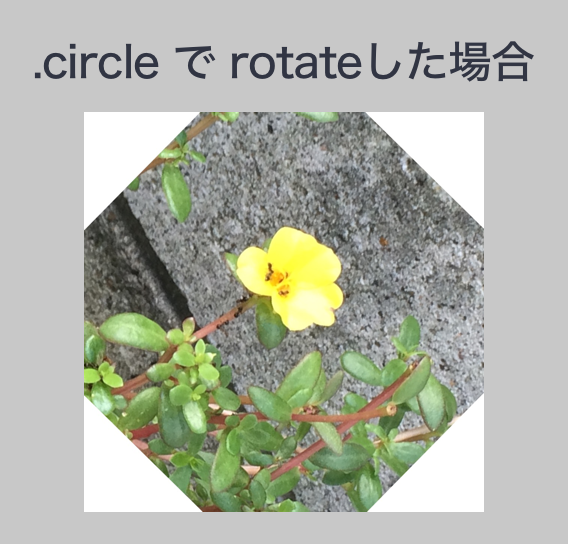
![]()
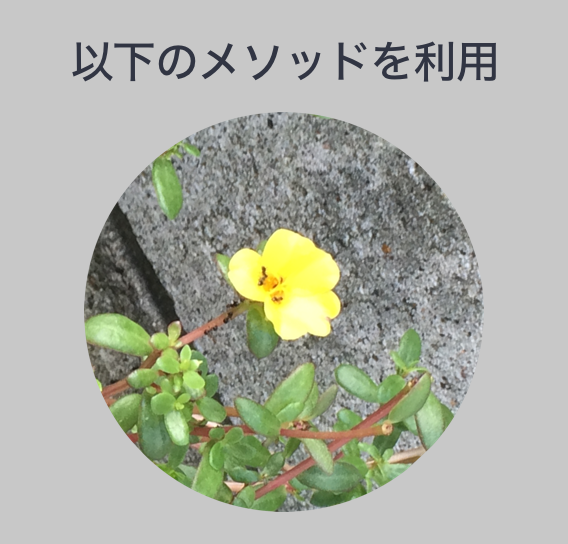
cropMode = .circleに指定した場合、実際に切り取られる画像は四角形になるようで、
-
ただ画像を表示させたいという場合
表示させるViewに対して
layer.cornerRadiusを指定して丸くするなどで対応できるかと思います。 -
画像として円形状のものが欲しい場合
delegateの
usingCropRectやcroppedImageなどを利用して自分で作成する必要がある?(更に、rotateした場合は画像が四角形かつ不透明な余白になってしまうため)
//完了を押した後の処理
func imageCropViewController(_ controller: RSKImageCropViewController, didCropImage croppedImage: UIImage, usingCropRect cropRect: CGRect) {
    //もし円形で画像を切り取りし、その画像自体を加工などで利用したい場合
    if controller.cropMode == .circle {
        UIGraphicsBeginImageContext(croppedImage.size)
        let layerView = UIImageView(image: croppedImage)
        layerView.frame.size = croppedImage.size
        layerView.layer.cornerRadius = layerView.frame.size.width * 0.5
        layerView.clipsToBounds = true
        let context = UIGraphicsGetCurrentContext()!
        layerView.layer.render(in: context)
        let capturedImage = UIGraphicsGetImageFromCurrentImageContext()!
        UIGraphicsEndImageContext()
        let pngData = UIImagePNGRepresentation(capturedImage)!
        //このImageは円形で余白は透過です。
        let png = UIImage(data: pngData)!
    }
}
おわりに
円形での画像の切り取りは、画像が四角形で返されてしまう事や、切り取り範囲が対象の画像よりも大きく切り出した時に、楕円形になってしまい正確には切り出せない事があるため、もし表示するUIが角丸でも四角形での画像切り取りにしてしまったほうが使いやすいのかもしれません。
また、cropModeにはもう一つのモード.customがあり、こちらはRSKImageCropViewControllerを細かく制御できるようなのですが、元画像やズーム率、回転角などを自ら計算する必要があるようで、少し扱いにくいと感じました。ただ、画像切り取りをUIで行えるのはとても良いと思いました。
参考にさせていただいた記事
見て頂いてありがとうございます。