- 環境の準備(OSセットアップ)
- 環境の準備(OS内のセットアップ)
- FlaskのQuickStartの内容をトレースする(インストールと最低限のセットアップ)
- FlaskのTutrialの内容をトレースする(基本的なアプリケーションの作り方の学習)★
- オリジナルの内容を作る
FlaskのTutrialはこちら。
Flaskrというマイクロブログのサービスを構築する。データベースとしてはsqliteを使用している。
フォルダ構成の作成
アプリケーションを配置するディレクトリを作成する。名前は任意だが、標準に合わせるためにstatic,templatesはそのまま使ったほうがよい。(templatesと複数形にすることを忘れずに)
[root@cnenyuy5l3c ~]# mkdir flaskr
[root@cnenyuy5l3c ~]# cd flaskr
[root@cnenyuy5l3c flaskr]#
[root@cnenyuy5l3c flaskr]# mkdir templates static
[root@cnenyuy5l3c flaskr]#
[root@cnenyuy5l3c flaskr]# virtualenv env
New python executable in /root/flaskr/env/bin/python2.7
Also creating executable in /root/flaskr/env/bin/python
Installing setuptools, pip, wheel...done.
[root@cnenyuy5l3c flaskr]#
[root@cnenyuy5l3c flaskr]# ls
env  static  templates
[root@cnenyuy5l3c flaskr]#
仮想環境分離とFlaskインストール
virtualenvを有効化して、そこにflaskをインストールする。
[root@cnenyuy5l3c flaskr]# . env/bin/activate
(env) [root@cnenyuy5l3c flaskr]#
(env) [root@cnenyuy5l3c flaskr]# pip install flask
Collecting flask
(中略)
Successfully installed Jinja2-2.9.5 MarkupSafe-0.23 Werkzeug-0.11.15 click-6.7 flask-0.12 itsdangerous-0.24
(env) [root@cnenyuy5l3c flaskr]#
DB作成
まずはスキーマを作成。
drop table if exists entries;
create table entries (
  id integer primary key autoincrement,
  title string not null,
  text string not null
);
このスキーマを直接流すわけではなく、Pythonでモジュール化している。
以下のflaskr.pyがflaskrアプリケーション本体になるが、ここではDBの初期化の部分だけ作成している。
import sqlite3
from flask import Flask, request, session, g, redirect, url_for, \
     abort, render_template, flash
from contextlib import closing    # ここはオフィシャルにはなかったが必要だった

# configuration
DATABASE = '/tmp/flaskr.db'
DEBUG = True
SECRET_KEY = 'development key'
USERNAME = 'admin'
PASSWORD = 'default'

# create our little application :)
app = Flask(__name__)
app.config.from_object(__name__)

def connect_db():
    return sqlite3.connect(app.config['DATABASE'])

def init_db():
    with closing(connect_db()) as db:
        with app.open_resource('schema.sql') as f:  # ここでschema.sqlを実行させる
            db.cursor().executescript(f.read())
        db.commit()

# ここに各種View関数を追記していく。

if __name__ == '__main__':
    app.run(host='0.0.0.0')  # ゲストローカル以外から参照させる
from_objectは対象内の大文字の変数をすべて読み込むというメソッド。
ここでの対象は__name__,すなわち自分自身のファイル(flaskr.py)。
またオリジナルでは最後のapp.runはオプションを指定していないが、今回はホストマシンから参照するために、host='0.0.0.0'を指定している。
これで準備ができたので、DBを作成する。
(flaskr) [root@localhost flaskr]# python
Python 2.7.12 (default, Jan  4 2017, 08:18:28)
[GCC 4.4.7 20120313 (Red Hat 4.4.7-17)] on linux2
Type "help", "copyright", "credits" or "license" for more information.
>>>
>>> from flaskr import init_db
>>> init_db()
>>>
ここで以下のエラーになる場合は、pythonコンパイル時にsqlite3-develが不足しているため、入れ直す必要あり。
>>> from flaskr import init_db
Traceback (most recent call last):
  File "<stdin>", line 1, in <module>
  File "flaskr.py", line 5, in <module>
    import sqlite3
  File "/opt/local/lib/python2.7/sqlite3/__init__.py", line 24, in <module>
    from dbapi2 import *
  File "/opt/local/lib/python2.7/sqlite3/dbapi2.py", line 28, in <module>
    from _sqlite3 import *
ImportError: No module named _sqlite3
作成されたデータベースを一応確認しておく。
(env) [root@cnenyuy5l3c flaskr]# sqlite3 /tmp/flaskr.db
SQLite version 3.6.20
Enter ".help" for instructions
Enter SQL statements terminated with a ";"
sqlite> .tables
entries
sqlite>
sqlite> .schema
CREATE TABLE entries (
  id integer primary key autoincrement,
  title string not null,
  text string not null
);
sqlite> .quit
View関数の作成
ここから関数を追加していく。最初はデータベースとのコネクション作成とクローズ処理。
@app.before_request
def before_request():
    g.db = connect_db()

@app.after_request
def after_request(response):
    g.db.close()
    return response
gはflaskの提供する特殊なオブジェクトで、現在のデータベースとのconnectionが保存されている。
(gは1つのリクエストの情報しか保存しない)
before_requestはリクエストの前に呼び出される。ここでは何の引数も持たない。
after_requestはリクエストの後に呼び出される。
ここでは、コネクションをクローズし、DBからのレスポンスをクライアントに渡している。
このへんはほぼ決まり文句と考えてよさそう?
ここから実際のページに対応する内容に入る。基本的にはrouteデコレータによって、URLと呼び出される関数を紐づけていく作業。
@app.route('/') # http://<hostname>:5000/ にアクセスした際に呼び出される関数を定義(ルーティング)
def show_entries():
cur = g.db.execute('select title, text from entries order by id desc')
entries = [dict(title=row[0], text=row[1]) for row in cur.fetchall()]
return render_template('show_entries.html', entries=entries) # show_entries.htmlというHTMLにentriesという値を埋め込み(レンダリング)
@app.route('/add', methods=['POST'])
def add_entry():
if not session.get('logged_in'):
abort(401)
g.db.execute('insert into entries (title, text) values (?, ?)',
[request.form['title'], request.form['text']])
g.db.commit()
flash('New entry was successfully posted')
return redirect(url_for('show_entries')) # レンダリングでなく、関数に飛ばす場合はredirect()を使用。
@app.route('/login', methods=['GET', 'POST'])
def login():
error = None
if request.method == 'POST':
if request.form['username'] != app.config['USERNAME']:
error = 'Invalid username'
elif request.form['password'] != app.config['PASSWORD']:
error = 'Invalid password'
else:
session['logged_in'] = True
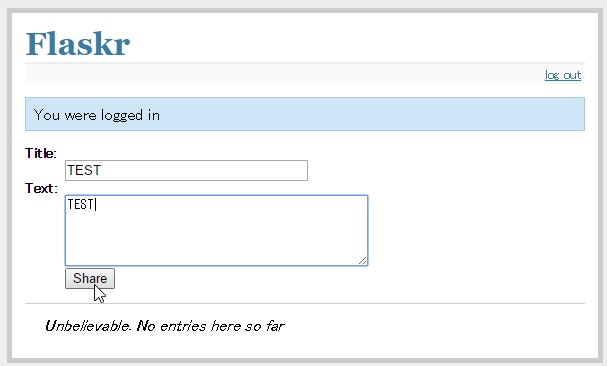
flash('You were logged in')
return redirect(url_for('show_entries'))
return render_template('login.html', error=error)
@app.route('/logout')
def logout():
session.pop('logged_in', None)
flash('You were logged out')
return redirect(url_for('show_entries'))
HTMLの作成
これで関数(機能)の部分を作成したので、次にHTML(見た目)に移る。
FlaskではおおもとのベースとなるHTML(layout.htmlということが多い)を作り、それを適宜拡張していく形になる。
<!doctype html>
<title>Flaskr</title>
<link rel=stylesheet type=text/css href="{{ url_for('static', filename='style.css') }}">
<div class=page>
  <h1>Flaskr</h1>
  <div class=metanav>
  {% if not session.logged_in %}
    <a href="{{ url_for('login') }}">log in</a>
  {% else %}
    <a href="{{ url_for('logout') }}">log out</a>
  {% endif %}
  </div>
  {% for message in get_flashed_messages() %}
    <div class=flash>{{ message }}</div>
  {% endfor %}
  {% block body %}{% endblock %}    <!-- このブロックが参照時に置き換えられる -->
</div>
{% extends "layout.html" %}    <!-- これで元になるHTMLを指定 -->
{% block body %}    <!-- layout.htmlのbodyというブロックを以下で置き換える -->
  {% if session.logged_in %}
    <form action="{{ url_for('add_entry') }}" method=post class=add-entry>
      <dl>
        <dt>Title:
        <dd><input type=text size=30 name=title>
        <dt>Text:
        <dd><textarea name=text rows=5 cols=40></textarea>
        <dd><input type=submit value=Share>
      </dl>
    </form>
  {% endif %}
  <ul class=entries>
  {% for entry in entries %}
    <li><h2>{{ entry.title }}</h2>{{ entry.text|safe }}
  {% else %}
    <li><em>Unbelievable.  No entries here so far</em>
  {% endfor %}
  </ul>
{% endblock %}
{% extends "layout.html" %}
{% block body %}
  <h2>Login</h2>
  {% if error %}<p class=error><strong>Error:</strong> {{ error }}{% endif %}
  <form action="{{ url_for('login') }}" method=post>
    <dl>
      <dt>Username:
      <dd><input type=text name=username>
      <dt>Password:
      <dd><input type=password name=password>
      <dd><input type=submit value=Login>
    </dl>
  </form>
{% endblock %}
CSSの作成
最後にCSSファイルを作成する。
body            { font-family: sans-serif; background: #eee; }
a, h1, h2       { color: #377BA8; }
h1, h2          { font-family: 'Georgia', serif; margin: 0; }
h1              { border-bottom: 2px solid #eee; }
h2              { font-size: 1.2em; }

.page           { margin: 2em auto; width: 35em; border: 5px solid #ccc;
                  padding: 0.8em; background: white; }
.entries        { list-style: none; margin: 0; padding: 0; }
.entries li     { margin: 0.8em 1.2em; }
.entries li h2  { margin-left: -1em; }
.add-entry      { font-size: 0.9em; border-bottom: 1px solid #ccc; }
.add-entry dl   { font-weight: bold; }
.metanav        { text-align: right; font-size: 0.8em; padding: 0.3em;
                  margin-bottom: 1em; background: #fafafa; }
.flash          { background: #CEE5F5; padding: 0.5em;
                  border: 1px solid #AACBE2; }
.error          { background: #F0D6D6; padding: 0.5em; }
起動、テスト
以上のファイルを以下のように配置する。
- flaskr/ (ルート)
- env/
- templates/
- layout.html
- show_entries.html
- login.html
- static/
- style.css
- flaskr.py
- schema.sql
ここまでできれば、アプリケーションを起動してアクセスを確認。
(env) [root@cnenyuy5l3c flaskr]# python flaskr.py
 * Running on http://0.0.0.0:5000/ (Press CTRL+C to quit)
 * Restarting with stat
 * Debugger is active!
 * Debugger pin code: 602-691-323
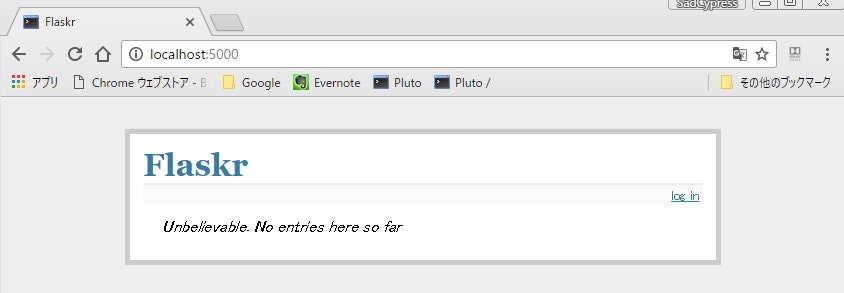

問題なさそう。
これで最低限の基礎は抑えられた(はず)なので、次回以降オリジナルに進む予定です。