Let's Encyptを使ってSSL通信をする
Let's Encrypt概要
Let's Encryptは無料かつオープンソースなSSL/TSLの証明書を発行するサービスです。
現在はオープンβに移行して、だれでも使用することができます。
これを使って、適当なWebサーバーとSSL通信を行います。
サーバーの用意
今回は、ConoHaを使います。
一番安いプランで、アプリケーションサーバーのLAMPに設定し、サーバーを起動します。
SSH Keyを設定し、SSHでログインできるようにしておきます。
ログイン
起動したサーバーのIPアドレスに対して、SSHでログインします。
================================================
Welcome LAMP application!

DocumentRoot: /var/www/html
URL:          http://<IPアドレス>/
phpinfo:      http://<IPアドレス>/phpinfo.php
MySQL root password: ********

Enjoy!

To delete this message: rm -f /etc/motd
================================================
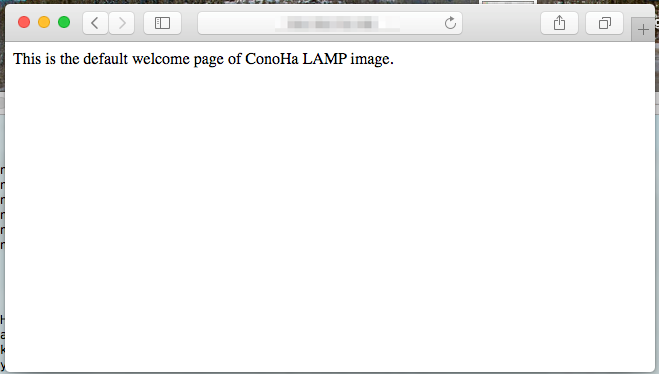
アプリケーションサーバーが正常に立ち上がっているようです。上記URLにアクセスすると、Webページが表示されます。
逆引きホスト名でもアクセスしておきます。
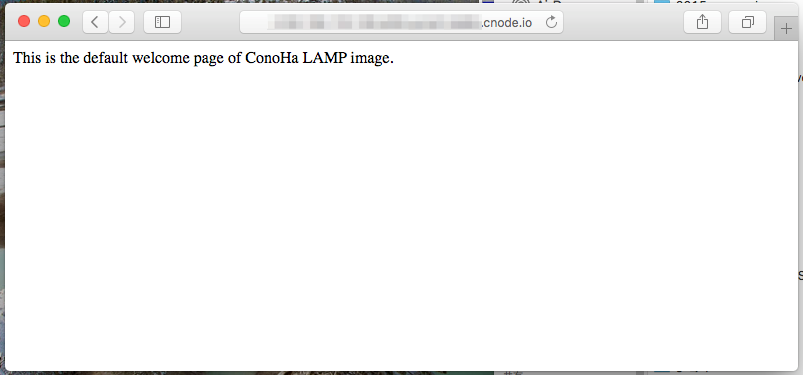
正常に表示されました。
OSを選んでサーバーを構築せず、アプリケーションから立ち上げたので、一応どのOSで動いているのかを確認しておきます。
# cat /proc/version
Linux version 2.6.32-573.7.1.el6.x86_64 (mockbuild@c6b8.bsys.dev.centos.org) (gcc version 4.4.7 20120313 (Red Hat 4.4.7-16) (GCC) ) #1 SMP Tue Sep 22 22:00:00 UTC 2015
CentOSのようです。
一応HTTPSで確認
http->httpsに変えてアクセスします。
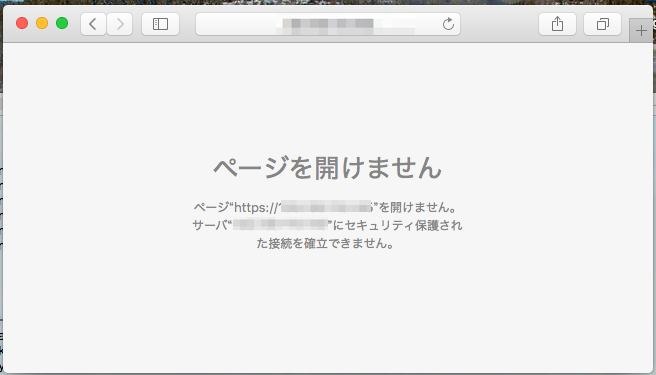
もちろんダメです。apacheも何も変えていないので当然です。
逆引きでもやってみます。
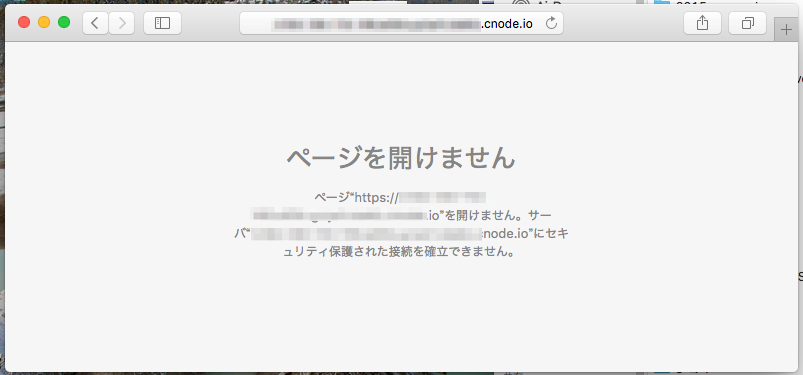
まぁダメですよね。
gitの導入
# yum install git
上記コマンドでgitをインストールします。Let's Encryptの導入に必要になります。
サイズは大したことないので、なければ入れてしまいましょう。
一旦サーバー側は終わりにしてLet's Encryptのページで導入方法を確認します。
How It works
https://letsencrypt.org/howitworks/
ここを参考にして導入してみます。色々書きますが、大体このページの意訳です。
Installing Let's Encrypt
最初に、ベータバージョンでバグとかあるかもだから期待しないでねとあります。ちゃんとしたSSL通信をしたいのであればお金を払いましょう。今はそんなに高くないですし。
gitからソースをクローンしてきます。
[https://github.com/letsencrypt/letsencrypt](git clone https://github.com/letsencrypt/letsencrypt)
$ git clone https://github.com/letsencrypt/letsencrypt

Initialized empty Git repository in /root/letsencrypt/.git/
remote: Counting objects: 29235, done.
remote: Compressing objects: 100% (35/35), done.
remote: Total 29235 (delta 16), reused 0 (delta 0), pack-reused 29200
Receiving objects: 100% (29235/29235), 7.73 MiB | 1.55 MiB/s, done.
Resolving deltas: 100% (20569/20569), done.
letsencrypt-autoはlentecryptのラッパーで、apacheやnginxなどの設定を自動でやってくれる便利ツールのようです。
$ cd letsencrypt
$ ./letsencrypt-auto --help
上記を実行すると、サーバーの依存関係を調べて必要なライブラリやパッケージをインストールします。
一部省略
完了しました!
WARNING: Python 2.6 support is very experimental at present...
if you would like to work on improving it, please ensure you have backups
and then run this script again with the --debug flag!
このWarningはPython2.6が気に食わないということだと思います。Python2.6以降に対応することで解消できますが、__--debug__をつけて実行するとなんとか動きます。
How To Use The Client
Let's Encryptはいくつかのプラグインをサポートしているようで、証明書の取得とインストールを行うコマンドが用意されています。
すでに最近のDebian系Linux上でApacheが動作している場合は、以下のコマンドで証明書の取得とインストールがされるようです。
./letsencrypt-auto --apache
それ以外の環境ではinstallはできないので、certonlyコマンドをつけて、証明書のみ取得を行います。
今回のOSはCentOSでDebian系じゃないので、証明書だけ取得します。
example.comとwww.example.comドメインの"スタンドアローン"なサーバーに対して証明書の取得をするには以下のコマンドを実行します。
./letsencrypt-auto certonly --standalone -d example.com -d www.example.com
httpサーバーはできたら止めたほうが良いそうです。止めましょう。
# apachectl stop

httpd: apr_sockaddr_info_get() failed for <IPアドレス>
httpd: Could not reliably determine the server's fully qualified domain name, using 127.0.0.1 for ServerName
正常じゃないけど停止されました。原因はわかりますが、今回は無視します。
Let's EncryptではIPアドレスに対して証明書が発行出来ません。なので、逆引きホスト名から証明書を発行します。
検証のために逆引きホストを使っています。ドメインをとりたくないからといってこのような方法で運用はしないようにしましょう。
./letsencrypt-auto certonly --standalone -d [逆引きホスト名] --debug
実行すると、次のような画面が表示され証明書に含まれるメールアドレスを要求されます。
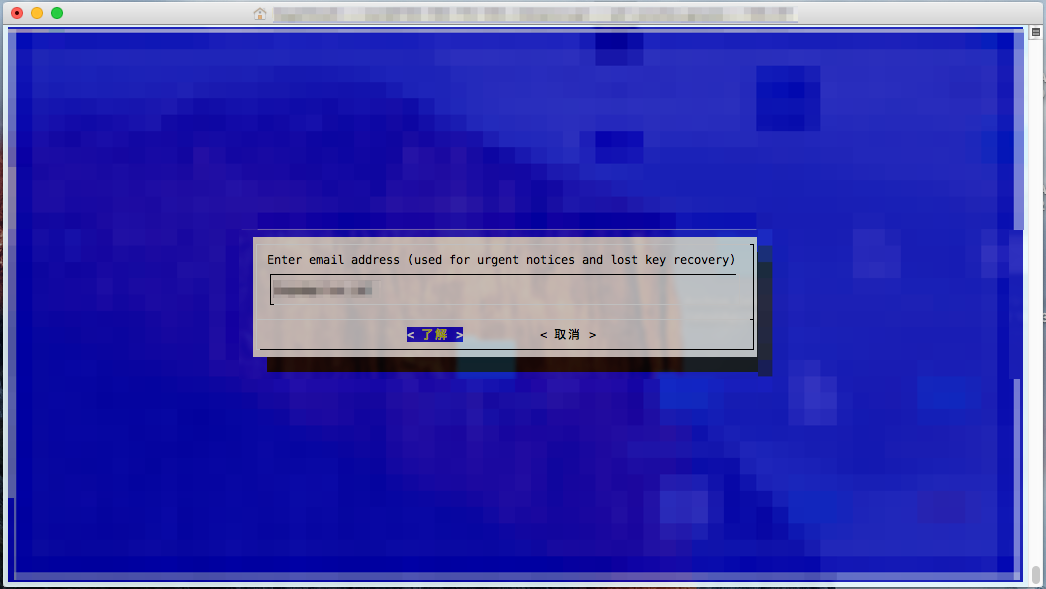
Let's Encryptの利用規約を読んで同意をします。
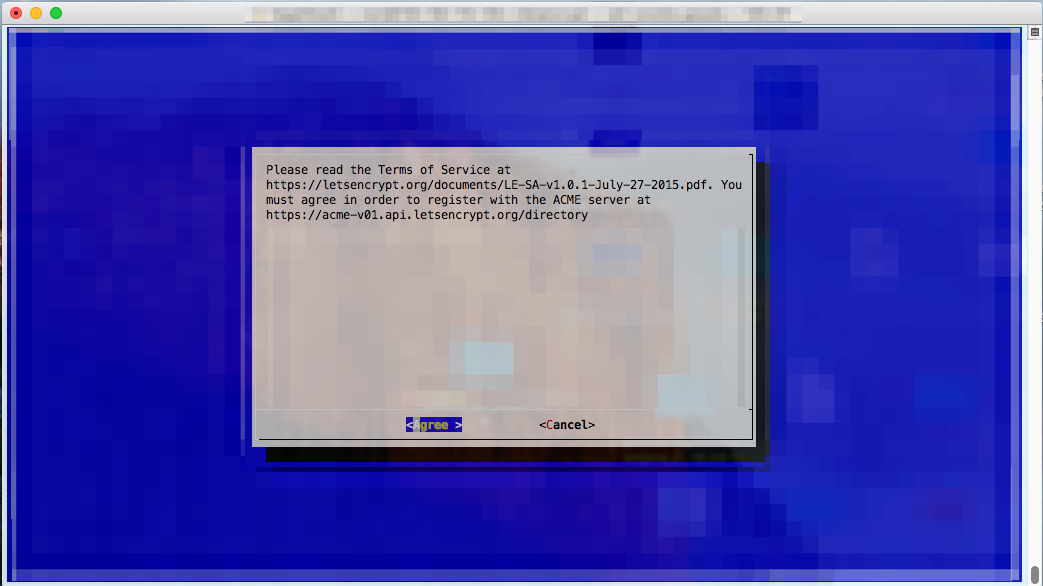
同意すると、画面が閉じてコンソール上に以下が出力されます。
IMPORTANT NOTES:
 - If you lose your account credentials, you can recover through
   e-mails sent to <Email-address>.
 - Congratulations! Your certificate and chain have been saved at /etc
   /letsencrypt/live/<逆引きホスト名>/full
   chain.pem. Your cert will expire on 2016-04-25. To obtain a new
   version of the certificate in the future, simply run Let's Encrypt
   again.
 - Your account credentials have been saved in your Let's Encrypt
   configuration directory at /etc/letsencrypt. You should make a
   secure backup of this folder now. This configuration directory will
   also contain certificates and private keys obtained by Let's
   Encrypt so making regular backups of this folder is ideal.
 - If you like Let's Encrypt, please consider supporting our work by:

   Donating to ISRG / Let's Encrypt:   https://letsencrypt.org/donate
   Donating to EFF:                    https://eff.org/donate-le
証明書が出力されました。証明書の場所は以下のパスにあるようです。
# pwd
/etc/letsencrypt/live/<逆引きホスト名>
# ls
cert.pem  chain.pem  fullchain.pem  privkey.pem
残念ながらapacheの設定まではしてくれないので自分でやります。
apacheの設定
/etc/httpd/conf.d以下にssl.confのバーチャルホスト設定ファイルがありますので、ここを編集します。
<VirtualHost _default_:443>

# General setup for the virtual host, inherited from global configuration
# DocumentRoot "/var/www/html"
# ServerName www.example.com:443

#   Server Certificate:
# Point SSLCertificateFile at a PEM encoded certificate.  If
# the certificate is encrypted, then you will be prompted for a
# pass phrase.  Note that a kill -HUP will prompt again.  A new
# certificate can be generated using the genkey(1) command.
SSLCertificateFile /etc/pki/tls/certs/localhost.crt

#   Server Private Key:
#   If the key is not combined with the certificate, use this
#   directive to point at the key file.  Keep in mind that if
#   you've both a RSA and a DSA private key you can configure
#   both in parallel (to also allow the use of DSA ciphers, etc.)
SSLCertificateKeyFile /etc/pki/tls/private/localhost.key

#   Server Certificate Chain:
#   Point SSLCertificateChainFile at a file containing the
#   concatenation of PEM encoded CA certificates which form the
#   certificate chain for the server certificate. Alternatively
#   the referenced file can be the same as SSLCertificateFile
#   when the CA certificates are directly appended to the server
#   certificate for convinience.
# SSLCertificateChainFile /etc/pki/tls/certs/server-chain.crt

#   Certificate Authority (CA):
#   Set the CA certificate verification path where to find CA
#   certificates for client authentication or alternatively one
#   huge file containing all of them (file must be PEM encoded)
# SSLCACertificateFile /etc/pki/tls/certs/ca-bundle.crt
↓
<VirtualHost *:443>

DocumentRoot "/var/www/html"
ServerName <逆引きホスト名>:443

#   Server Certificate:
# Point SSLCertificateFile at a PEM encoded certificate.  If
# the certificate is encrypted, then you will be prompted for a
# pass phrase.  Note that a kill -HUP will prompt again.  A new
# certificate can be generated using the genkey(1) command.
SSLCertificateFile /etc/letsencrypt/live/<逆引きホスト名>/cert.pem

#   Server Private Key:
#   If the key is not combined with the certificate, use this
#   directive to point at the key file.  Keep in mind that if
#   you've both a RSA and a DSA private key you can configure
#   both in parallel (to also allow the use of DSA ciphers, etc.)
SSLCertificateKeyFile /etc/letsencrypt/live/<逆引きホスト名>/privkey.pem

#   Server Certificate Chain:
#   Point SSLCertificateChainFile at a file containing the
#   concatenation of PEM encoded CA certificates which form the
#   certificate chain for the server certificate. Alternatively
#   the referenced file can be the same as SSLCertificateFile
#   when the CA certificates are directly appended to the server
#   certificate for convinience.
SSLCertificateChainFile /etc/letsencrypt/live/<逆引きホスト名>/chain.pem

#   Certificate Authority (CA):
#   Set the CA certificate verification path where to find CA
#   certificates for client authentication or alternatively one
#   huge file containing all of them (file must be PEM encoded)
# SSLCACertificateFile /etc/pki/tls/certs/ca-bundle.crt
書き換えが完了したら、apacheを再起動します。
# sudo apachectl restart
HTTPS通信確認
ブラウザで逆引きアドレスにhttpsをつけてアクセスします。
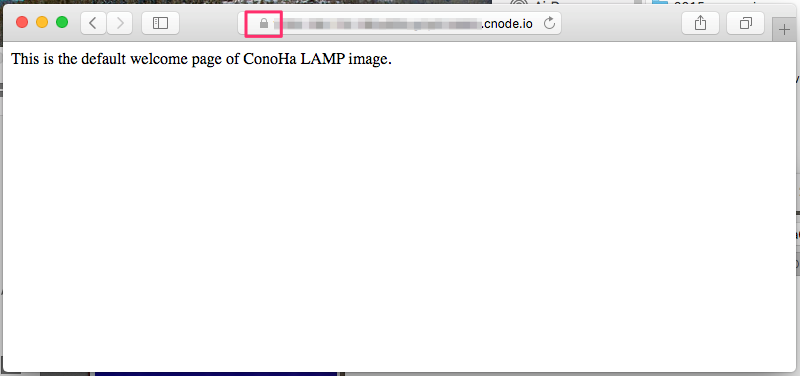
Safariから正常にアクセスできました。

証明書も正常だと確認できます。