PrismとUnityを使うWPFプロジェクトテンプレートを使ってみる
Visual Studioの拡張機能の「Prism Template Pack」
Prism Template Packには、WPFを構築するためのスニペット、アイテムテンプレート、およびプロジェクトテンプレートのコレクションと、Prismを使用するXamarin.Formsアプリケーションが含まれています。
注:Xamarin.Formsテンプレートをインストールするには、最新バージョンのXamarinが必要です。
とのこと。
-
追記:2018/10/08
- いつの間にか注意書きが増えていました。
- https://marketplace.visualstudio.com/items?itemName=BrianLagunas.PrismTemplatePack
注:Visual Studio 2017の推奨バージョンは v15.4.2です
注意:UWPには、フォールトクリエイターのアップデートv10.0.16299.0が必要です
注:Xamarin.Formsテンプレートには、Xamarinの最新バージョンがインストールされている必要があります
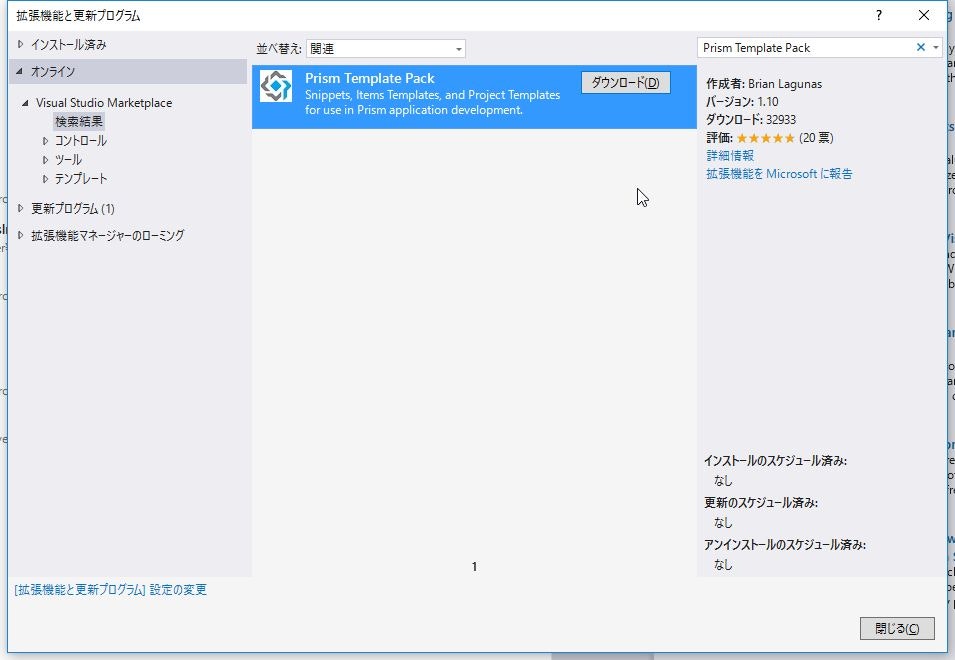
まずは、ダウンロード
- VisualStudioを起動
- ツール > 拡張機能と更新プログラム を選択
- オンラインタブ > 検索条件に「Prism Template Pack」を入力
- 検索が表示されたら「Prism Template Pack」をダウンロード
- VisualStudioを再起動するとインストールが始まります。
※2017/04/14に1.10が公開されています。VisualStudio2017にも対応している模様
- 追記:2018/11/16
- Version 2.1.3
- ※ VisualStudio2017とVisualStudio2019が対応。
- ※ VisualStudio2015は、使えなくなっています。
何ができる?
スニペット:
- propp - BindableBaseに依存するバッキングフィールドを持つプロパティ ※通知を伝播させる時に使用
- cmd - プライベートセッターでDelegateCommandプロパティ
- cmdg - 汎用のDelegateCommand プロパティ ※パラメータ有りのDelegateCommandの場合に使用
スニペットの例:
propp
        private string fieldName;
        public string PropertyName
        {
            get { return fieldName; }
            set { SetProperty(ref fieldName, value); }
        }
アイテムテンプレート:
- Prism ViewModel - BindableBaseから派生し、デフォルトコンストラクタを持つViewModel
- Prism UserControl - ViewModelLocatorを使用したUserControl
- Prism Window - ViewModelLocatorを使ったWindow
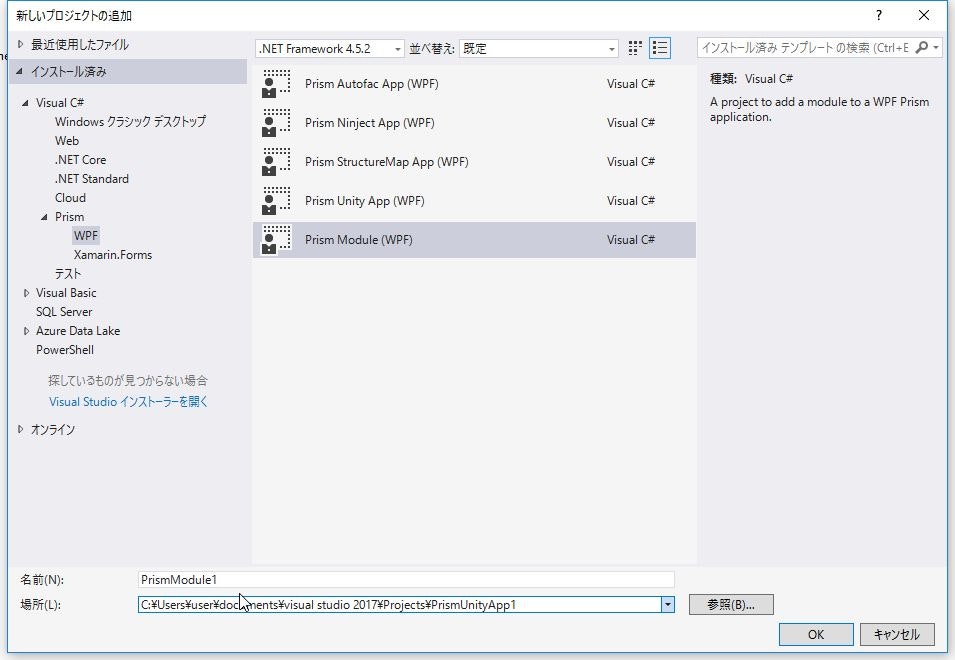
プロジェクトテンプレート:
- Prism Module - WPF Prismアプリケーションにモジュールを追加するプロジェクト
- Prism Autofac App - PrismとAutofacでWPFアプリケーションを構築するためのプロジェクトテンプレート
- Prism Ninject App - PrismとNinjectを使用してWPFアプリケーションを構築するためのプロジェクトテンプレート
- Prism StructureMap App - PrismとStructureMapを使用してWPFアプリケーションを構築するためのプロジェクトテンプレート
- Prism Unity App - PrismとUnityを使ってWPFアプリケーションを構築するためのプロジェクトテンプレート
xamarinも対応していますが、ここでは説明省略。
今回は、Prism Unity Appを使用します。
プロジェクトの作成
- 新しいプロジェクト > テンプレート > Prism > WPF > Prism Unity App(WPF)を選択。
- プロジェクト名を入力
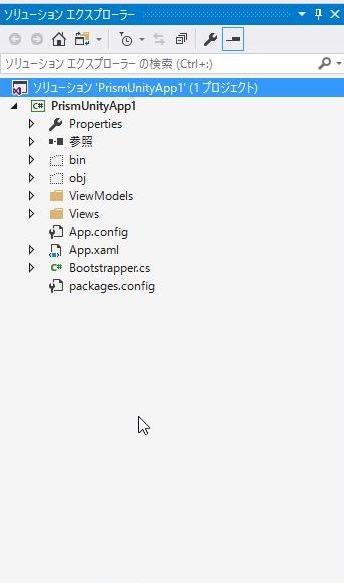
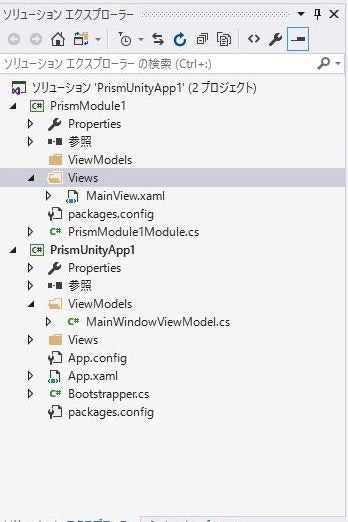
こんな感じで、ディレクトリ構成やBootstrapperクラスも作ってくれます。
モジュールの追加
- ソリューションを右クリック > 新しい項目 > Prism Module(WPF)を選択
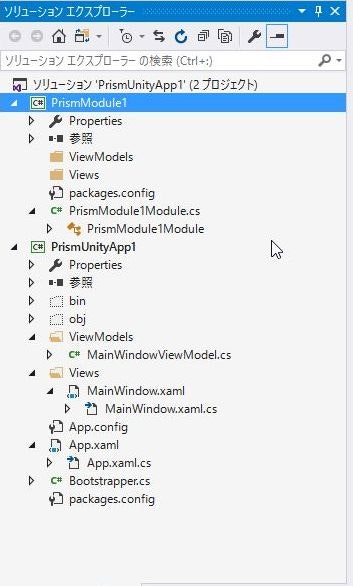
Prismモジュールを追加をするとこんな感じに
ちょっと作成
1.プロジェクトテンプレートでPrism Moduleを追加
- 上の方で説明しましたがモジュールもプロジェクトテンプレートがあるので、そちらから追加をしておけば、Viewsフォルダなんかも作られています。
- なので、ここでは、一旦ソリューションをリビルドします。
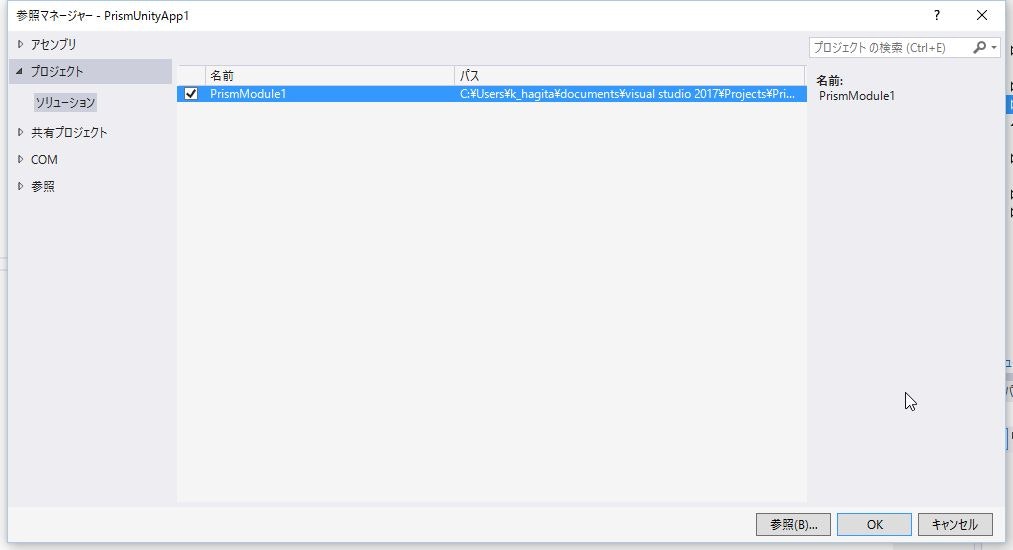
2.作成したPrism ModuleをWindowの方のプロジェクトで参照
- 参照を右クリックして > 参照の追加 > プロジェクトタブを選択 > 追加したPrism Moduleのプロジェクトにチェックを入れる > OKを押下します。
3.Bootstrapperクラス
- プロジェクトテンプレートでBootstrapper.csは、作成されているので、そちらに追記します。
-
ConfigureModuleCatalogで外部モジュールから呼び出すためのモジュール・カタログを作成します。
using Microsoft.Practices.Unity;
using Prism.Modularity;
using Prism.Unity;
using PrismUnityApp1.Views;
using System.Windows;

namespace PrismUnityApp1
{
    class Bootstrapper : UnityBootstrapper
    {
        protected override DependencyObject CreateShell()
        {
            return Container.Resolve<MainWindow>();
        }

        protected override void InitializeShell()
        {
            Application.Current.MainWindow.Show();
        }

        protected override void ConfigureModuleCatalog()
        {
            base.ConfigureModuleCatalog();


            ModuleCatalog moduleCatalog = (ModuleCatalog)this.ModuleCatalog;
            moduleCatalog.AddModule(typeof(PrismModule1.PrismModule1Module));
        }

    }
}
4.メインページの作成
- Prismモジュールで作成したプロジェクトのViewsフォルダにUserControlを作成します。
- 今回は、「MainView」としています。
<UserControl x:Class="PrismModule1.Views.MainView"
             xmlns="http://schemas.microsoft.com/winfx/2006/xaml/presentation"
             xmlns:x="http://schemas.microsoft.com/winfx/2006/xaml"
             xmlns:mc="http://schemas.openxmlformats.org/markup-compatibility/2006"
             xmlns:d="http://schemas.microsoft.com/expression/blend/2008"
             xmlns:local="clr-namespace:PrismModule1.Views"
             mc:Ignorable="d"
             d:DesignHeight="300" d:DesignWidth="300">
    <Grid>
        <Grid.RowDefinitions>
            <RowDefinition Height="50"/>
            <RowDefinition Height="*"/>
        </Grid.RowDefinitions>
        <Grid Grid.Row="0" Background="Gray">
            <TextBlock VerticalAlignment="Stretch" HorizontalAlignment="Stretch" Text="「Prism Template Pack」サンプル" FontSize="20" Foreground="White" Margin="10"/>
        </Grid>
        <Grid Grid.Row="1" >
            <DataGrid VerticalAlignment="Stretch" HorizontalAlignment="Stretch" Margin="10"></DataGrid>
        </Grid>
    </Grid>
</UserControl>
5.領域の作成
- PrismModule1Module.csを開いて領域の作成を行います。
- ここでもPrism Moduleのプロジェクトテンプレートで作成した場合は、ある程度作成されているので、Initializeメソッドを修正します。
using Prism.Modularity;
using Prism.Regions;
using System;

namespace PrismModule1
{
    public class PrismModule1Module : IModule
    {
        IRegionManager _regionManager;

        public PrismModule1Module(IRegionManager regionManager)
        {
            _regionManager = regionManager;
        }

        public void Initialize()
        {
            //throw new NotImplementedException();
            _regionManager.RegisterViewWithRegion("ContentRegion", typeof(Views.MainView));
        }
    }
}
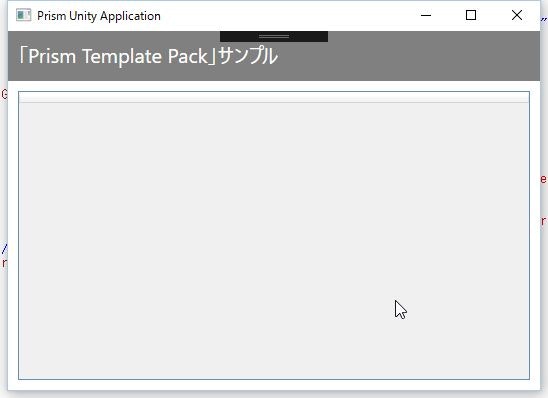
6.リビルドして、実行
- はい、これでMainViewがMainWindow内に表示されることが確認できました。
まとめ
プロジェクトテンプレートでちょこっとだけ手間が省けました。
とはいっても、いろいろと追記していかないといけないのですが、まず最初のディレクトリ構成を整えて、StartUp消して、Bootstrapperクラスを作成して・・・
とかのめんどくささからは、少しだけ解放といったところでしょうか?
普段社内でWPFアプリケーションは、MEFを使っていて、Unityって触れたことがないので、今後は、これを使って何かやってみます。
ちなみに古い記事ですがこんなのがありました。
リンク:Unity vs. MEF