はじめてのLaravelアプリケーションを構築する為のStep by Step Guide
この記事は Step by Step Guide to Building Your First Laravel Applicationを翻訳したチュートリアル記事です。日本語の翻訳ならびに、記事の公開、コードの引用は製作者であるEric L. Barnes氏に既に許可を取ってあります。
Thank you for making great tutorial articles!
※追記
こちらにチュートリアルに説明を加え、改良した記事を公開したので
良かったらこちらもご覧下さい。
はじめに
Since its initial release in 2011, Laravel has experienced exponential growth. In 2015, it became the most starred PHP framework on GitHub and rose to the go-to framework for people all over the world.
2011年の最初のリリース以来、Laravelは急激な成長を経験してきました。 2015年には、LaravelはGithubでもっとも花形のPHPフレームワークになり、世界中の人々のための頼りになるフレームワークになるまで出世しました。
Laravel focuses on you, the end user, first which means its focus is on simplicity, clarity, and getting work done. People and companies are using it to build everything from simple hobby projects all the way to Fortune 500 companies.
Laravelはエンドユーザーに焦点を当てています。これはまず、シンプルさ、明快さ、作業の効率化に重点を置いていることを意味します。人々や企業は、単純な趣味のプロジェクトからフォーチュン500に出て来る企業まで、あらゆるものを構築するためにこれを使用しています。
※フォーチュン500(Fortune 500)は、アメリカ合衆国のフォーチュン誌が年1回編集・発行するリストの1つで、全米上位500社がその総収入に基づきランキングされる企業が記載されています。
My goal with this is to create a guide for those just learning the framework. This guide will take you from the very beginning of an idea into a real deployable application.
これを書いた私の目的は、今まさにフレームワークを勉強し始めた人たちのためのガイドを作ることです。このガイドでは、アイデアの初めから実際の展開可能なアプリケーションまで導きます。
This look at Laravel will not be exhaustive, covering every detail of the framework, but if you want that I recommend the book Laravel: Up and Running. This tutorial does expect a few prerequisites and here is what you will need to follow along:
Laravelのこの見方(前述に記述されている目標や方向性)は完璧ではなくLaravelの詳しい説明は補えてないですが、もし必要であればLaravel: Up and Runningを読み事をお薦めします。このチュートリアルでLaravelを動かすために、いくつかの以下の前提条件が必要です。
- ローカルPHP環境(Valet, Homestead, Vagrant, MAMP, etc.)。
- データベース。私はMySQLを使用します。
- PHPUnitがインストールされている。
- Nodeがインストールされている。
Note: For the local PHP environment I am using a Mac and like to use Valet because it automatically sets up everything. If you are on Windows, you should consider Homestead or some flavor of a virtual machine.
ローカルPHP環境について、私はMacを使っていて自動的になんでもセットアップしてくれるのでValetを使うのが好きです。もしあなたがWindowsなら、Homesteadか、ほかのお気に入りの仮想マシンにするかを熟考すべきです。
I am attempting to go through the process of creating a new application just as I would in a real world environment. In fact, the code and idea are taken from a project I built.
現実世界で行うのと同様に新しいアプリケーションを作る過程を始めようと思います。実際にここで紹介するコードやアイデアは私が構築したプロジェクトから得ています。
計画
Every project has to start from somewhere, either assigned to you by your work or just an idea in your head. No matter where it originates, thoroughly planning out all the features before you start coding is paramount in completing a project.
どんなプロジェクトでも、仕事によって割り当てられたか、もしくは頭の中のアイデアから始まります。最初がどうであれコーディングを開始する前にすべての機能を計画しておくことが、プロジェクトを完了する上で最も重要です。
How you plan is dependent on how your mind works. As a visual person, I like to plan on paper, drawing out the way I picture the screens looking and then working backward into how I’d code it out. Others prefer to write a project plan in a text file, wiki, or some mind mapping tool. It doesn’t matter how you plan, just that you do it.
どのように計画するかは、あなたの心がどのように働くか次第です。目で見る方が早い私は紙の上に計画を立て、スクリーンを描き、それを裏側で動作するようにコードに落としこんでいきます。 他の人は、テキストファイルやwiki、もしくはマインド・マッピング・ツールなどに書き込むことを好みます。 しかし計画する方法など問題ではありません。
For this guide, we are going to be building a link directory. Here is a list of fundamental goals for this links app:
Let's get started!
このガイドでは、リンクディレクトリを構築する予定です。 これがリンクアプリの基本的な目標になります。:
- 1.簡単なリンクリストを表示する
- 2.新しいリンクを投稿できるフォームを作成する
- 3.フォームを検証する
- 4.データをデータベースに保存する
それでは始めてみましょう!
最初のステップ
With a simple plan of attack outlined, it’s time to get a brand new empty project up and running. I like to put all my projects in a ~/Sites directory, and these instructions will use that location. I’ve already “parked” this directory in Valet, so any folders will automatically be mapped to “foldernam.test" in the browser.
シンプルな計画をざっくり書くと、空のプロジェクトを使ってそこで始めてみましょう。 私はすべてのプロジェクトを〜/ Sitesディレクトリに入れたいと思っており、チュートリアルでこの場所を使用します。 私は既にこのディレクトリーをValetに "展開"しているので、どのフォルダもブラウザの "foldername.test"に自動的にマップされます。
Open your terminal application and switch into this directory.
ターミナルアプリケーションを開き、このディレクトリに切り替えます。
mkdir ~/Sites
ccd ~/Sites
Next, install Laravel’s command line installer:
次に、Laravelのインストーラをインストールします。
composer global require "laravel/installer"
You need to make sure that the global Composer bin is in your path. You can do so by adding the following to your PATH in your ~/.bash_profile or ~/.zshrc if you are using Z shell:
インストールしたComposerがPATHに含まれていることを確認する必要があります。~/.bash_profileまたは zシェルを使っている場合は ~/.zshrc のPATHに次の行を追加してください。
export PATH="$HOME/.composer/vendor/bin:$PATH"
For the path to take effect, you need to restart your terminal session of source the file again:
追加したパスを有効化させるために、再度terminal上でsourceコマンドを実行します。
source ~/.bash_profile
Now you can use the Laravel installer to create new projects from the command line:
これで、Laravelインストーラを使ってコマンドライン上から新しいプロジェクトを作成できます。
laravel new links
This will create a new directory at ~/Sites/links and install an stock Laravel project. Visiting links.test in the browser now shows the default Laravel welcome page:
新しく~/Sites/linksディレクトリが作られ、Laravelプロジェクトがインストールされています。 ブラウザーの "links.test"を訪れると、デフォルトのLaravelのwelcomeページが表示されます:
Now scaffold out the authentication system by running
次のコマンドを実行して認証システムの土台を作りましょう。
php artisan make:auth
Even though this tutorial will not dive into authentication by running this command, it will modify our views and routes. So by doing it early, we don’t have to worry about it messing with any of our code.
このチュートリアルでは、認証を行うことはありませんが、上のコマンドを実行する事でビューとルーティングが変更されます。従って早い段階で実行する事で、コードが乱れる心配をせずに済みます。
With the basics setup and working it’s time to start doing some coding.
いよいよここから基本的なセットアップと作業で、コーディングを始める時が来ました。
リンクリストの作成
If you start thinking about the whole finished project, it’s easy to get overwhelmed. The best way to fight this is to break everything down into small tasks. So, let’s start with showing a list of links.
完成したプロジェクト全体について考え始めたとしたら圧倒されるのは当然です。これに取り組む最善の方法は、すべて小さな仕事に分割することです。まずはリンクのリストを表示することから始めましょう。
Even though showing a list of links sounds like a small task it still requires a database, a database table, data in the table, a database query, and a view file.
リンクのリストを表示することは小さなタスクのように聞こえますが、依然としてデータベース、データベーステーブル、テーブル内のデータ、データベースクエリ、およびビューファイルが必要です。
Creating a migration will be the first step, and the Laravel Artisan command line tool can help us create that.
マイグレーションファイルを作成することが最初のステップとなり、Laravel Artisanコマンドラインツールがその作成に役立ちます。
php artisan make:migration create_links_table --create=links
Now, open the file this command created. It will be located at database/migrations/{{datetime}}_create_links_table.php
次にこのコマンドで作成したファイルを開きます。 ファイルはdatabase/migrations/{{datetime}}_create_links_table.phpにあります。
Inside the up method add our new columns:
メソッドの中に新しい列を追加します。
Schema::create('links', function (Blueprint $table) {
      $table->increments('id');
      $table->string('title');
      $table->string('url’)->unique();
      $table->text('description');
      $table->timestamps();
});
Save the file and run the migration:
ファイルを保存して、マイグレーションを実行します。
php artisan migrae
While you are working with test data, you can quickly apply the schema:
一方でテストデータを生成する場合は、以下のコマンドを実行する事でテーブルスキーマを直ぐに適用させる事ができます
php artisan migrate:fresh
Next, we need some data and a model to work with our database table. Laravel provides two features which help with this: the first is a database seeder, which populates the database with data, and second, the model factory files that allow us to generate fake model data that we can use to fill our development database and tests:
次に、DBのtableからいくつかのデータとそれを扱うモデルが必要です。Laravelはこれを助ける2つの機能を提供します。 1つめはデータベースシードでこの機能はDBにテストデータを登録させる事ができます。2つめはモデルファクトリーで、この機能を使う事で開発用のDBにテスト用のモデルデータを生成する事ができます。
php artisan make:model --factory Link
The
--factoryflag will generate a new factory file in thedatabase/factoriespath, in our case a newLinkFactoryfile will include an empty factory definition for our Link model.
--factoryフラグはdatabase/factoriesに新しいファクトリーを生成し、今回のケースではLinkFactoryを生成されリンクモデルの空のファクトリ定義が含まれます。
Open the LinkFactory.php file and fill in the following:
LinkFactory.phpを開き、次の情報を入力します。
<?php

use Faker\Generator as Faker;

/* @var Illuminate\Database\Eloquent\Factory $factory */

$factory->define(App\Link::class, function (Faker $faker) {
    return [
        'title' => substr($faker->sentence(2), 0, -1),
        'url' => $faker->url,
        'description' => $faker->paragraph,
    ];
});
We use the $faker->sentence() method to generate a title, and substr to remove the period at the end of the sentence.
$faker->sentence()メソッドを使う事でテストデータのイトルを生成し、substrで文末のピリオドを削除します。
Next, create the link seeder, so we can easily add demo data to the table:
次に、テストデータをテーブルに簡単に追加できるようにlink seederを作成します。
php artisan make:seeder LinksTableSeeder
The make:seeder command generates a new database seeder class to seed our links table. Open the database/seeds/LinksTableSeeder.php file and add the following:
make:seederコマンドは新しいデータベースシーダクラスを生成して、リンクテーブル用の初期値設定を行います。database/seeds/LinksTableSeeder.phpを開いて次に以下のようにコードを追加して下さい。
public function run()
{
    factory(App\Link::class, 5)->create();
}
In order to “activate” the LinksTableSeeder, we need to call it from the main database/seeds/DatabaseSeeder.php run method:
LinksTableSeederを"有効化"するためにdatabase/seeds/LinksTableSeeder.php のrunメソッド内で呼び出す必要があります
public function run()
{
    factory(App\Link::class, 5)->create();
}
Open the DatabaseSeeder.php and add this to the run method:
DatabaseSeeder.phpを開き、runメソッドに追加します:
$this->call(LinksTableSeeder::class);
You can now run the migrations and seeds to add data to the table automatically.Using the migrate:fresh command, we can get a clean schema that applies all migrations and then seeds the database:
以下のコマンドでマイグレーションとシードを実行して、テーブルに自動的にテストデータを追加できます。migrate:freshコマンドを使う事でデータベースを全テーブルからドロップしてから、マイグレーションとシードを同時に実行してくれます。
(seederを追加するにはcomposer dump-autoloadを実行する必要があります。そうしないとClass LinksTableSeeder does not existでエラーが発生します。)
ref:https://laravel.com/docs/5.6/seeding#running-seeders
php artisan migrate:fresh --seed
Using the tinker shell you can start playing around with the model data:
tinnker shellを使う事でモデルからのデータを取得する事ができます。
>>> \App\Link::first();
=> App\Link {#747
     id: 1,
     title: "Aliquam quo pariatur",
     url: "https://gibson.com/consequuntur-consequatur-eius-expedita-maiores-quaerat-occaecati.html",
     description: "Temporibus eaque aspernatur...",
     created_at: "2017-11-04 05:35:45",
     updated_at: "2017-11-04 05:35:45",
   }
>>>
We have the data place and a model to interact with the database. We are now ready to start building the UI to add new links to the application.
Laravelにはこのようにデータを用意する場所と、相互的にデータベースと対話できるモデルを持っています。これで、UIを構築してアプリケーションに新しいリンクを追加する準備が整いました。
ルーティングとビュー
To build out a view showing the list of links, we need to update the main project route and also define a new route that will display our submission form. We can add new routes to our application in the routes/web.php file.
リンクのリストを表示するビューを構築するには、最初にメインプロジェクトのルーティングを更新して、投稿フォームを表示する新しいルーティングを用意する必要がります。新しいルーティングはroutes/web.phpファイルを開いて、新しいルートを追加する事ができます。
In the web routes file you should see the default route below:
webのルーティングには以下のデフォルトのルーティングが表示されています。
Route::get('/', function () {
    return view('welcome');
});
To create a new route we can either use a route closure or a dedicated controller class. In this tutorial, we will use closures for our submission and index routes.
新しいルートを作成する為に、ルートクロージャまたは専用のコントローラクラスを使用します。 このチュートリアルでは、ルートクロージャを使って投稿フォームと最初のホームページ用のルーティングを定義します。
First, let’s update the home route by getting a collection of links from the database and passing them to the view:
まず、データベースからlinkのコレクションを取得し、ビューに渡す為に、ホームルートを更新しましょう。
Route::get('/', function () {
    $links = \App\Link::all();
    return view('welcome', ['links' => $links]);
});
The second argument can be an associative array of data, and the key ends up being the variable name in the template file.
view()の2番目の引数は連想配列でデータを渡しており、キー名はテンプレートファイルの変数名になります。
You can also use a fluent API to define variables if you prefer:
また、必要に応じては以下のように定義することもできます
// with()メソッドを使う
return view('welcome')->with('links', $links);

// 直接メソッドを呼び出して引数を渡す
return view('welcome')->withLinks($links);
Next, edit the welcome.blade.php file and add a simple foreach to show all the links:
次に、welcome.blade.phpファイルを編集し、単純なforeachを追加してすべてのリンクを表示します。
@foreach ($links as $link)
  <li>{{ $link->title }}</li>
@endforeach
Here’s what the welcome.blade.php HTML should look like:
welcome.blade.phpのHTMLは次のようになります。
<body>
    <div class="flex-center position-ref full-height">
        @if (Route::has('login'))
            <div class="top-right links">
                @auth
                    <a href="{{ url('/home') }}">Home</a>
                @else
                    <a href="{{ route('login') }}">Login</a>
                    <a href="{{ route('register') }}">Register</a>
                @endauth
            </div>
        @endif

        <div class="content">
            <div class="title m-b-md">
                Laravel
            </div>

            <div class="links">
                @foreach ($links as $link)
                    <a href="{{ $link->url }}">{{ $link->title }}</a>
                @endforeach
            </div>
        </div>
    </div>
</body>
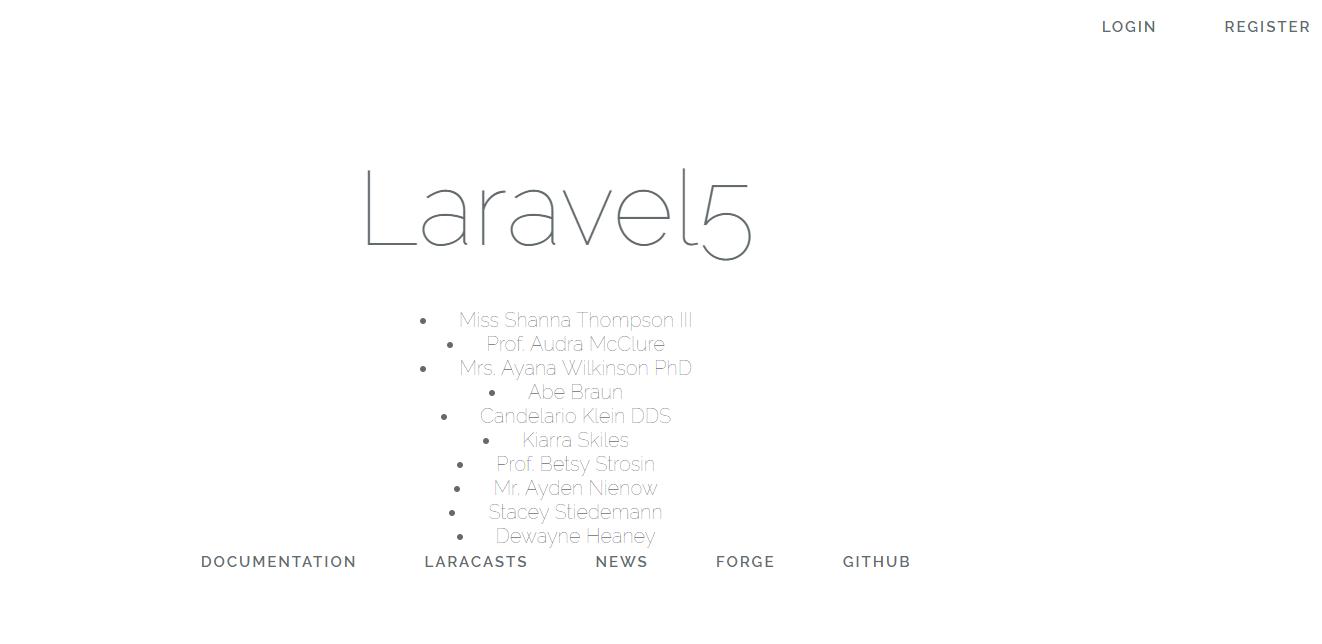
If you refresh your browser, you should now see the list of all the links added. With that all set, let’s move to submitting links.
ブラウザを更新すると、追加されたすべてのリンクのリストが表示されます。 準備が整ったので、リンクを追加するフォームを加えてみましょう。
リンクの投稿フォームの表示
We are almost done creating our first application in Laravel. We will round out this Laravel tutorial with the ability for others to submit links into the app, which requires three fields: title, URL, and a description.
Laravelでの最初のアプリケーションの作成は終わりました。次にここでのチュートリアルではタイトル、URL、説明という3つのフィールドを必要とするリンクを送信する機能をアプリケーションに追加していきます。
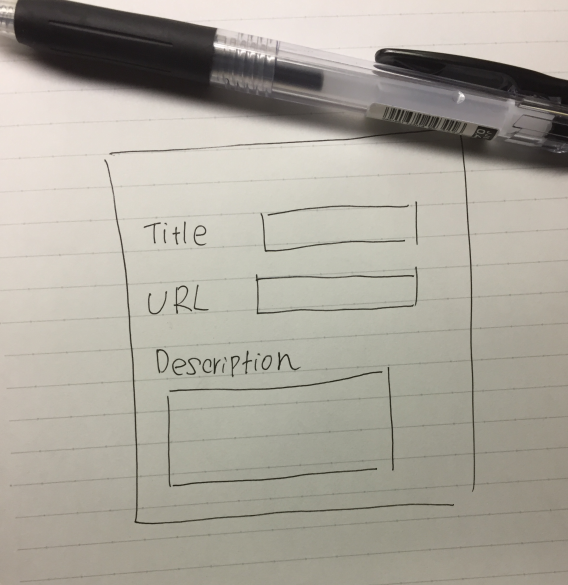
I am a visual person and before planning out features that will require HTML I like to draw them out so I can get an idea of what I’m building in my head. Here is a simple drawing of this form:
私は先程も述べたように目で見て覚えるタイプなので、HTMLを必要とする機能を計画する前に絵を書いて頭の中で何を構築しているのかを引き出す事が好きです。 以下はこのフォームの簡単な図です:
※この絵は元の絵を参考にして私自身が書きました。
Since we’ve added all the core structure, model factory, migration, and model, in the last section, we can reap the benefits by reusing all those for this section.
これまでのセクションでコアとなる設計、モデルファクトリ、マイグレーション、モデルを追加しました。このセクションではこれら再利用することで追加したメリットを享受できます。
First, create a new route in the routes/web.php file:
まず、routes / web.phpファイルに新しいルーティングを作成します。
Route::get('/submit', function () {
   return view('submit');
});
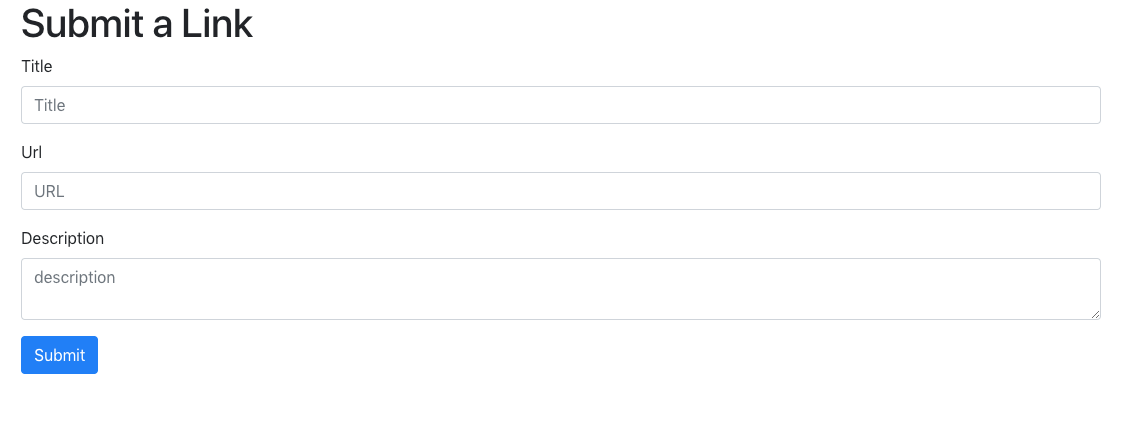
Next, we need to create the submit.blade.php template at resources/views/submit.blade.php with the following boilerplate bootstrap markup:
次に、ボイラープレートにbootstrapを使っている submit.blade.phpテンプレートファイルをresources/views/submit.blade.phpに作成します。
※デフォルトではapp.blade.phpは用意されてないので以下のテンプレートファイルを /views/layouts/app.blade.phpとして置いてください。
<!DOCTYPE html>
<html lang="ja">
<head>
    <meta charset="utf-8">
    <meta http-equiv="X-UA-Compatible" content="IE=edge">
    <meta name="viewport" content="width=device-width, initial-scale=1">
    <!-- Bootstrap4 CDN -->
    <title>@yield('title')</title>
</head>
<body>
{{-- コンテンツの表示 --}}
<div class="container">
    @yield('content')
</div>
</body>
submit.balde.phpは以下のようになります。
@extends('layout.app')

@section('content')
    <div class="container">
        <div>
            <h1>Submit a Link </h1>
            <form action="/submit" method="post" >
                @if ($errors->any())
                    <div class="alert alert-danger" role="alert">
                        Plese fix the following errors
                    </div>
                @endif

                {!!csrf_field()!!}

                <div class="form-group{{ $errors->has('title') ? 'has-error' : ''}}">
                    <label for="title">Title</label>
                    <input type="text" class="form-control" id="title" name="title" placeholder="Title" value="{{ old('title') }}">
                    @if($errors->has('title'))
                        <div class="alert alert-danger">
                            {{ $errors->first('title') }}
                        </div>
                    @endif
                </div>

                <div class="form-group{{ $errors->has('url') ? ' has-error' : '' }}">
                    <label for="url">Url</label>
                    <input type="text" class="form-control" id="url" name="url" placeholder="URL" value="{{ old('url') }}">
                    @if($errors->has('url'))
                        <span>
                            <div class="alert alert-danger">
                                {{ $errors->first('url') }}
                            </div>
                        </span>
                    @endif
                </div>

                <div class="form-group{{ $errors->has('description') ? ' has-error' : '' }}">
                    <label for="description">Description</label>
                    <textarea class="form-control" id="description" name="description" placeholder="description">{{ old('description') }}</textarea>
                    @if($errors->has('description'))
                        <div class="alert alert-danger">
                        {{ $errors->first('description') }}
                        </div>
                    @endif
                </div>

                <button type="submit" class="btn btn-primary">Submit</button>
            </form>
        </div>
    </div>
@endsection
There’s quite a bit going on in this form, so let’s go over the major points that might be confusing when you are new to Laravel.
このフォームのチュートリアルではかなり進んでしまっているので、Laravelを初めて使う方は混乱するかもしれない主なポイントを見て行きましょう。
Near the top of the form, we have a blade conditional that checks to see if there are any validation errors. When errors exist, the bootstrap alert message will be shown, prompting the user to fix the invalid form fields:
フォームの上部には、エラーがあるかどうかをチェックする条件文があります。エラーが存在する場合は、bootstrapのアラートメッセージが表示され、修正するようユーザーに求めます。
@if ($errors->any())
    <div class="alert alert-danger" role="alert">
        Please fix the following errors
    </div>
@endif
Each individual form field checks for validation errors and displays an error message and outputs a has-error class:
それぞれのフォームフィールドでは、エラーが発生したかをチェックし、エラーメッセージを表示しhas-errorクラスに出力します。
<div class="form-group{{ $errors->has('title') ? ' has-error' : '' }}">
    <label for="title">Title</label>
    <input type="text" class="form-control" id="title" name="title" placeholder="Title" value="{{ old('title') }}">
    @if($errors->has('title'))
        <span class="help-block">{{ $errors->first('title') }}</span>
    @endif
</div>
If the user submits invalid data, the route will store validation in the session and redirect the user back to the form. The {{ old('title') }} function will populate the originally submitted data. If a user forgot to submit one of the fields, the other fields that have data would be populated after validation fails and errors are shown.
もしも、ユーザが誤ったデータを投稿する場合には、ルートセッションでバリデーション結果を保存し、投稿フォームにリダイレクトします。 {{old( 'title')}}は、直前に送信されたデータを表示します。こうする事でもしユーザー直前に送信したデータを忘れた場合でも、データを持っているフィールドにデータが入力された状態にして、バリデーションに失敗したエラー表示します。
If a field has an error, the first() method returns the first error for a given field:
エラーがある場合、first()を使って指定されたフィールドの最初のエラーを返します。
{{ $errors->first('title') }}
投稿フォーム
With the form in place, we are ready to handle the POST data and validate data. Back in the routes/web.php file, create another route for the POST request:
フォームを用意して、POSTで送られてきたデータバリデーションする準備が整いました。 routes/web.phpファイルに戻って、POSTリクエスト用のルーティングを作成します。
use Illuminate\Http\Request;

Route::post('/submit', function (Request $request) {
   $data = $request->validate([
       'title' => 'required|max:255',
       'url' => 'required|url|max:255',
       'description' => 'required|max:255',
   ]);

   $link = tap(new App\Link($data))->save();

   return redirect('/');
});
This route is a little more complex than the others.
このルートは、他のルートより少し複雑です。
First, we are injecting the Illuminate\Http\Request which will hold all of the POST data and other data about the request.
まず、すべてのPOSTデータとリクエストに関する他のデータを保持するIlluminate \ Http \ Requestを注入します。
Next, we use the request’s validate() method to validate the form data. The validate method was introduced in Laravel 5.5 and is a nice shortcut over other methods used for validation. As a bonus, the validated fields are returned to the $data variable, and we can use them to populate our model.
次に、リクエストのvalidate()メソッドを使用してフォームデータをバリデーションします。 validateメソッドはLaravel 5.5で導入されました。これは、バリデーションに使用される他のメソッドより優れたショートカットです。 ボーナスとして、バリデーションされたフィールドは$data変数に返され、モデルを作成するために使用できます。
We require all three fields, and using the pipe character; we can define multiple rules. All three rules can have a max of 255 characters, and the url field requires a valid URL.
ここでは、3つのフィールドをすべて必須項目にして、パイプ文字(|)を使って複数のルールを定義できます。3つのルールはすべて最大255文字を持つことができ、urlフィールドには有効なURLが必要です。
If validation fails, an exception is thrown, and the route returns the user with the original input data and validation errors.
バリデーションに失敗した場合は例外が投げられて、ルーティングは元の入力データとバリデーションエラーをを返します。
Next, we use the tap() helper function to create a new Link model instance and then save it. Using tap allows us to call save() and still return the model instance after the save.
次に、tapヘルパー関数を使用して新しいLinkモデルインスタンスを作成し保存します。 tapを使用すると、save()を呼び出しても、保存後にモデルインスタンスを返すことができます。
Typically, you would have to do the following without tap, it just adds a little syntactic sugar:
一般的にはtapメソッドが使わずに、以下のように糖衣構文のように追加しています
$link = new \App\Link($data);
$link->save();

return $link;
Finally, if everything passed validation, we use the “App::Link” model to add the data.
最後に、すべてが検証に合格した場合、"App :: Link"モデルを使用してデータを追加します。
If we want to populate a new model with data, we need to allow the fields to be “fillable” via mass assignment. The fillable property is designed to prevent fields from being mass-assigned except for the items you define in the array.
新しいモデルにデータを設定する場合は、fillablを使用して保存可能なフィールドを定義する必要があります。fillableプロパティで配列で定義した項目を除いて、フィールドがmass-assignedされる事を防ぐように設計されています。
In our case, we are validating each field so allowing them to be mass-assigned is safe. To allow our model to assign values to these fields, open the app/Link.php file and update it to look like the following:
今回のケースでは各フィールドをバリデーションしてmass-assignedされることは安全です。モデルでこれらのフィールドに値を割り当てるには、app/Link.phpファイルを開き、次のように更新します。
<?php

namespace App;

use Illuminate\Database\Eloquent\Model;

class Link extends Model
{
    protected $fillable = [
        'title',
        'url',
        'description'
    ];
}
If we wanted to prevent mass-assignment, this is how our code would look:
mass-assignmentを避けた場合、コードはこのようになります。
$data = $request->validate([
    'title' => 'required|max:255',
    'url' => 'required|url|max:255',
    'description' => 'required|max:255',
]);

// データを更新する
$link = new \App\Link;
$link->title = $data['title'];
$link->url = $data['url'];
$link->description = $data['description'];

// モデルを保存する
$link->save();
The last thing we do in our POST route redirects the user back to the home page after saving the link successfully.
POSTルートで最後に行っている事は、リンクを正常に保存した後、ユーザーをホームページにリダイレクトさせています。
投稿フォームのテスト
Laravel makes HTTP testing a breeze for performing integration tests against routes and middleware, so let’s write a few feature tests to verify our code works as expected.
Laravelはルーティングとミドルウェアに対する統合テストを実行するためのHTTPテストを簡単に行えるので、コードが期待どおりに機能することを期待する機能テストを作成しましょう。
Before we get started, we need to adjust a few things in our phpunit.xml file so that we can use an in-memory SQLite database. You will need to make sure that you have the proper PHP modules installed.
開始する前に、phpunit.xmlファイルでいくつか設定を調整して、SQLiteデータベースを使用するようにします。PHPモジュールがインストールされていることを確認しましょう。
<php>
    <env name="DB_CONNECTION" value="sqlite"/>
    <env name="DB_DATABASE" value=":memory:"/>
</php>
Next, remove the placeholder test that ships with Laravel:
次に、デフォルトで存在しているテストファイルを削除します。
rm tests/Feature/ExampleTest.php
We are ready to start testing the /submit form through HTTP requests to make sure that the route validation, saving, and redirecting are working as expected.
これでルーティングでのバリデーション、保存、およびリダイレクトが期待どおりに機能していることを確認するために、HTTPリクエストを使って投稿フォームをテストする準備が整いました。
First, let’s create a new feature test to test against our route:
まず、ルーティングに対してテストするための新しいテストファイルを作成します。
php artisan make:test SubmitLinksTest
The command creates a new testing file with the proper dependencies, including a RefreshDatabase trait that we are going to use to verify that our links are being saved to the database when valid.
このコマンドを打つことで、有効なリンクデータがデータベースに保存されていることを確認するために使用するRefreshDatabaseを含んだ、適切な依存関係を持つテストファイルが作られます。
Open the new tests/Feature/SubmitLinksTest.php file and let’s define a few skeleton tests in the body of the class that we are going to flesh out:
tests/Feature/SubmitLinksTest.phpファイルを開き、以下のようにいくつかのテストケースを定義しましょう:
/** @test */
function guest_can_submit_a_new_link() {}

/** @test */
function link_is_not_created_if_validation_fails() {}

/** @test */
function link_is_not_created_with_an_invalid_url() {}

/** @test */
function max_length_fails_when_too_long() {}

/** @test */
function max_length_succeeds_when_under_max() {}
These tests should give you a high-level overview of what we are going to test:
これらのテストは、これから記述していくテストコードの概要を示してます。
- 1.Verify that valid links get saved in the database
- 2.When validation fails, links are not in the database
- 3.Invalid URLs are not allowed
- 4.Validation should fail when the fields are longer than the max:255 validation rule
- 5.Validation should succeed when the fields are long enough according to max:255.
- 1.有効なリンクがデータベースに保存されることを確認する
- 2.バリデーションに失敗すると、リンクはデータベースに保存されない
- 3.有効でないリンクは、許可されない
- 4.フィールドに入力された文字が
max:255よりも長い場合は失敗する。 - 5.フィールドに入力された文字が
max:255より少ない場合は成功する。
We might be missing some things, but for your first Laravel application, this is a decent list that should illustrate some basic HTTP testing techniques in Laravel.
いくつか不足しているかもしれませんが最初のLaravelアプリケーションではこれらが基本的なHTTPテスト手法を説明するのに適切な一覧になります。
有効なリンクを保存する
The first test we’ll write is the test that verifies that valid data gets stored in the database:
最初に行うテストでは有効なリンクがデータベースに保存されることを確認するテストを実行します
<?php

namespace Tests\Feature;

use Illuminate\Validation\ValidationException;
use Tests\TestCase;
use Illuminate\Foundation\Testing\RefreshDatabase;

class SubmitLinksTest extends TestCase
{
    use RefreshDatabase;

    /** @test */
    function guest_can_submit_a_new_link()
    {
        $response = $this->post('/submit', [
            'title' => 'Example Title',
            'url' => 'http://example.com',
            'description' => 'Example description.',
        ]);

        $this->assertDatabaseHas('links', [
            'title' => 'Example Title'
        ]);

        $response
            ->assertStatus(302)
            ->assertHeader('Location', url('/'));

        $this
            ->get('/')
            ->assertSee('Example Title');
    }
}
Take note of the RefreshDatabase trait which makes sure that each test has a new database to give each test a pristine database environment with all the migrations.
RefreshDatabaseトレイトによって、テストが実行される際にすべてのマイグレーション環境に応じた新しいデータベースが提供されることに注意してください。
Our first test submits valid post data, which returns a response object that we can use to assert that our route responded as expected. We verify that the database contains a record with the title we just created.
最初のテストでは有効なデータを送信した際に、レスポンスで帰ってくるオブジェクトを使ってルーティングが期待どおりに応答したことを確認するために使います。ここではデータベースに、作成したばかりのタイトルがレコードに含まれていることを確認しています。
Next, we verify that the response was a 302 status code with a Location header pointing to the homepage.
次にレスポンスで帰ってくるステータスコードが302のLocationヘッダーがホームページを指していることを確認しています
Last, we request the home page and verify that the link title is visible on the homepage.
最後に、ホームページをリクエストして、その後ホームページにリンクのタイトルが表示されていることを確認しています。
バリデーション失敗時のテスト
When a user generally submits bad data, we expect the validation to trigger an exception and we can use that to make sure our validation layer is working:
ユーザーが一般的に不正なデータを送信すると、バリデーション時に例外が発生するのでこれを使ってバリデーション時の機能が動作しているかを確認する事ができます。
/** @test */
function link_is_not_created_if_validation_fails()
{
    $response = $this->post('/submit');

    $response->assertSessionHasErrors(['title', 'url', 'description']);
}
We use Laravel’s assertSessionHasErrors() to make sure that the session has validation errors for each of our required fields. Because we submitted empty data to the route, we expect the required rule will trigger for each field.
LaravelのassertSessionHasErrors()を使用して、セッションに必要な各フィールドに対してバリデーションエラーがあることを確認できます。 なぜなら、ここで行っているテストはルーティングには空のデータが投稿された場合に、各フィールドに対して必須項目のバリデーションで落ちる事を確認しています。
Let’s run the test suite to verify our work thus far:
テストが正しく動作するか確認する為にテストコードを実行します。
$ vendor/bin/phpunit
PHPUnit 6.4.3 by Sebastian Bergmann and contributors.

...                                                                 3 / 3 (100%)

Time: 173 ms, Memory: 16.00MB

OK (3 tests, 10 assertions)
URLバリデーション時のテスト
We expect only valid URLs to pass validation so that our application doesn’t try to display invalid data.
ここでは有効なURLのみがバリデーションを通過して、アプリケーション側で無効なデータが表示されない事を期待します。
/** @test */
function link_is_not_created_with_an_invalid_url()
{
    $this->withoutExceptionHandling();

    $cases = ['//invalid-url.com', '/invalid-url', 'foo.com'];

    foreach ($cases as $case) {
        try {
            $response = $this->post('/submit', [
                'title' => 'Example Title',
                'url' => $case,
                'description' => 'Example description',
            ]);
        } catch (ValidationException $e) {
            $this->assertEquals(
                'The url format is invalid.',
                $e->validator->errors()->first('url')
            );
            continue;
        }

        $this->fail("The URL $case passed validation when it should have failed.");
    }
}
Laravel 5.5 introduced the withoutExceptionHandling() method which disables Laravel’s route exception handling code used to generate an HTTP response after an exception. We use this to our advantage so we can inspect the validation exception object and assert against the error messages.
Laravel5.5から、例外発生後のHTTPレスポンスを生成するために、Laravelテスト時の例外処理を無効化するwithoutExceptionHandling()メソッドが導入されました。これを使用してバリデーション時の例外オブジェクトを使ってエラーメッセージが正しいかを確認するることができます。
We loop through various cases (add your own if you’d like to cover more scenarios) and catch instances of ValidationException. If the text makes it past the exception handling, we manually fail the test because we expect the route throws a ValidationExcepiton exception each time.
ループを使ってさまざまなケース(より多くのテストケースをカバーする場合は独自のケースを追加してください)、例外発生時のValidationExceptionのインスタンスをキャッチします。誤ったテキストがpostされると、そのたびにValidationExcepiton例外が発生して、手動で落ちるようになっています。
The
catchblock uses the validator object to check theurlerror and asserts that the actual error message matches the expected validation error message.
catchブロック内では、バリデータオブジェクトを使用してURLエラーをチェックし、実際のエラーメッセージが予想される、ブラウザで表示されるエラーメッセージと一致することを確認しています。
I like using the try/catch technique, followed by a $this->fail() as a safety harness instead of using exception annotations provided by PHPUnit. I feel catching the exception allows the ability to do assertions that wouldn’t otherwise be possible and provides a more granular control that I like in most cases.
私はPHPUnitが提供するdataProviderを使用する代わりに、try/catchのテクニックを使用し、その後に落ちた事を確認する方法として、$this->fai()を使うのが好きです。
MaxLengthバリデーション時のテスト
We will test a few scenarios with the max:255 validations rules: when the field fails max-length validation with a length of 256 characters, and when the field is long enough to pass validation at 255 characters.
max:255のバリデーションルールに関するテストをいくつかのテストケースを用意してテストします。フィールドが長さ256文字の最大長のバリデーションに失敗し、フィールドが255文字の場合はバリデーションが通る事を確認します。
Although Laravel contains the max validation rule functionality, I like to test it to verify that my application applies the rules. If someone removes the max validation rule, then the tests will catch it.
Laravelにはmaxバリデーション時のルールに含まれていますが、私はアプリケーション側でルールが適用されている為のテストしたいと思います。もしも誰かがmaxバリデーションをルールを削除した場合は、テストはその事をキャッチして落ちるでしょう。
I like to test the threshold of min and max validation rules as an extra caution to make sure my application respects the min and max boundaries I set.
最小と最大のバリデーションルールのしきい値をテストして、アプリケーションが設定した最小値と最大の境界を担保しているかどうかを確認しましょう。
First, let’s test the “max length” scenario:
まず、max lengthのテストケースです。
/** @test */
function max_length_fails_when_too_long()
{
    $this->withoutExceptionHandling();

    $title = str_repeat('a', 256);
    $description = str_repeat('a', 256);
    $url = 'http://';
    $url .= str_repeat('a', 256 - strlen($url));

    try {
        $this->post('/submit', compact('title', 'url', 'description'));
    } catch(ValidationException $e) {
        $this->assertEquals(
            'The title may not be greater than 255 characters.',
            $e->validator->errors()->first('title')
        );

        $this->assertEquals(
            'The url may not be greater than 255 characters.',
            $e->validator->errors()->first('url')
        );

        $this->assertEquals(
            'The description may not be greater than 255 characters.',
            $e->validator->errors()->first('description')
        );

        return;
    }

    $this->fail('Max length should trigger a ValidationException');
}
Again, we disable exception handling and create data that is one character too long to pass validation.
ここでもwithoutExceptionHandlingでテスト内の例外処理を無効にし、バリデーションをパスするには長すぎるデータを作成します。
We assert each field to make sure they all have a max length validation error message.
各フィールドにmax lengthのバリデーション時のエラーメッセージがあることを確認するために、各フィールドに対してassertEqualsで確認しています。
Last, we need to return in the caught exception and use the $this->fail() as a safety harness to fail the test.
最後にキャッチされた例外から、バリデーションで失敗した事を確認する為に$this->fail()を使って確認する必要があります。
Next, we test the “under the max” scenario:
次に、 max lengthよりも少ない場合のテストケースです。
/** @test */
function max_length_succeeds_when_under_max()
{
    $url = 'http://';
    $url .= str_repeat('a', 255 - strlen($url));

    $data = [
        'title' => str_repeat('a', 255),
        'url' => $url,
        'description' => str_repeat('a', 255),
    ];

    $this->post('/submit', $data);

    $this->assertDatabaseHas('links', $data);
}
We make the form data long enough to pass max:255 validation and assert that the data is in the database after submitting the data.
このテストケースではmax:255のバリデーションで通る長さのデータを作成して、データを送信した後にデータがデータベースに格納されている事を確認します。
Run the test suite and make sure everything is passing:
テストを実行してすべてのテストケースが通る事を確認してください。
$ vendor/bin/phpunit
PHPUnit 6.4.3 by Sebastian Bergmann and contributors.

......                                                              6 / 6 (100%)

Time: 197 ms, Memory: 16.00MB

OK (6 tests, 17 assertions)
まとめ
Congratulations on making it through the tutorial. This guide was designed to get you started on building your app, and you can use this as a building block to you gain the skills you need to build your application. I know this covers a lot of features and can be overwhelming if you are not familiar with the framework.
チュートリアルを完了したことを祝福しましょう。 このガイドは、アプリケーションの構築を開始するためのもので、これを最初の土台として使用することで、アプリケーションを構築するために必要なスキルを身に付けることができます。 私はこのチュートリアルに多くの機能をカバーしており、フレームワークに精通していないと圧倒されてしまう事を知っています。
I hope this introduction to Laravel shows you why so many people are excited about the framework.
私はこのLaravelでのチュートリアル記事が、なぜ多くの人々がLaraveに興奮しているのかを示してくれることを願っています。