はじめに
AWS Lambda + API Gateway でAPIつくってReactの部分はS3に置けば超低コストでSPA作れるんじゃね!?という思いつき(みんな気づいてる)を実践してみた記録です。
バージョン
- Serverless v0.5.5
- React v15.1.0
- aws-cli v1.10.35
- Node.js v4.3
Serverlessはバージョン毎にかなり差異が大きいようなので注意してください(数カ月前に書かれた記事を読んでも???となることが多い)。
Nodeの他にPythonでもいけますが今回はNodeでいきます。LambdaはNode v5~系にはまだ対応していません。
プロジェクトをつくる
AWSのIDとシークレットを取得する
Serverless - Configuring AWS に書いてある通りに進めます。また、AWSは日本語に設定してあるものとします。
- AWSのダッシュボードよりIAM設定ページへ行く(見つからない場合は上部ナビのユーザー名をクリックして出てくる"認証情報"をクリックしてください)。
- "ユーザー"メニューから「新規ユーザーの作成」の青いボタンを押す。
- テキストボックスが5つほど表示されるので
serverless-adminと入力し1つユーザーを作成します。 - 作成が完了すると認証情報がダウンロードできるのでこれをダウンロードしておきます。また、ダウンロードしなくても認証情報を表示するとアクセスキーIDとシークレットアクセスキーを見ることができますのでこれをコピーします。
Serverlessを始める
$ npm install serverless -g
$ serverless project create

Serverless: Initializing Serverless Project...
Serverless: Enter a name for this project:  (serverless-h1cjyg) serverless-react
Serverless: Enter a new stage name for this project:  (dev) dev
Serverless: For the "dev" stage, do you want to use an existing Amazon Web Services profile or create a new one?
    Existing Profile
  > Create A New Profile
Serverless: Please enter the ACCESS KEY ID for your Admin AWS IAM User:  XXXXXXXXXXXXXXX(先ほど作った)
Serverless: Enter the SECRET ACCESS KEY for your Admin AWS IAM User:  XXXXXXXXXXXXXXXXXXXXXXXXXXXXX(先ほど作った)
Serverless: Enter the name of your new profile:  (serverless-react_dev) serverless-admin(作ったIAMの名前)
Serverless: Creating stage "dev"...
Serverless: Select a new region for your stage:
    us-east-1
    us-west-2
    eu-west-1
    eu-central-1
  > ap-northeast-1
Serverless: Creating region "ap-northeast-1" in stage "dev"...
Serverless: Deploying resources to stage "dev" in region "ap-northeast-1" via Cloudformation (~3 minutes)...
今回は東京リージョンで動かしますのでこんな感じに質問に答えます。認証がうまくいけば
Serverless: Successfully deployed "dev" resources to "ap-northeast-1"
Serverless: Successfully created region "ap-northeast-1" within stage "dev"
Serverless: Successfully created stage "dev"
Serverless: Successfully initialized project "serverless-react"
こんな表示が出てプロジェクトが作られます。
Lambda functionとAPIをつくる
curlで動かす
早速できたプロジェクトのディレクトリに移動し、次のように操作します。
$ serverless function create functions/hello
  > nodejs4.3
    python2.7
    nodejs (v0.10, soon to be deprecated)
Serverless: For this new Function, would you like to create an Endpoint, Event, or just the Function?
  > Create Endpoint
    Create Event
    Just the Function...
Serverless: Successfully created function: "functions/hello"
これでプロジェクト以下にfunctions、その下にhelloというディレクトリが作られるのでそこへ移動し、おもむろに今作った関数を実行してみます。
$ serverless function run
Serverless: Running hello...
Serverless: -----------------
Serverless: Success! - This Response Was Returned:
Serverless: {
    "message": "Go Serverless! Your Lambda function executed successfully!"
}
うまく動きました。次にこれをデプロイしてしまいます。
$ serverless function deploy
Serverless: Deploying the specified functions in "dev" to the following regions: ap-northeast-1
Serverless: ------------------------
Serverless: Successfully deployed the following functions in "dev" to the following regions:
Serverless: ap-northeast-1 ------------------------
Serverless:   hello (serverless-react-hello): arn:aws:lambda:ap-northeast-1:xxxxxxxxxx:function:serverless-react-hello:dev
これでもうAWSのWebコンソール上でこのLambda関数をテストすることができますが、そこを飛ばしてエンドポイントも作ります。
$ serverless endpoint deploy

Serverless: Deploying endpoints in "dev" to the following regions: ap-northeast-1
Serverless: Successfully deployed endpoints in "dev" to the following regions:
Serverless: ap-northeast-1 ------------------------
Serverless:   GET - hello - https://xxxxxxxxxx.execute-api.ap-northeast-1.amazonaws.com/dev/hello
メッセージにURLがありますのでこれを叩いてみます。
$ curl https://xxxxxxxxxx.execute-api.ap-northeast-1.amazonaws.com/dev/hello
{"message":"Go Serverless! Your Lambda function executed successfully!"}
APIが完成しました。このコードの実体はhandler.jsにありますので少し編集してみます。
'use strict';

module.exports.handler = function(event, context, cb) {
  return cb(null, {
    message: 'Go Serverless! Your Lambda function executed successfully!' //ここを
  });
};
'use strict';

module.exports.handler = function(event, context, cb) {
  return cb(null, {
    message: 'Hello Serverless and React!' //こう
  });
};
同じように serverless function deploy し、同じAPIを叩いてみるとメッセージが変わっているのが確認できると思います。
CORSに対応する
このままだと、APIと同じオリジンからでないとCross-Origin Resource Sharing(CORS)に引っかかって開発時に面倒なため制限を緩和します(別ドメインにXHRすると失敗するアレです)。
Serverlessには serverless-cors-plugin という便利なプラグインがあるのでこれを利用します。
$ npm install serverless-cors-plugin -S
プロジェクトルートの s-project.json を編集して plugins を追加します。
"plugins": ["serverless-cors-plugin"]
先ほど作った hello ディレクトリに戻り、 s-function.json を編集して cors を追加します。
  "custom": {
    "excludePatterns": [],
    "cors": {
      "allowOrigin": "*"
    }
  },
これで serverless endpoint deploy すれば完了です。
ReactでWebアプリケーションをつくる
プロジェクトルートに戻り、Reactでアプリを作っていきます。Reactの詳しい解説は(自信がなく)省きますので他の記事を参考にしてください。
今回はWebpackを使っていきます。
$ npm install webpack webpack-dev-server babel-core babel-loader babel-preset-es2015 babel-preset-react -D
$ npm install react react-dom react-redux redux redux-thunk isomorphic-fetch -S
必要なnpmモジュールはこんな感じです。
webpack-web-server は watchify 的なことをやってくれるので開発時に大変便利です。また、特に説明をせず redux を使っていきますがそちらも他の記事を参考にして頂けると助かります。
Reactアプリケーションは serverless-react/client/src 以下に作っていきますが、まず serverless-react/webpack.config.js を以下のように記述します。
module.exports = {
    entry: './client/src/index.jsx',

    output: {
        path: './client/dist',
        filename: 'bundle.js',
        publicPath: ''
    },

    module: {
        loaders: [{
            test: /\.jsx?$/,
            exclude: [ /node_modules/, /functions/ ],
            loader: 'babel',
            query: {
                presets: ['es2015', 'react']
            }
        }]
    }
};
次にpackage.jsonに追記します。
  "scripts": {
    "start": "webpack-dev-server --inline --content-base client/dist",
    "build": "webpack"
  },
ビルドしたjsを読み込むhtmlを client/dist/index.html として作ります。
<!doctype html>
<html lang="ja">
    <head>
        <title>Serverless + React</title>
    </head>
    <body>
        <div id="app"></div>
        <script src="bundle.js"></script>
    </body>
</html>
index.jsx, app.jsx, actions.js, reducer.js を client/src ディレクトリ以下に作ります。
import React from 'react';
import { render } from 'react-dom';
import { createStore, applyMiddleware } from 'redux';
import thunk from 'redux-thunk';
import { Provider } from 'react-redux';

import App from './app.jsx';
import reducer from './reducer';

const createStoreWithMiddleware = applyMiddleware(thunk)(createStore);
const store = createStoreWithMiddleware(reducer);

render(
    <Provider store={store}>
        <App />
    </Provider>,
    document.getElementById('app')
);
import React from 'react';
import { connect } from 'react-redux';

import { fetchHello } from './actions';

class App extends React.Component {
    constructor() {
        super();
        this.onClickHello = this.onClickHello.bind(this);
    }

    onClickHello() {
        this.props.dispatch(fetchHello());
    }

    render() {
        return (
            <div>
                <h1>{this.props.message}</h1>
                <button onClick={this.onClickHello}>Hello</button>
                <div>
                    {this.props.isFetching ? 'Fetching...' : ''}
                </div>
            </div>
        );
    }
}

export default connect((state) => {
    return {
        message: state.message,
        isFetching: state.isFetching
    };
})(App);
import fetch from 'isomorphic-fetch';

export const REQUEST = 'REQUEST';
function request() {
    return {
        type: REQUEST
    };
}

export const RECEIVE = 'RECEIVE';
function recieve(result) {
    return {
        type: RECEIVE,
        message: result.message
    };
}

export function fetchHello() {
    return (dispatch) => {
        dispatch(request());

        return fetch('https://xxxxxxxxxx.execute-api.ap-northeast-1.amazonaws.com/dev/hello').then((response) => {
            return response.json();
        }).then((result) => {
            return dispatch(recieve(result));
        });
    };
}
import { REQUEST, RECEIVE } from './actions';

const initialState = {
    isFetching: false,
    message: 'This is React App.'
};

export default (state = initialState, action) => {
    switch (action.type) {
    case REQUEST:
        return Object.assign({}, state, {
            isFetching: true
        });
    case RECEIVE:
        return Object.assign({}, state, {
            isFetching: false,
            message: action.message
        });
    default:
        return state;
    }
};
これでReactアプリはひとまず完成なので
$ npm start
として起動します。
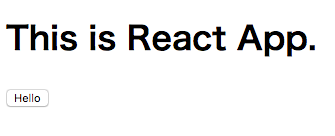
標準ですと http://localhost:8080/ で動いていますので確認してみます。
Helloボタンを押すと…
動いていることが確認できました。
S3にアップロードする
Reactで書いたアプリをビルドします。
$ npm run build
完了すると client/dist に bundle.js が生成されています。これと index.html をS3にアップロードすると完了です。Serverlessにはこれもやってくれる serverless-client-s3 プラグインがありますのでこれを利用します。
$ npm install serverless-client-s3 -S
適当な名前でS3の東京リージョンにバケットを作っておき、プロジェクトルートの s-project.json を編集します。
  "custom": {
    "client": {
        "bucketName": "foo"
    }
  },
  "plugins": [
    "serverless-cors-plugin",
    "serverless-client-s3"
  ]
最後にデプロイして完了です。
$ serverless client deploy
完成物はこちらで確認できます。Serverless + React
コードはこちら Eiryyy/serverless-react
雑感
- EC2でNode.js動かしたりすることなく気軽にSPAを作ることができた
- デプロイが異常に楽
- DynamoDBを使えばローコストのままもっといろいろできる
- 今回はサーバーサイドレンダリングには触れていないが一考の余地がありそう
- React+Reduxの前提知識はある状態で、ServerlessをインストールしてQiita書きながら4時間強で完成

