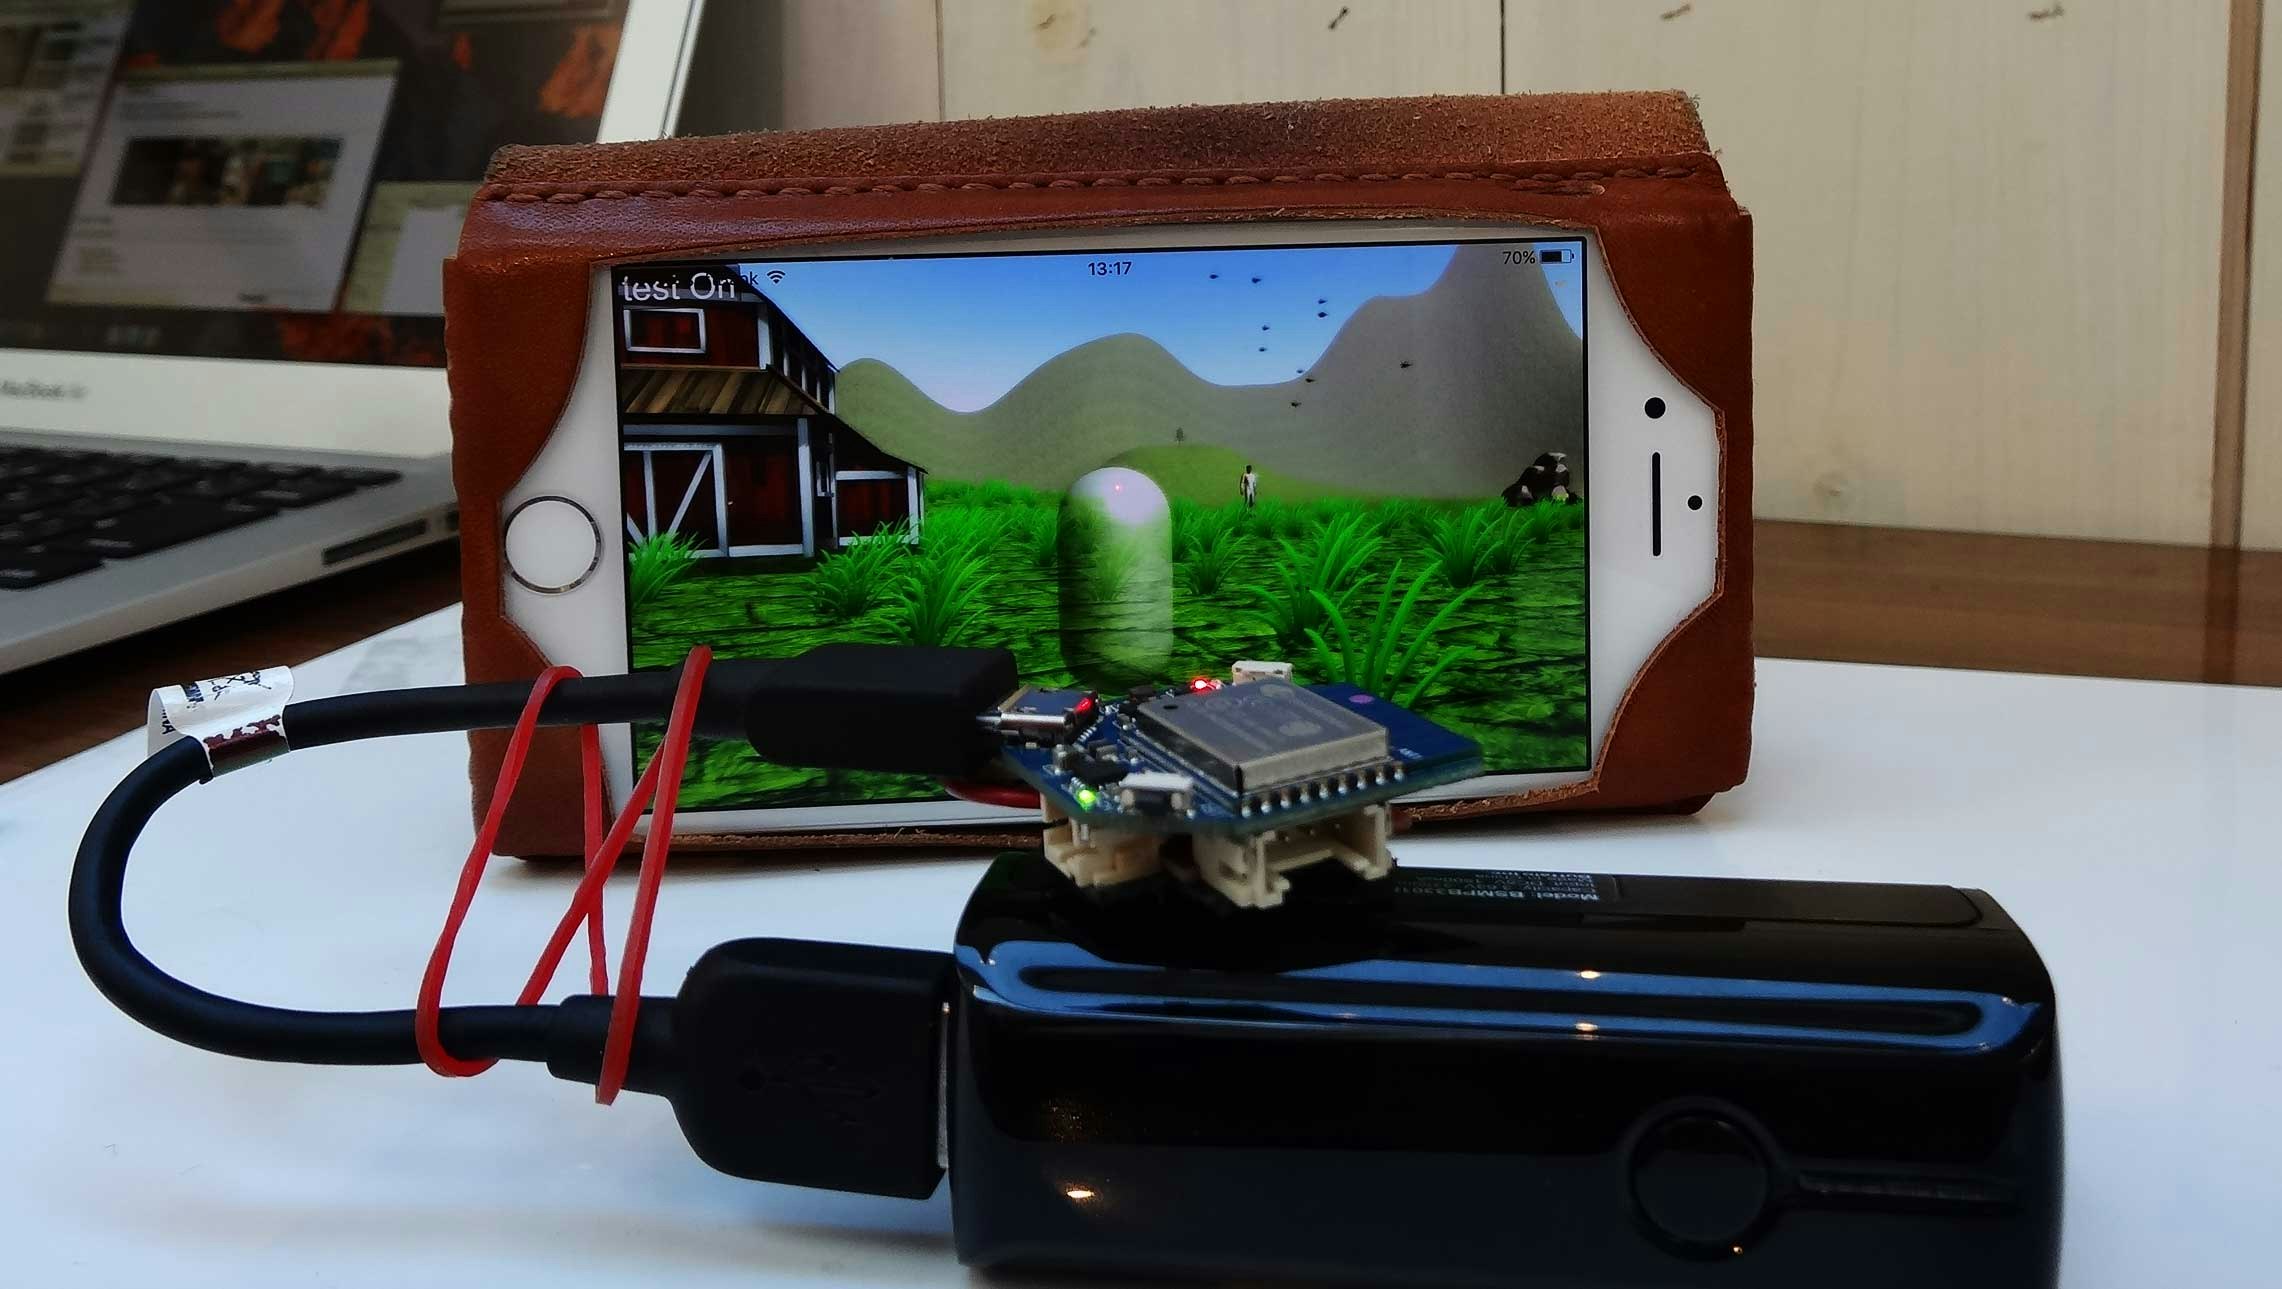
前回はGR-COTTONというボードを使用しましたが、今回はWIO-NODEを使用して同様のコントローラーを作ります。
WIO-NODEに搭載されているWi-FiモジュールESP-WROOM-02は、単体でArduinoとして動作するので、このモジュールに直接プログラムを書き込みます。
また、WIO-NODEはコネクタから直接I2Cのデータを受け取れるので、加速度センサーにもI2Cのものを使用します。
揃えるもの
パーツ
・WIO-NODE
・3軸加速度センサモジュール ADXL345(SPI/IIC)
・シリアル変換モジュール
工作道具
・ワイヤーストリッパー(またはニッパー、ナイフ等)
・GROVE 4ピンケーブル
・ハンダ
・ハンダこて
電源
ソフトウェア
ハードウェア接続
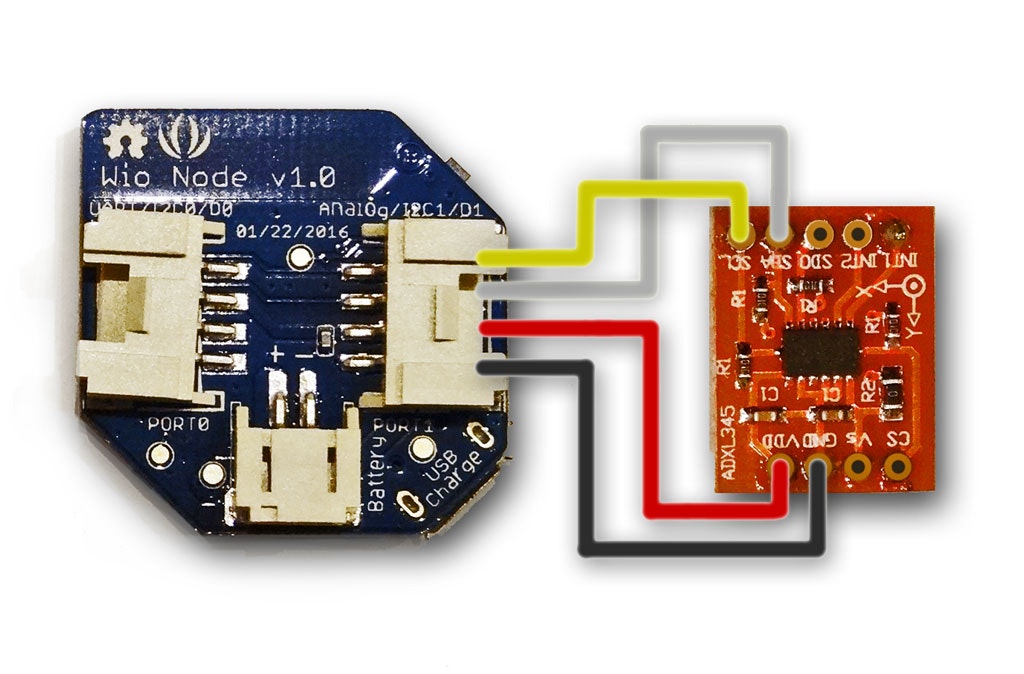
まずはWIO-NODEと加速度センサーを下記のように配線・半田付けします。

半田付けしたら完成です。
ソフトウェア作成
WIO-NODE用加速度送信プログラム
# include <Wire.h>
# include <ESP8266WiFi.h>
# include <WiFiUDP.h>

# define WIO_POW_PIN 15

// port2:GND,3V3,SDA,SCL
// http://akizukidenshi.com/download/ds/freescale/ADXL345_jp.pdf

# define ADXL 0x1D // (SDO HIGH) or 0x53 (SDO LOW)
# define BW_RATE 0x2C
# define POWER_CTRL 0x2D
# define DATA_FORMAT 0x31
# define DATAX0 0x32 // Low
# define DATAX1 0x33 // High
# define DATAY0 0x34
# define DATAY1 0x35
# define DATAZ0 0x36
# define DATAZ1 0x37

/* for Wi-Fi */
# define HOST_NAME   "192.168.4.2"
# define HOST_PORT   (7001)
# define RECV_PORT   (7001)
static WiFiUDP wifiUdp;
static const char *ssid = "skipshoes0";
static const char *password = "123456789";

void setup() {
  // put your setup code here, to run once:
  delay(1000);
  pinMode(WIO_POW_PIN, OUTPUT); //
  digitalWrite(WIO_POW_PIN,HIGH); // Vcc (and LED) on
  delay(100);
  Serial.begin(115200);
  delay(100);
  espWifiSetup();
  delay(1000);
  adxlSetup();
  delay(100);
}

void loop() {
  // put your main code here, to run repeatedly:
//  scan();

    int val[3]; // x,y,z
    char buff[15];

    adxlRead(val);
    delay(1);
    espWifiUpdate(val);
    delay(30);

    sprintf(buff,"%d,%d,%d",val[0],val[1],val[2]);
    Serial.println(buff);
}

void adxlSetup(){
  Wire.begin();
  delay(100);
  Wire.beginTransmission(ADXL);
  Wire.write(DATA_FORMAT);
  // D7:SELF_TEST
  // D6:SPI
  // D5:INT_INVERT
  // D4:0
  // D3:FULL_RES
  // D2:Justify
  // D1,0: 00=2g,01=4g,10=8g,11=16g
  Wire.write(B00000000);
  Wire.endTransmission();

  Wire.beginTransmission(ADXL);
  Wire.write(BW_RATE);
  // D4:LOW_POWER
  // D3-D0:Rate 400Hz:1100,200:1011,100:1010,50:1001
  Wire.write(B00001010);
  Wire.endTransmission();

  Wire.beginTransmission(ADXL);
  Wire.write(POWER_CTRL);
  // D7:0
  // D6:0
  // D5:Link
  // D4:AUTO_SLEEP
  // D3:Measure
  // D2:Sleep
  // D1,0: wakeup
  Wire.write(B00001000);
  Wire.endTransmission();

}

int adxlRead(int val[3]){
//符号なしで送る
    int STATUS=0x2F;
    byte vH,vL,st;
    st= 1;

  Wire.beginTransmission(ADXL);
  Wire.write(DATAX0);
  Wire.endTransmission();
  Wire.requestFrom(ADXL, 6); // DATAX0~DATAZ1
  Wire.endTransmission();

   //I2c.read(ADXL,0x32,2);
    vL = Wire.read();
    vH = Wire.read();
    val[0]=(short)(word(vH,vL))+512;

    //I2c.read(ADXL,0x34,2);
    vL = Wire.read();
    vH = Wire.read();
    val[1]=(short)(word(vH,vL))+512;

    //I2c.read(ADXL,0x36,2);
    vL = Wire.read();
    vH = Wire.read();
    val[2]=(short)(word(vH,vL))+512;

   return st; //1:dataready, 0:not ready
}

void   espWifiSetup(){
  Serial.println("espWifiSetup");
  delay(500);
  WiFi.mode(WIFI_AP);
  WiFi.softAP(ssid, password, 1, false);
  delay(500);
  wifiUdp.begin(RECV_PORT);
  delay(500);

}

void   espWifiUpdate(int val[3]){
  String sendStr = "x:" + String(val[0])+",y:" + String(val[1])+",z:" + String(val[2]);
  wifiUdp.beginPacket(HOST_NAME, HOST_PORT);
  wifiUdp.write((const uint8_t*)(sendStr.c_str()), strlen(sendStr.c_str()));
  wifiUdp.endPacket();
}
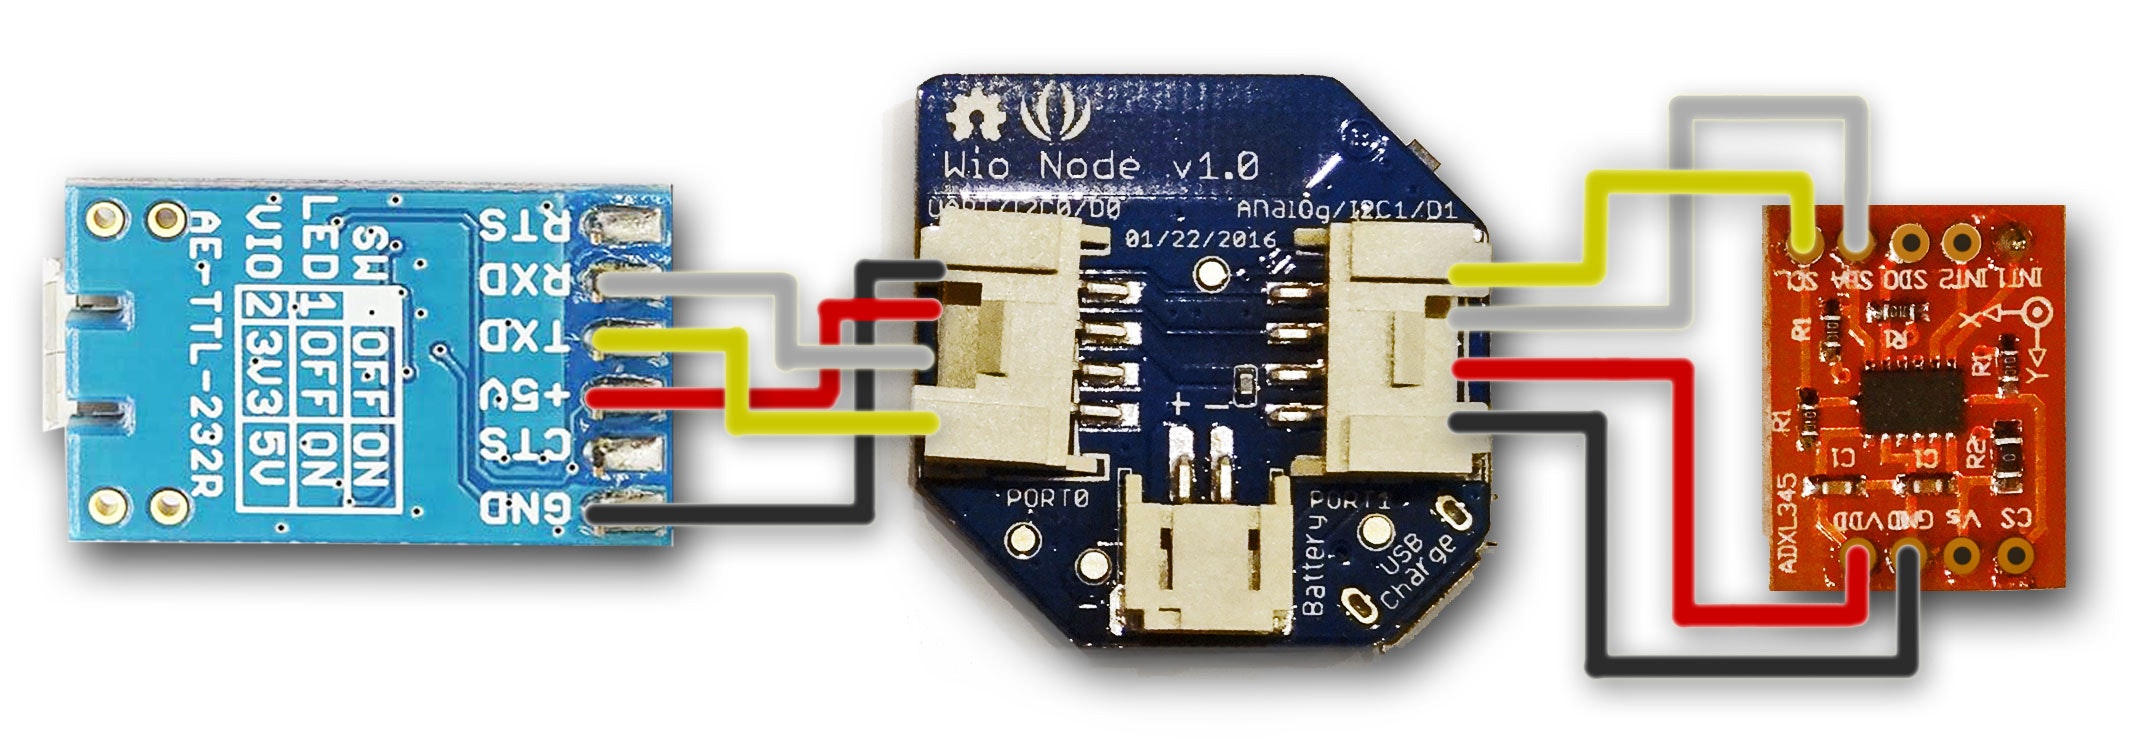
下の画像のように配線し、シリアル変換モジュールのSW1をOFFにして(3.3V)
1.Funcボタンを押しながらRSTボタンを押す
2.RSTボタンを離す
3.Funcボタンを離す
の手順で書き込みモードにした後、シリアル変換モジュールのUSBポートとPCを接続し、Arduino IDEを使用して書き込みます。
書き込みするためには、事前に[IDEにESP8266ボードを追加しておく]
(http://trac.switch-science.com/wiki/esp_dev_arduino_ide)必要があります。
Unity用加速度受信スクリプト
前回と同じです。

