皆様こんにちは。Dreamwalkerです。
今回はAndroidのSupport DesignのCoordinator Layoutについて書いてみたいとおもいます。
序論
2年前の頃GOOGLEで、Material Designを発表した後、開発者もUIをデザインすることが、重要になりました。
Coordinator Layoutは基本APIじゃなくて、support DESIGN WIDGETです。SDK22.2.0から追加されました。
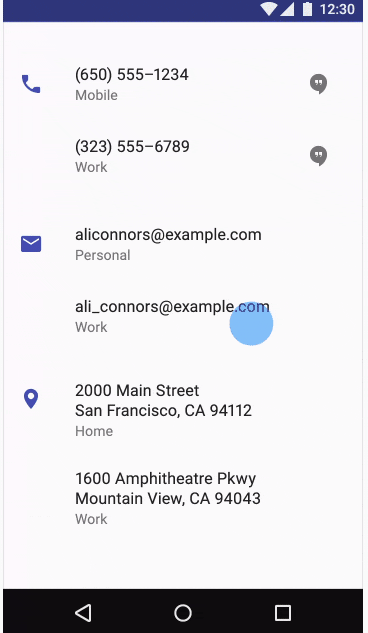
ソース : https://material.io/guidelines/patterns/scrolling-techniques.html#scrolling-techniques-behavior
最初にこれを見て驚きました。今回は上のような画面を作ってみます。
テスト環境は下のようになります。
| software | Version |
|---|---|
| Android Studio | 2.3.1 |
| test device | 4.4.2 |
| windows | 10(64) |
本論
新しいPROJECT
まず、新しいProjectを作りたいと思います。
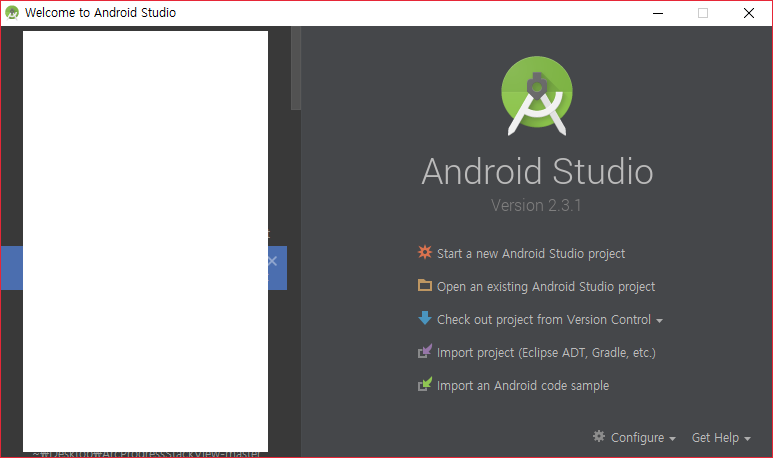
左側は保安の問題なので消しました。Android Studioを開けたら普通こんな画面が出ます。
1. Start a new Android Studio projectをClickしましょう。
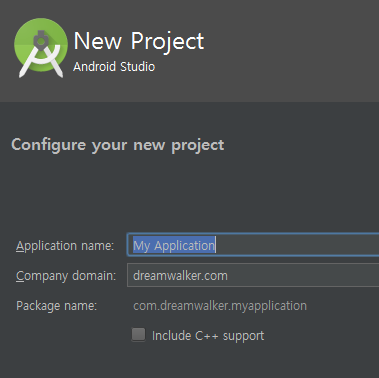
2. Projectの名前とdomainを自由に書いましょう。<NEXT>クリック
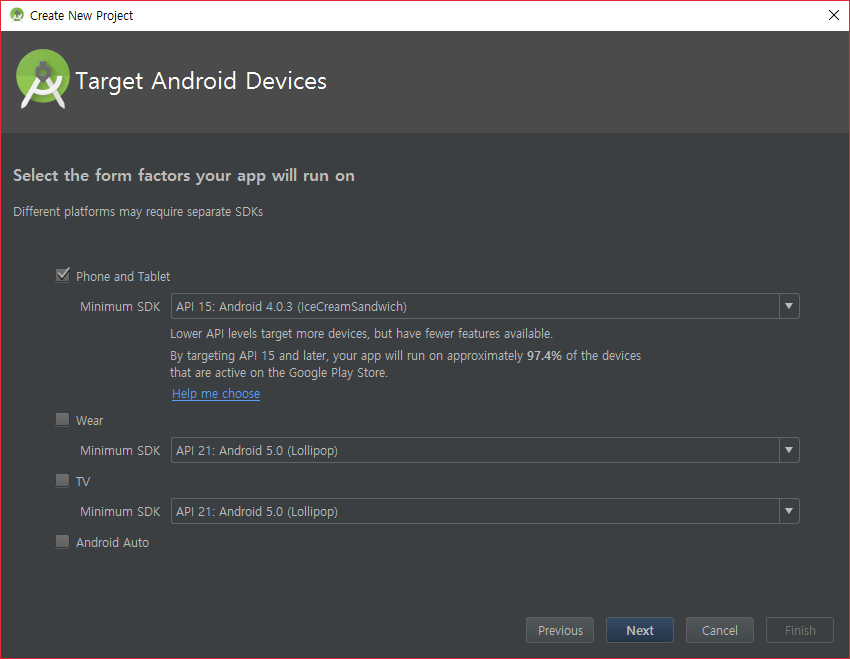
3. 私はいつもこの設定で始まっています。自由に選んでください。<NEXT>クリック
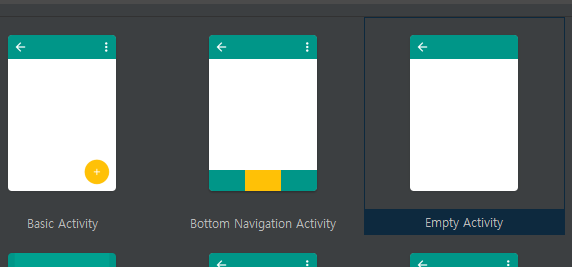
4. Empty Activity 選択。<NEXT>クリック
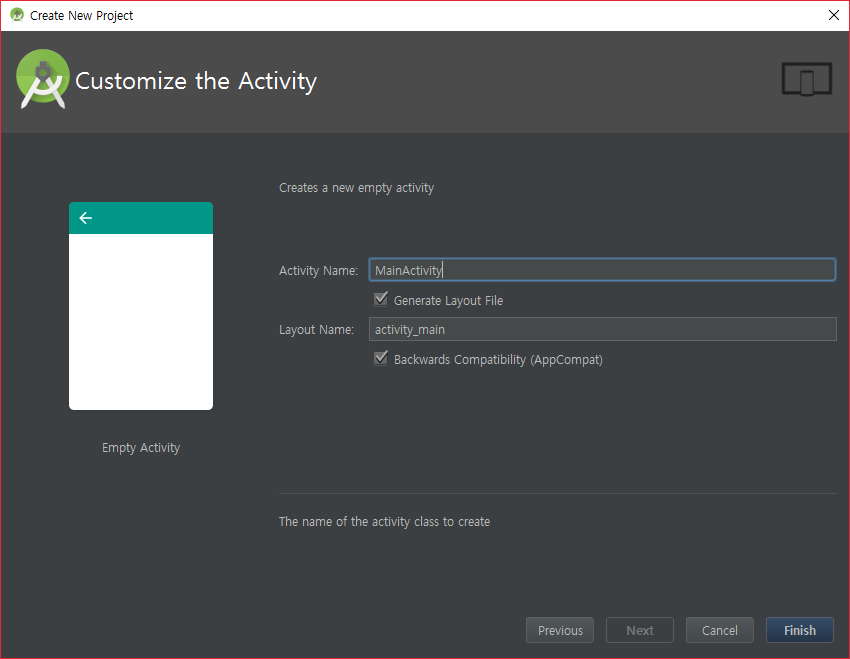
5. Activity 名前をご自由に。。<FINISH>クリック
Library追加。
皆様全部アンドロイドマスターなので、しやすいと思います。
- build.gradleをクリックしてdependenciseを追加します。
    compile 'com.android.support:design:25.3.1'
    compile 'com.android.support:cardview-v7:25.3.1'

2. Sync now
ここまで、問題ないと初期設定完了です。
資料準備
私は冬の欅坂が好きなので、下のサイトで写真とtextを参考しました。
Winter Illumination at Keyakizaka-dori Street
皆さんが使いたい写真やテキスト準備してください。
- drawbleに写真をPASTE.
- 使用するicon追加。
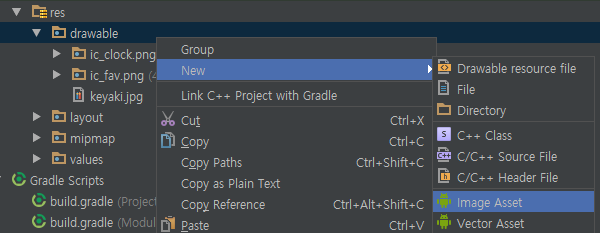
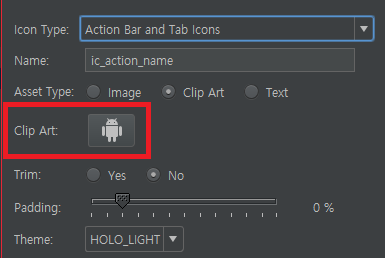
- drawble右クリック → New → image Assetをクリックしましょう。
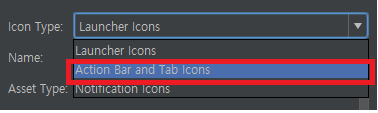
- icon typeをAction Bar and Tab icons 選択。
- Clip Art icon Click
- 使いたいアイコンを検索。
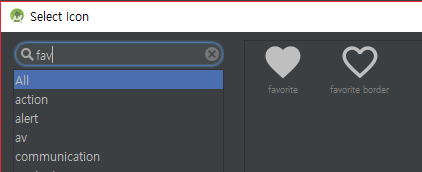
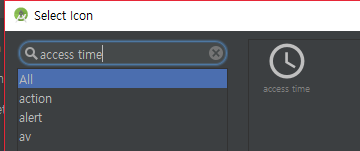
私の場合はfavoriteとaccess timeを使いました。ご自由に選んでみましょう。
アイコンはこの方法以外にもKOKO!でダウンロードして追加しても良いですので、便利な方法でしましょう。
string.xmlでstring追加。
これは決まっていることではないですので、自由に入力しましょう。
 <string name="news_title">WINTER ILLUMINATION AT KEYAKIZAKA-DORI STREET</string>
 <string name="cont">In winter, beautiful illumination shines all over the Tokyo.
                     When I see beautiful illumination, I’m excited even though cold
                     night.Many other illumination events or installation are held at
                     Roppongi Hills. All of them ends at December 25th.</string>
 <string name="published_date">2017-05-02 12:13:43</string>
Layout Coding
java fileで追加しても良いですが、私はxmlでいじっていきたいと。。
-
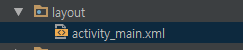
activity_main.xmlをクリック。
-
コンポネントTree作成。
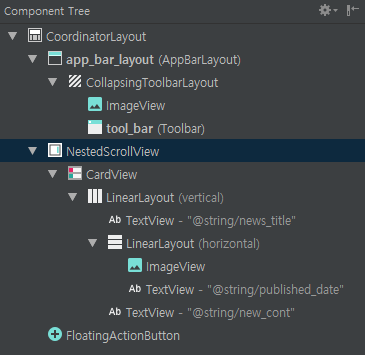
自分が考えたコンポネントTreeはしたのようになしました。
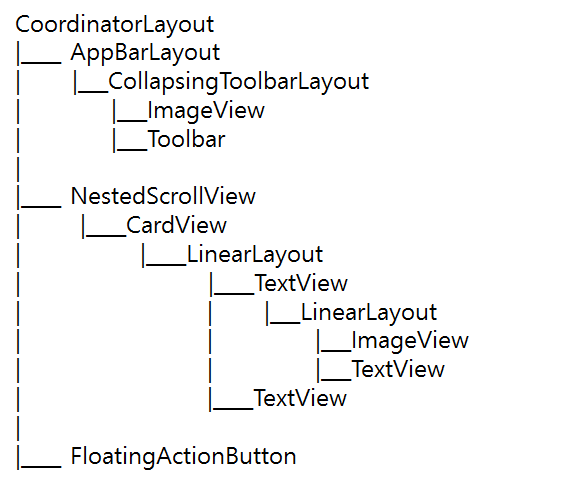
見ずらい方は下を見たら理解できると思います。
3.コーディング
AppBarLayout 部分です。
<android.support.design.widget.AppBarLayout
        android:id="@+id/app_bar_layout"
        android:layout_width="match_parent"
        android:layout_height="wrap_content"
        android:fitsSystemWindows="true"
        android:theme="@style/ThemeOverlay.AppCompat.Dark.ActionBar">

        <android.support.design.widget.CollapsingToolbarLayout
            android:layout_width="match_parent"
            android:layout_height="350dp"
            android:fitsSystemWindows="true"
            app:expandedTitleTextAppearance="@android:color/transparent"
            app:layout_scrollFlags="scroll|exitUntilCollapsed"
            app:contentScrim="@color/colorPrimary">

            <ImageView
                android:layout_width="match_parent"
                android:layout_height="350dp"
                android:contentDescription="@string/app_name"
                android:scaleType="centerCrop"
                android:src="@drawable/keyaki"
                app:layout_collapseMode="parallax" />

            <android.support.v7.widget.Toolbar
                android:id="@+id/tool_bar"
                android:layout_width="match_parent"
                android:layout_height="?attr/actionBarSize"
                android:title="@string/news_title"
                app:layout_collapseMode="pin"
                app:popupTheme="@style/ThemeOverlay.AppCompat.Light">


            </android.support.v7.widget.Toolbar>

        </android.support.design.widget.CollapsingToolbarLayout>

    </android.support.design.widget.AppBarLayout>
NestedScrollView 部分です。
<android.support.v4.widget.NestedScrollView
        android:layout_width="match_parent"
        android:layout_height="match_parent"
        android:clipToPadding="false"
        app:layout_behavior="@string/appbar_scrolling_view_behavior">

        <android.support.v7.widget.CardView
            android:layout_width="match_parent"
            android:layout_height="wrap_content"
            android:layout_marginBottom="16dp"
            app:cardElevation="5dp"
            app:cardUseCompatPadding="true">

            <LinearLayout
                android:layout_width="match_parent"
                android:layout_height="match_parent"
                android:orientation="vertical">

                <TextView
                    android:layout_width="wrap_content"
                    android:layout_height="wrap_content"
                    android:layout_marginTop="12dp"
                    android:padding="12dp"
                    android:text="@string/news_title"
                    android:textColor="@color/colorPrimaryText"
                    android:textSize="20sp"
                    android:textStyle="bold" />

                <LinearLayout
                    android:layout_width="match_parent"
                    android:layout_height="wrap_content"
                    android:orientation="horizontal"
                    android:padding="12dp">

                    <ImageView
                        android:layout_width="0dp"
                        android:layout_height="wrap_content"
                        android:layout_weight="1"
                        android:contentDescription="@string/app_name"
                        android:src="@drawable/ic_clock" />

                    <TextView
                        android:layout_gravity="center_vertical"
                        android:layout_width="0dp"
                        android:layout_height="wrap_content"
                        android:layout_weight="9"
                        android:padding="12dp"
                        android:text="@string/published_date"
                        android:textColor="@color/colorPrimaryText"
                        android:textSize="14sp"
                        android:textStyle="bold" />

                </LinearLayout>
                <TextView
                    android:layout_gravity="center_vertical"
                    android:layout_width="wrap_content"
                    android:layout_height="wrap_content"
                    android:lineSpacingMultiplier="1.5"
                    android:layout_marginTop="12dp"
                    android:padding="12dp"
                    android:text="@string/new_cont"
                    android:textSize="13sp"
                    />

            </LinearLayout>


        </android.support.v7.widget.CardView>

    </android.support.v4.widget.NestedScrollView>
FloatingActionButton 部分です。
<android.support.design.widget.FloatingActionButton
        app:elevation="6dp"
        android:src="@drawable/ic_fav"
        android:layout_width="wrap_content"
        android:layout_height="wrap_content"
        app:pressedTranslationZ="12dp"
        app:layout_anchor="@id/app_bar_layout"
        app:layout_anchorGravity="bottom|right"/>
Inflation (インフレーション)
   @Override
    protected void onCreate(Bundle savedInstanceState) {
        super.onCreate(savedInstanceState);
        setContentView(R.layout.activity_main);
        Toolbar toolbar = (Toolbar)findViewById(R.id.tool_bar);
        setSupportActionBar(toolbar);
        if (getSupportActionBar() != null){
            getSupportActionBar().setDisplayHomeAsUpEnabled(true);
        }
    }
結論
RUNしてみました。
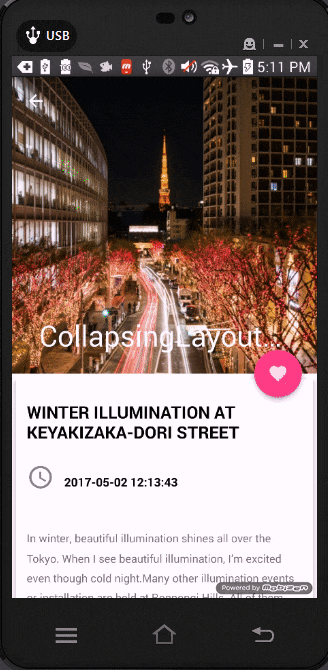
完成です。。。
ソースコードは私のGithubであります。
https://github.com/JAICHANGPARK/Coordinator-Layout101
色んな方法ありますが、ここまで読んでくれたあなた参考になったら、嬉しいです。
XMLでレイアウト構成することは最初にコンポネントTreeを書いて見ることが大事です。
そして、沢山の練習が必要です。
読みいただきありがとうございました。
次のPostで会いましょう!
良いゴールデンウィークをー
Dreamwalker。
References
- http://coolphotojapan.com/coolphotojapan/category/culture/current/winter-illumination-at-keyakizaka-dori-street
- https://developer.android.com/reference/android/support/design/widget/CoordinatorLayout.html
- https://material.io/guidelines/patterns/scrolling-techniques.html#scrolling-techniques-behavior