XcodeでCocos2d-xの開発をできるようにして、iOSのエミュレータとandroidの実機でサンプルプログラムが動くようになるところまでやってみます。
間違っているところが多々あるかもしれません。
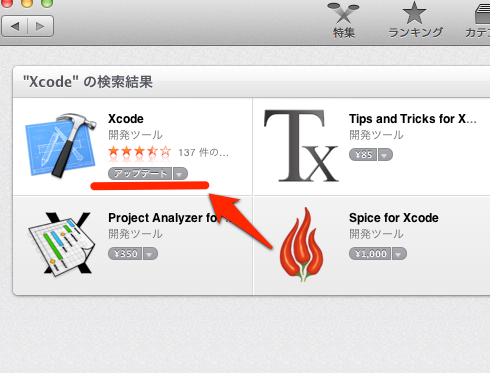
1.Xcodeをインストールする
・App Storeの右上のところに"Xcode"と打ちこんで検索します。

・インストールを選択します これでXcodeのインストールは完了です。
2.Cocos2d-xをダウンロード
・公式の右上の辺りから最新版をダウンロードしてきます。

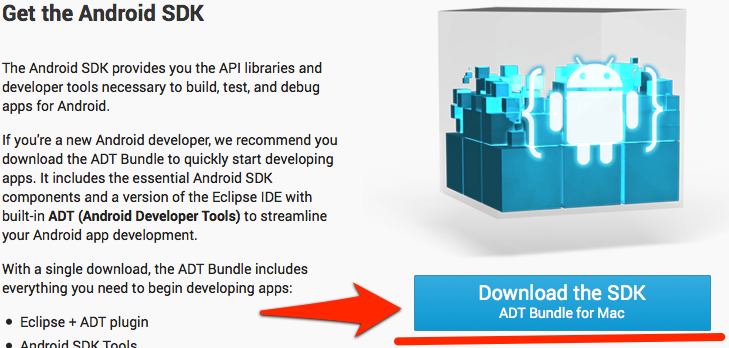
3.android-sdkをダウンロードする
http://developer.android.com/sdk/index.html
・Download the SDKをクリックします。
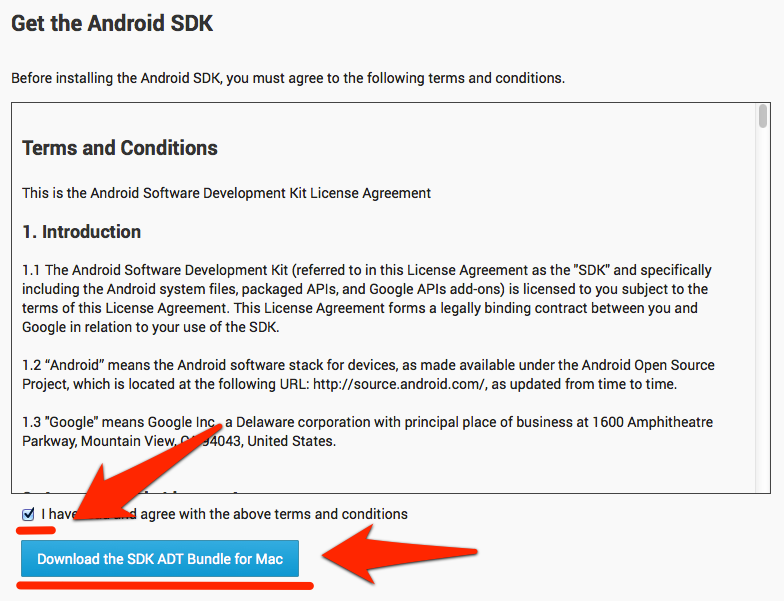
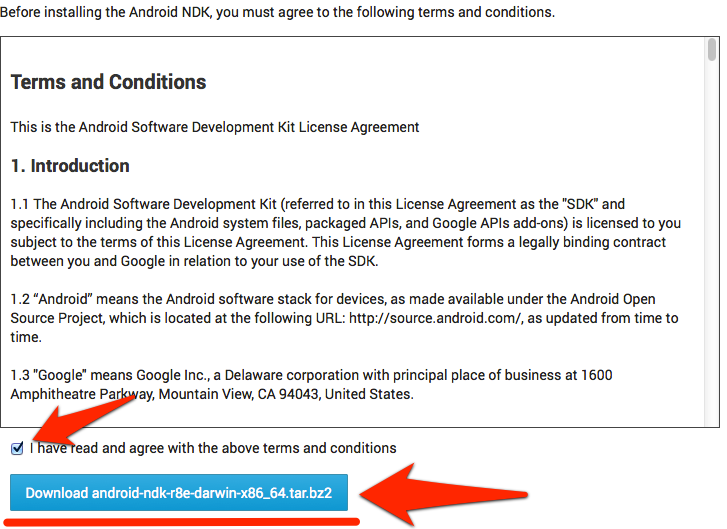
・I have read and agree with the above terms and conditionsにチェックを入れて、sdkをダウンロードします。
4.android-ndkをダウンロードする
http://developer.android.com/tools/sdk/ndk/index.html
・開発するプラットフォームのndkをダウンロードします。今回はMac OS X 64bit版を選択します。
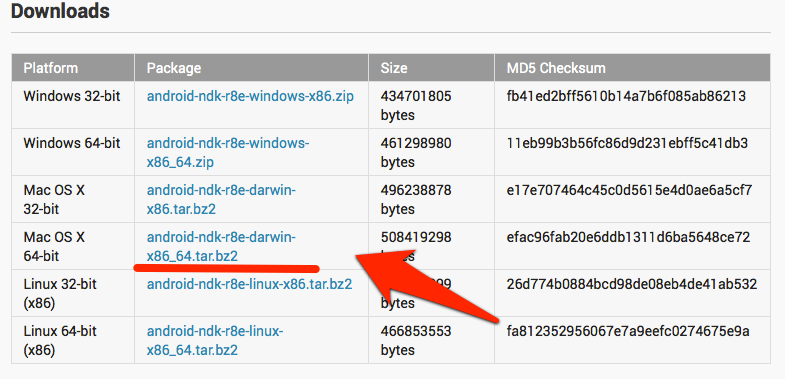
・ I have read and agree with the above terms and conditionsにチェックを入れて、ndkをダウンロードします。
5.Cocos2d-xのiOS用のプロジェクトを作って実行する
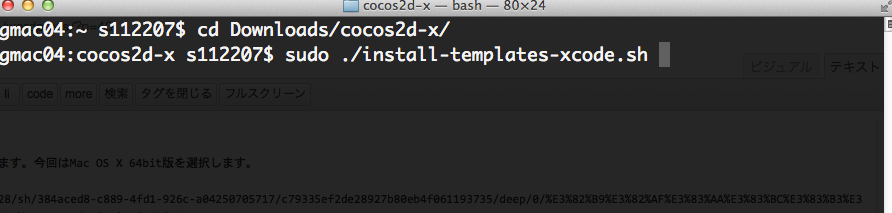
・ダウンロードの中にあるCocos2d-xのzipを解凍し、cocos2d-xにリネームします。そして、ターミナルを起動させて、cocos2d-xディレクトリ内に移動し、install-template-xcode.shを実行します。
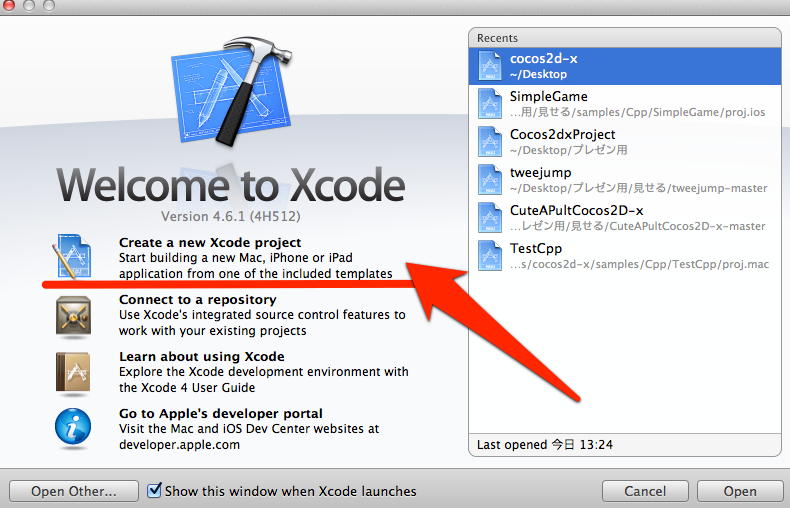
・Xcodeを立ち上げ、Create a new Xcode projectを選択します。
・cocos2dxを選択し、Nextを押します。

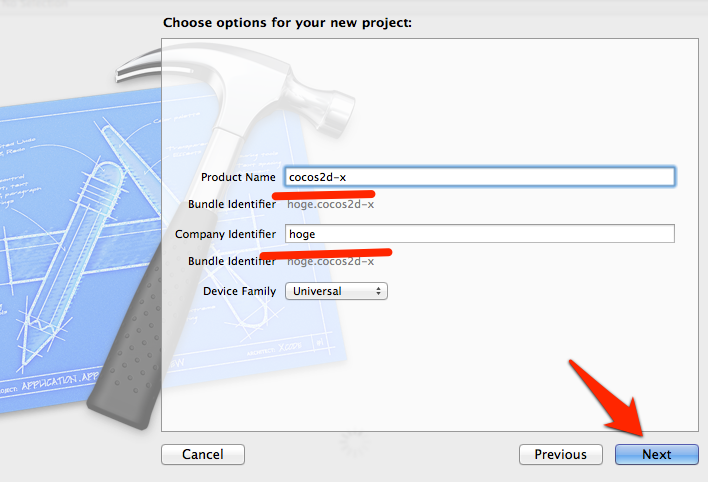
・プロジェクトの名前等を決めたあと、プロジェクトを生成するディレクトリを指定します。
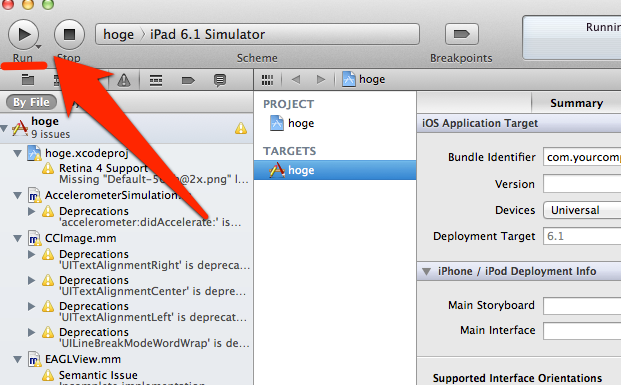
・Runをクリックします。
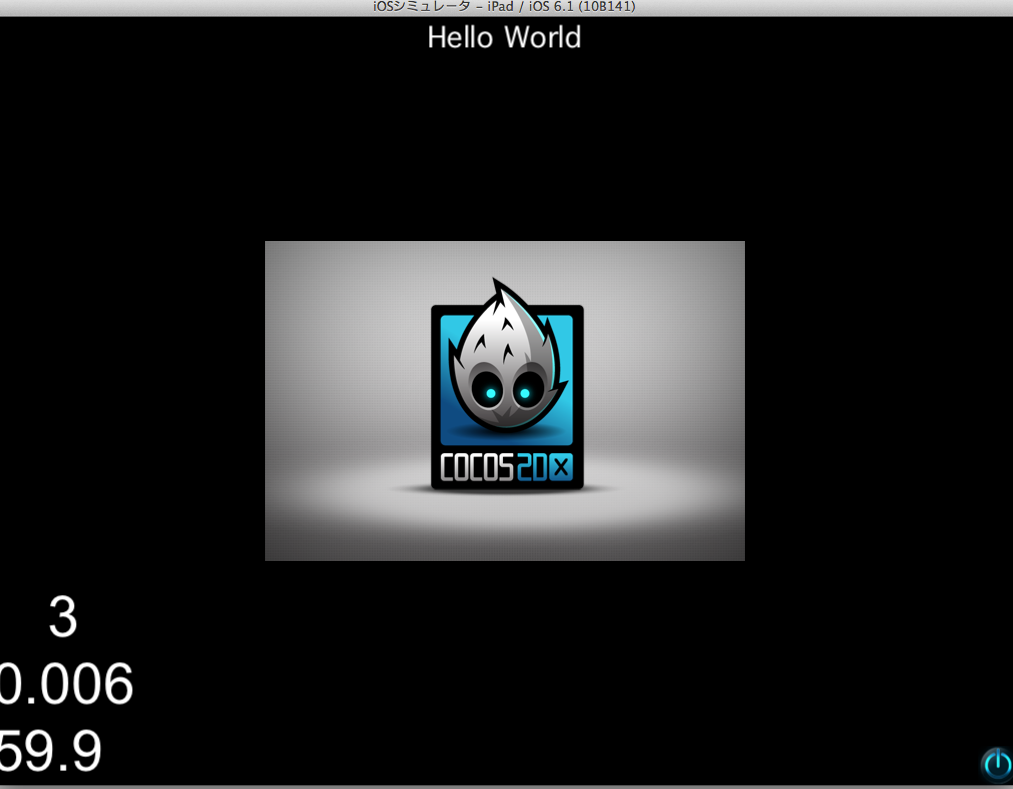
・HelloWorldという画面が表示されれば成功です。これでiOS向けの開発環境は整いました。
6.Cocos2d-xのandroid用のプロジェクトを作成し、実機でサンプルを動かす
・ダウンロードの中にあるsdkとndkを、それぞれandroid-sdkとandroid-ndkにリネームしておきます。その後、Applicationsの中にでも入れておきましょう。

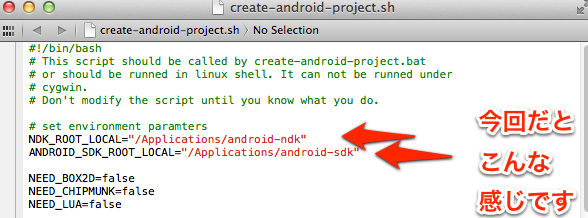
・ダウンロードの中のcocos2d-xディレクトリの中にある、create-android-project.shを編集します。筆者はXcodeで開きました。そして、NDK_ROOTとSDK_ROOTのパスを変更して保存します。
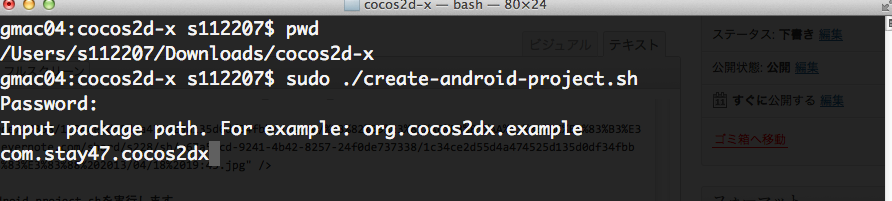
・ターミナルを起動し、ダウンロードのcocos2d-xディレクトリの中へと移動します。そして、create-android-project.shを実行します。

・パッケージパスを入力します。
・ターゲットidを入力します。今回はandroid-17を選択します。
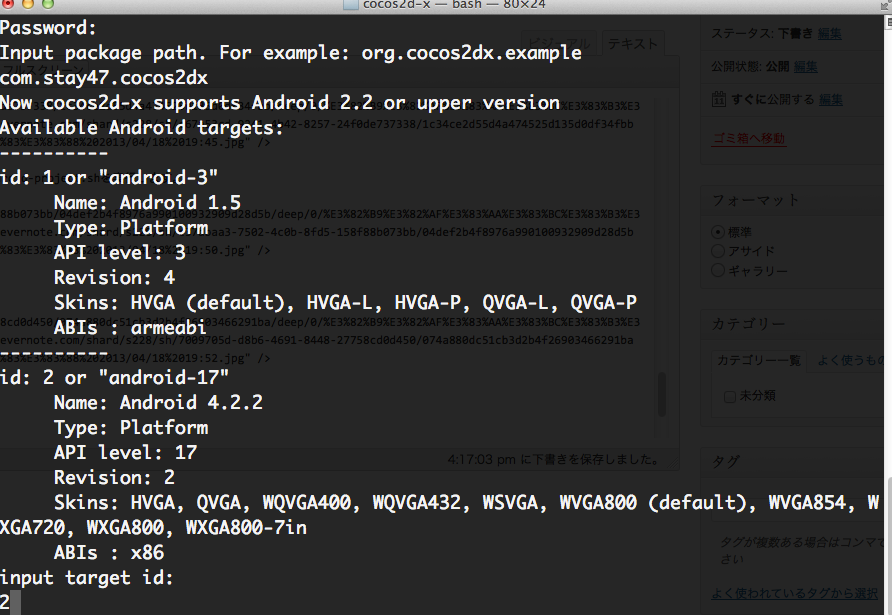
・プロジェクト名を入力します。

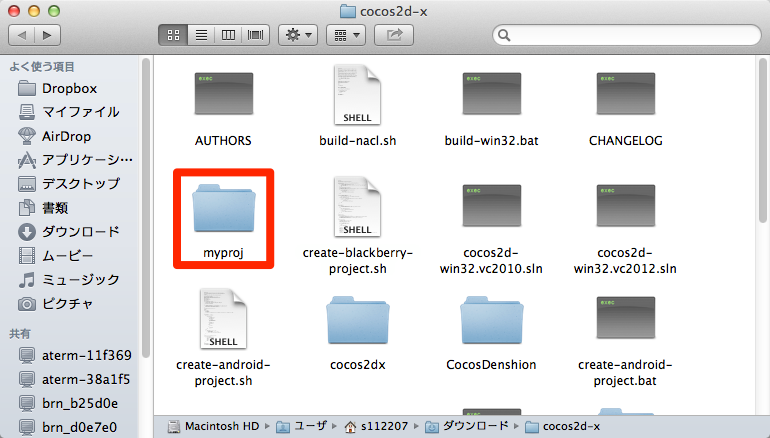
・ダウンロードの中のcocos2d-xディレクトリ内に、android用のプロジェクトが生成されています。今回の場合ですとmyprojが生成されています。
・myproj内のproj.androidディレクトリを、先ほど作ったiOS用のプロジェクト"cocos2d-x"に、このような階層になるように突っ込みます。

・ダウンロード内のcocos2d-x/cocos2dx/platform/android/java/src/org/cocos2dx/libディレクトリをコピーし、iOS用プロジェクトcocos2d-x/cocos2d-x/proj.android/src/org/cocos2dx/libとなるようにペーストします。

・proj.android内のAndroidManifest.xmlを開き、minSdkVersion = 10に変更して保存します。

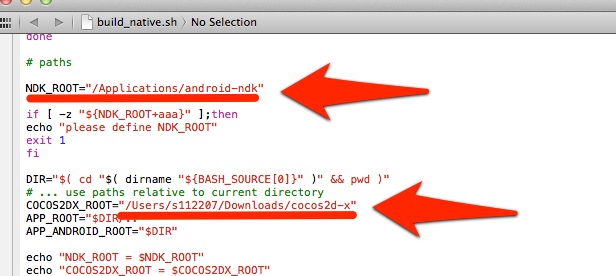
・proj.android内のbuild_native.shを開き、以下の場所にコードを追加&変更します。NDK_ROOTとCOCOS2DX_ROOTのパスを指定してあげるだけです。
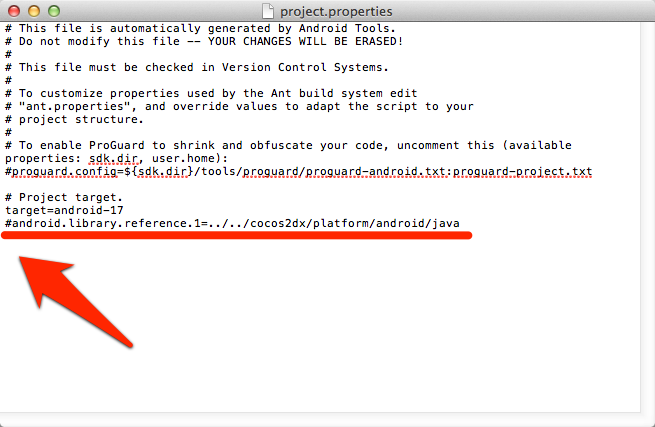
・proj.android内のproject.propertiesを開き、一番下の行をコメントアウトします。
・実機をPCに接続してセットアップしてください。その後、ターミナルを立ち上げて、proj.androidディレクトリ内に移動します。そして、build_native.shを実行してください。

・ビルドが終了したら、ant debug installとコマンドを入力して実行してください。

・実機を確認してください。myprojというアプリがありませんか?これで全く同一のソースでiOS・androidのゲームを開発することができます。また、cppを追加した場合、proj.android/jni/Android.mkに追加したcppの名前を追加しておくことを忘れないようにしてください。