今回RabbitMQサーバーと有効なSSL証明書で通信したいので、 stg-deploy-server.not-exist.com ドメインをLet's encryptという無料のサービスでSSL化しました。 イメージつかない場合まずNginxで試すといいと思います。
まずサーバーの 80と443番ポートを開けておいて、外部からアクセスできるようにする必要があります。
そして letsencryptのレポジトリをローカルcloneしてから、証明書を発行するコマンドを実行します。
コマンドに関する説明はここを参照できます。 standaloneオプション要はNginx、Apache2などのウェブサーバー使わない場合に、登録手続きだけをしたいときに使います。今回RabbitMQに証明書を適応したいので、standaloneオプションを使います。 -dオプションを後ろに認証したいドメインが続きます。
# git clone https://github.com/letsencrypt/letsencrypt
# cd letsencrypt
# ./letsencrypt-auto certonly --standalone -d stg-deploy-server.not-exist.com
これでうまくいくと下のような出力が表示されます。
IMPORTANT NOTES:
 - Congratulations! Your certificate and chain have been saved at
   /etc/letsencrypt/live/stg-deploy-server.not-exist.com/fullchain.pem.
   Your cert will expire on 2016-11-03. To obtain a new or tweaked
   version of this certificate in the future, simply run
   letsencrypt-auto again. To non-interactively renew *all* of your
   certificates, run "letsencrypt-auto renew"
 - If you like Certbot, please consider supporting our work by:

   Donating to ISRG / Let's Encrypt:   https://letsencrypt.org/donate
   Donating to EFF:                    https://eff.org/donate-le
これでディレクトリ /etc/letsencrypt/live/stg-deploy-server.not-exist.com/の下に四つファイルが生成されたことが確認できます。
live下のファイルは全部シンボリックリンクです。
# ls -l /etc/letsencrypt/live/stg-deploy-server.not-exist.com/
合計 0
lrwxrwxrwx 1 root root 72  8月  5 16:28 cert.pem -> ../../archive/stg-deploy-server.not-exist.com/cert1.pem
lrwxrwxrwx 1 root root 73  8月  5 16:28 chain.pem -> ../../archive/stg-deploy-server.not-exist.com/chain1.pem
lrwxrwxrwx 1 root root 77  8月  5 16:28 fullchain.pem -> ../../archive/stg-deploy-server.not-exist.com/fullchain1.pem
lrwxrwxrwx 1 root root 75  8月  5 16:28 privkey.pem -> ../../archive/stg-deploy-server.not-exist.com/privkey1.pem
ここで重要なのは 四つのファイルの権限は全部rootになっていることです。 これらのファイルのowner:groupを変更しないと、RabbitMQ中のMochiwebがHTTPのインターフェースとしてリクエストが受付できないです。ログファイル /var/log/rabbitmq/rabbit@stg-deploy-server.logに次のようなエラーが出しています。
=ERROR REPORT==== 5-Aug-2016::17:42:58 ===
    application: mochiweb
    "Accept failed error"
    "{error,{options,{cacertfile,\"/etc/letsencrypt/live/stg-deploy-server.not-exist.com/chain.pem\",\n                            {error,eacces}}}}"
なのでファイルのオーナーをrabbitmqに修正する必要があります。
# chown -R rabbitmq:rabbitmq /etc/letsencrypt/live
# chown -R rabbitmq:rabbitmq /etc/letsencrypt/archive
最後にRabbitMQのSSL部分を設定します。
/etc/rabbitmq/rabbitmq.configファイルのSSL部分は次のようになっています。
[
 {rabbit,
  [
   {tcp_listeners, [{"10.1.1.141", 5672},
                     {"::1",       5672}]},


   {ssl_listeners, [5671]},

   {ssl_options, [
                  {cacertfile, "/etc/letsencrypt/live/stg-deploy-server.not-exist.com/fullchain.pem"},
                  {certfile,   "/etc/letsencrypt/live/stg-deploy-server.not-exist.com/cert.pem"},
                  {keyfile,    "/etc/letsencrypt/live/stg-deploy-server.not-exist.com/privkey.pem"},
                  {verify,verify_none},
                  {fail_if_no_peer_cert,false}
   ]}
...

 {rabbitmq_management,
  [
   {listener, [{port,     65171},
               {ip,       "10.1.1.141"},
               {ssl,      true},
               {ssl_opts, [{cacertfile, "/etc/letsencrypt/live/stg-deploy-server.not-exist.com/fullchain.pem"},
                           {certfile,   "/etc/letsencrypt/live/stg-deploy-server.not-exist.com/cert.pem"},
                           {keyfile,    "/etc/letsencrypt/live/stg-deploy-server.not-exist.com/privkey.pem"},
                           {verify,verify_peer},
                           {fail_if_no_peer_cert,false}
                           ]}
   ]}
...
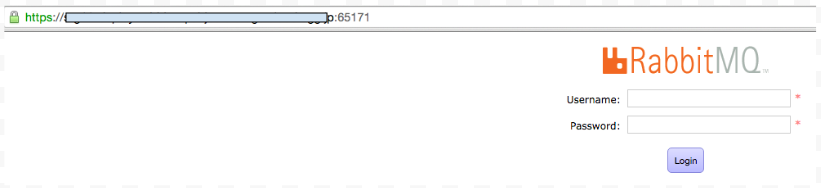
これでウェブブラウザから httpsでドメインの65171番ポートにアクセスすると画面表表示されます。