Edison Board for Arduinoを使ったLチカ(LED点滅)の実施例はよく見かけるが、Breakout Board Kitを使ったLチカの文献はあまり見ないので書いてみた。
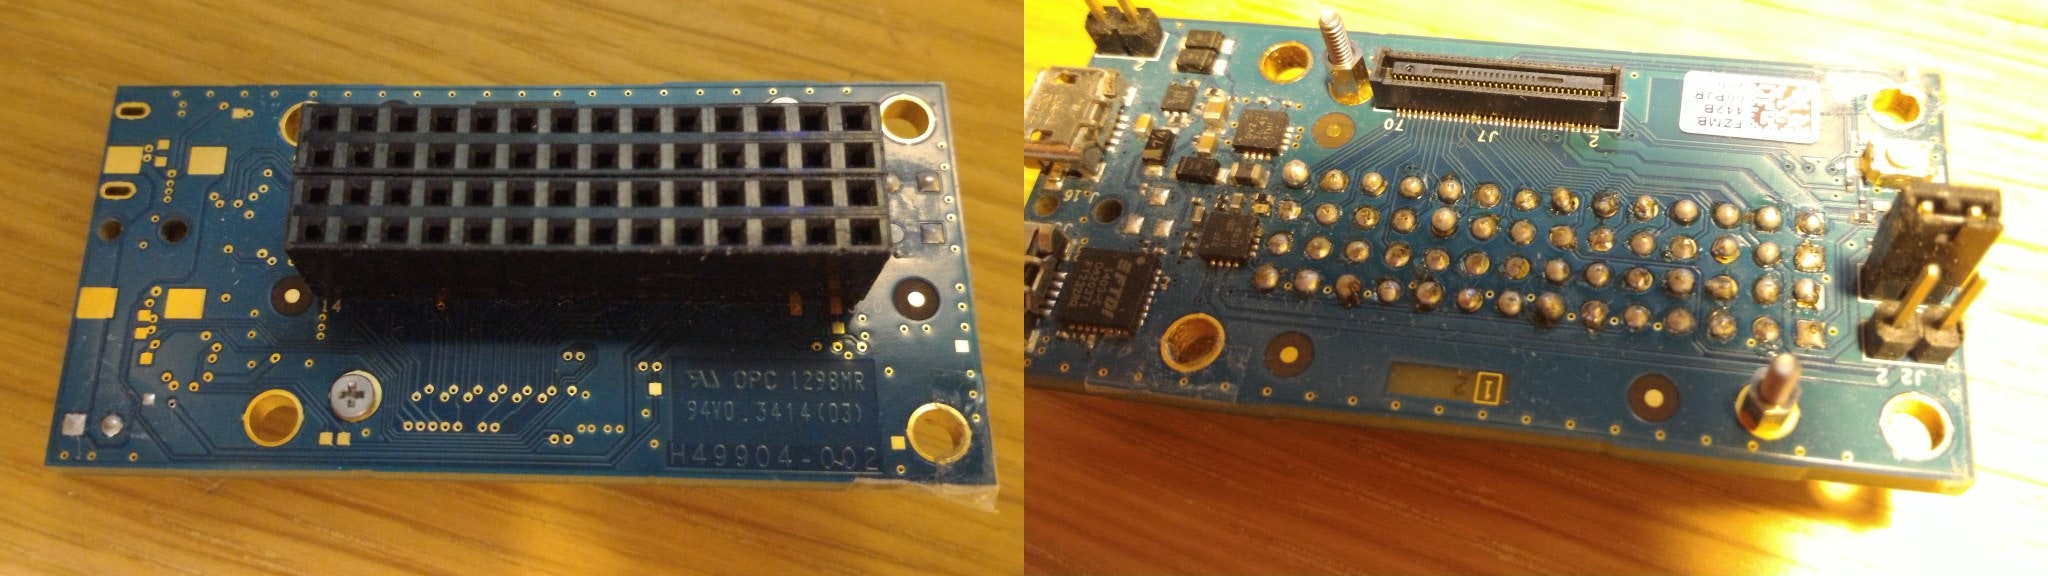
Breakout Boardへピンソケット取り付け
まず、Breakout Boardの各ピンに簡単に接続できるように、ピンソケットをつけよう。
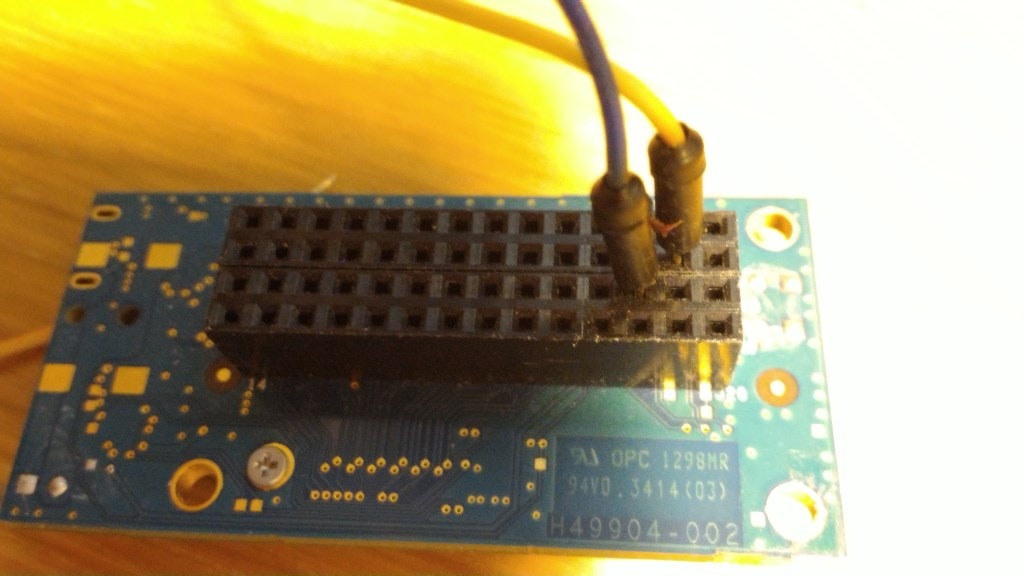
Breakout BoardからEdison本体を外した状態にして、ピンソケット 2x14 (28P)を2個、裏面から差し込み、表面からハンダを流し込むようにハンダ付けする。ピンソケットの足の長さは3ミリくらいをお勧めする。
こんな感じ。
LED点灯回路を作ろう
Breakout BoardのGPIO端子に直接LEDをつけると電流や電圧が合わずLEDが点灯しない場合もあるし、Breakout Boardを壊してしまうかもしれない。
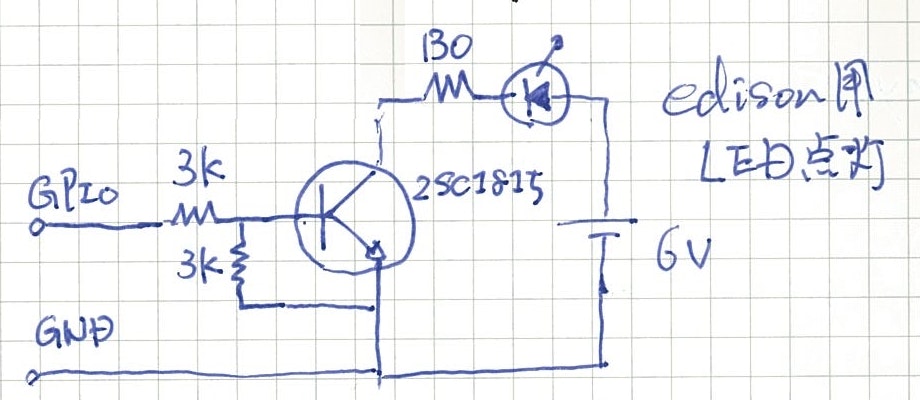
なので、GPIOがONになるとそれをトリガーにLEDを点灯する回路を作る。
回路図は以下の通り。(手書きでこめんよ)
上記をブレットボード上にアッセンブリしたのがこちらの写真。
真ん中で立っているのは3KΩの抵抗。
+に繋がっている赤い線とその4穴隣の-に繋がっている青い線は6V電源へ。赤い線の8穴隣の-に繋がっている青い線は、EdisonのGND(J19-3ピン)へ繋がっている。
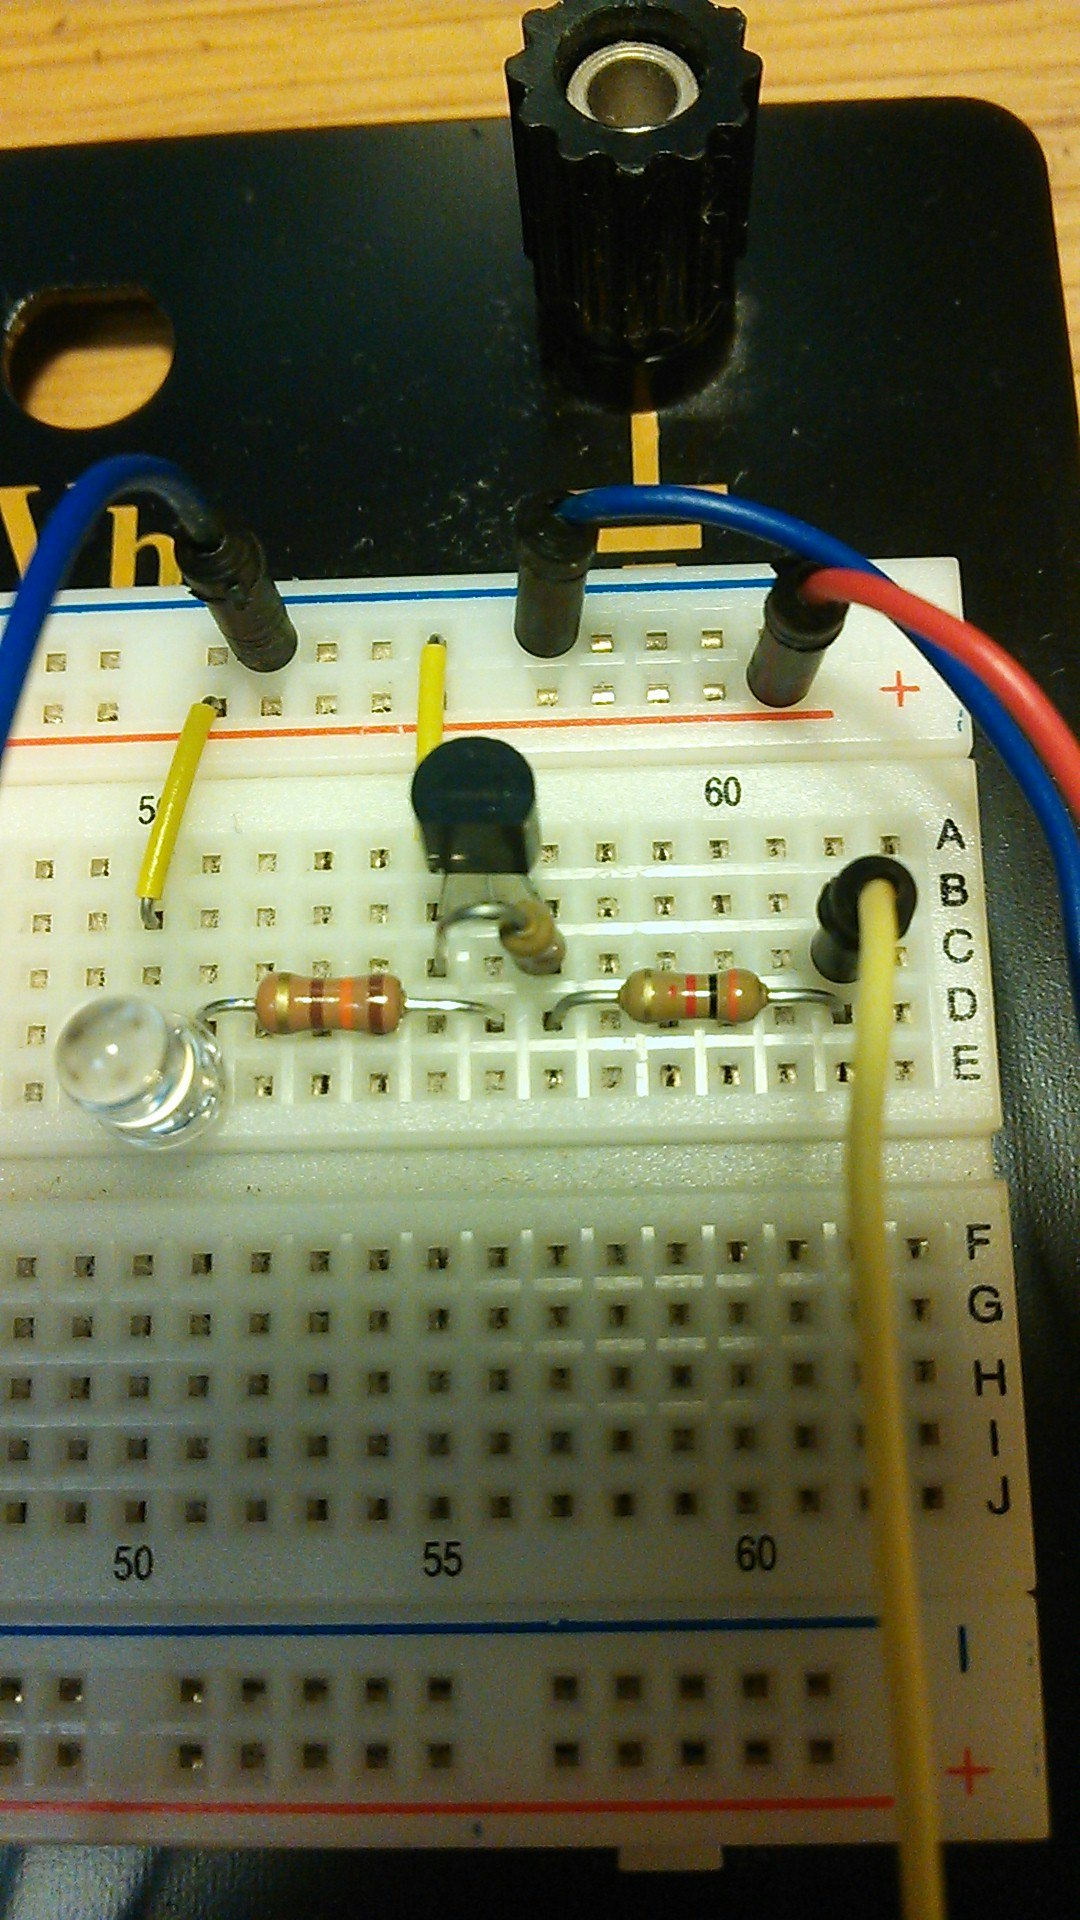
Edison側は、黄色をGP165(J18-2ピン)、青は先ほどの通りJ19-3へ接続。
mraaライブラリをインストール
以下のサイトを参考(すごくわかりやすく書かれています)
http://nonnoise.github.io/Edison/index2.html#id2
ここの「Edisonを最新にする」の手順でパッケージマネージャのリストを更新しmraaライブラリをインストールする準備をします。
この後、以下のコマンドでmraaライブラリをインストール。
opkg install libmraa0
Lチカのプログラムを書こう
まず、ピンに対応したmraaの番号が必要となる。以下の参考文献によると、GP165は、MRAAで15番。
【参考】
http://iotdk.intel.com/docs/master/mraa/edison.html
mraaライブラリのサンプルプログラムをちょっとかえて以下のようにしてみた。
サンプルプログラムの格納ディレクトリへは以下のコマンドで行ける。
cd /usr/share/mraa/examples/javascript
この中のBlink-IO.js というファイルがLチカのサンプル。
これをblink.jsと言う名前でコピーして以下のように編集する。
/*
 * Author: Dan Yocom <dan.yocom@intel.com>
 * Copyright (c) 2014 Intel Corporation.
 *
 * Permission is hereby granted, free of charge, to any person obtaining
 * a copy of this software and associated documentation files (the
 * "Software"), to deal in the Software without restriction, including
 * without limitation the rights to use, copy, modify, merge, publish,
 * distribute, sublicense, and/or sell copies of the Software, and to
 * permit persons to whom the Software is furnished to do so, subject to
 * the following conditions:
 *
 * The above copyright notice and this permission notice shall be
 * included in all copies or substantial portions of the Software.
 *
 * THE SOFTWARE IS PROVIDED "AS IS", WITHOUT WARRANTY OF ANY KIND,
 * EXPRESS OR IMPLIED, INCLUDING BUT NOT LIMITED TO THE WARRANTIES OF
 * MERCHANTABILITY, FITNESS FOR A PARTICULAR PURPOSE AND
 * NONINFRINGEMENT. IN NO EVENT SHALL THE AUTHORS OR COPYRIGHT HOLDERS BE
 * LIABLE FOR ANY CLAIM, DAMAGES OR OTHER LIABILITY, WHETHER IN AN ACTION
 * OF CONTRACT, TORT OR OTHERWISE, ARISING FROM, OUT OF OR IN CONNECTION
 * WITH THE SOFTWARE OR THE USE OR OTHER DEALINGS IN THE SOFTWARE.
 */

var m = require('mraa'); //require mraa
console.log('MRAA Version: ' + m.getVersion()); //write the mraa version to the console

var myLed = new m.Gpio(15); //MRAAの番号が15なので
myLed.dir(m.DIR_OUT); //set the gpio direction to output
var ledState = true; //Boolean to hold the state of Led

periodicActivity(); //call the periodicActivity function

function periodicActivity()
{
  myLed.write(ledState?1:0); //if ledState is true then write a '1' (high) otherwise write a '0' (low)
  ledState = !ledState; //invert the ledState
  setTimeout(periodicActivity,500); //call the indicated function after 0.5 second (500 milliseconds)
}
以下のコマンドで実行する。
node brink.js