Bloccom Chapter2 温湿度・気圧センサ
Chapter2では、温湿度・気圧センサの使い方を説明する。
今回使用するセンサは BME280 という温湿度・気圧センサである。
BME280 温湿度・気圧センサ 秋月電子通商
手順
1,ライブラリをインストール
はじめに、BME280のためのライブラリをダウンロードする。
下記のURLより、Clone or download を選択する。
https://github.com/embeddedadventures/BME280
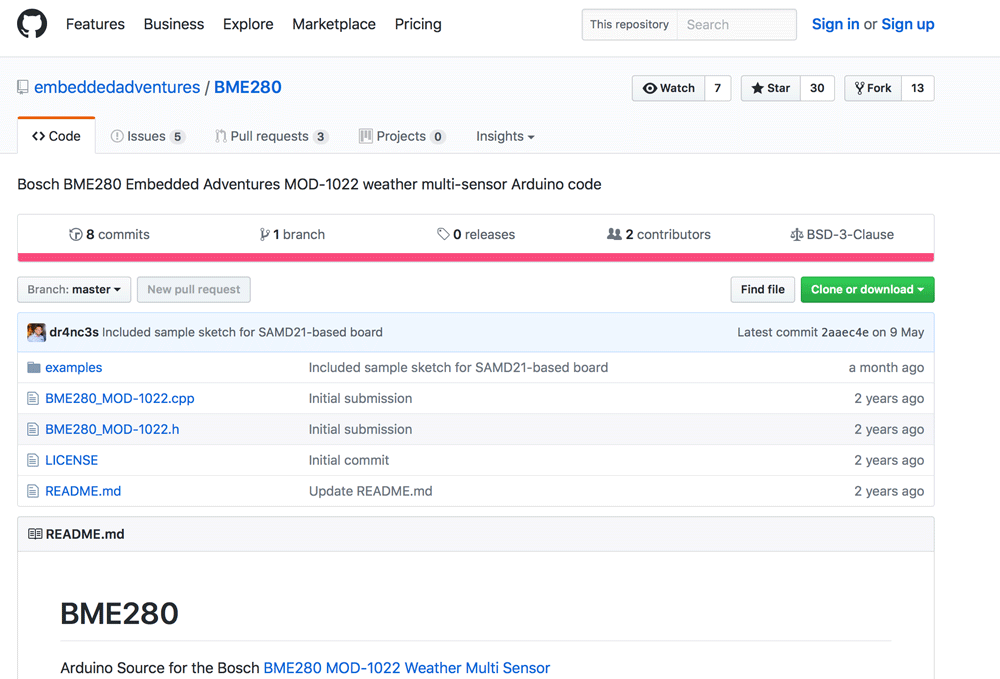
ZIPファイルがダウンロードされるはず!!解凍されている状態でダウンロードされる場合もあるため、ZIP形式に圧縮することをオススメする。
Arduinoを開き、スケッチ>ライブラリをインクルード>.ZIP形式のライブラリをインストール...を選択し、先ほどのZIPファイルを選択する。
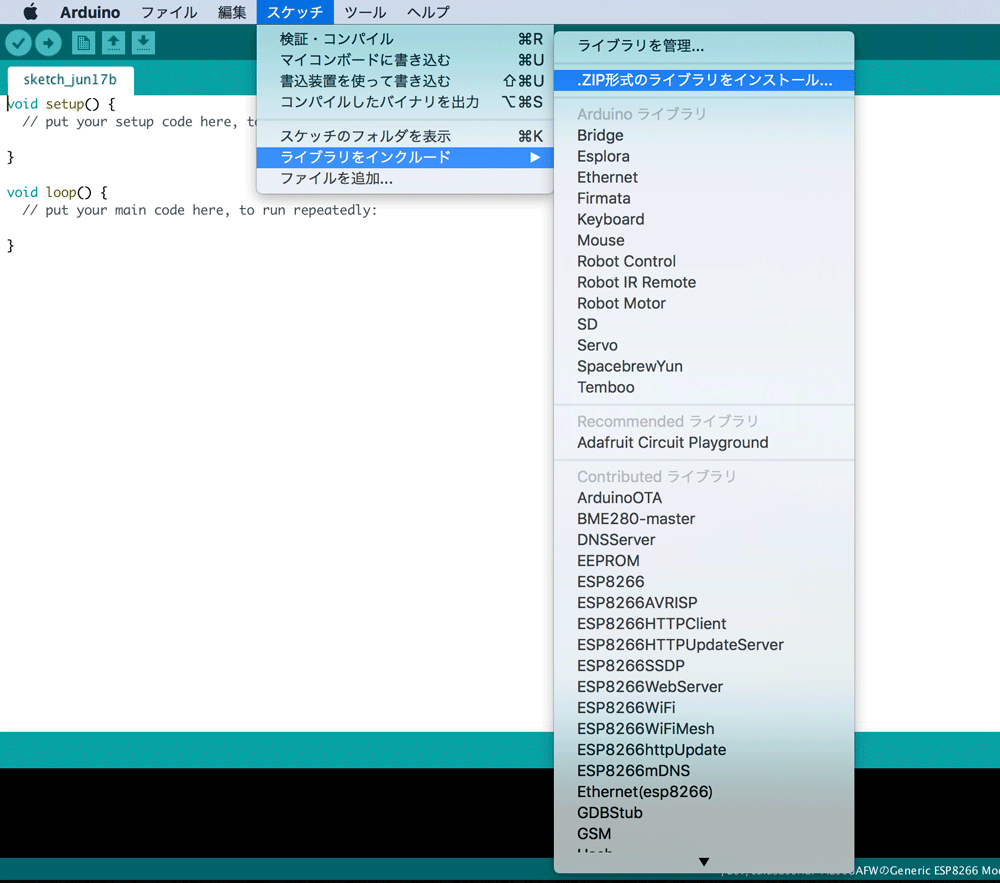
以上でインストール完了
2,スケッチを書き込む
次に、スケッチを書き込みシリアルモニタに温度・湿度・気圧の値を出力することを目指す!!

スケッチは下記の通りである。
# include <BME280_MOD-1022.h>
# include <Wire.h>
# include <ESP8266WiFi.h>
# define BME280_ADDRESS 0x76

float temperature;
float humidity;
float pressure;

WiFiClient client;

void setup() {
  // I2Cの通信を開始
  // SDA: GPIO4
  // SCL: GPI14
  Wire.begin(4, 14);
  Serial.println("I2C start.");

  // シリアル通信を開始
  Serial.begin(115200);
  Serial.println("Serial start.");

  // BME280を初期化
  BME280.readCompensationParams();

  // オーバーサンプリングの回数を設定
  BME280.writeOversamplingTemperature(os1x);
  BME280.writeOversamplingHumidity(os1x);
  BME280.writeOversamplingPressure(os1x);
  Serial.println("BME280 start.");
}

void loop() {
  // BME280を1度だけ測定を行うモードに設定し計測が終わるまで待機
  BME280.writeMode(smForced);
  while (BME280.isMeasuring()) {
    delay(1000);
  }

  // BME280から測定値を読み取る
  BME280.readMeasurements();
  temperature = BME280.getTemperature();
  humidity = BME280.getHumidity();
  pressure = BME280.getPressure();

  // 読み取った値をシリアルにプリント
  Serial.print("Temperature: ");
  Serial.println(temperature);
  Serial.print("Humidity: ");
  Serial.println(humidity);
  Serial.print("Pressure: ");
  Serial.println(pressure);
  Serial.println("---------------------");
}
書き出す前に以前書いたスケッチのリセットを行うことを忘れずに!!
リセット方法 Chapter1 SetUp参照
検証を実行する、コンパイルに成功したことを確認する。
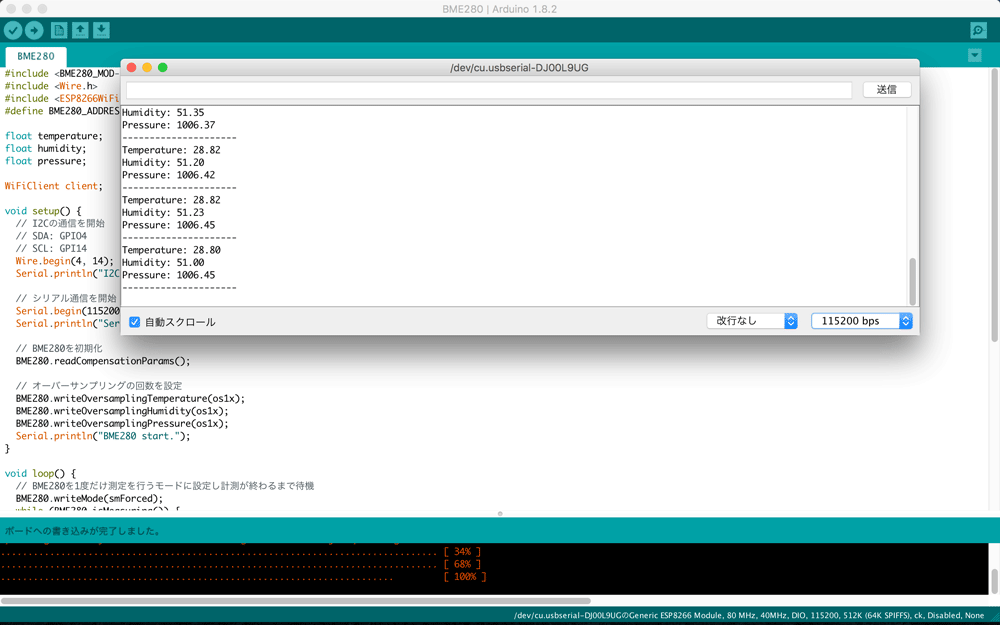
3,モニタを確認する
次に、実行したスケッチをモニタで確認する。
書き込みに成功したことを確認したら、ツール>シリアルモニタを選択。
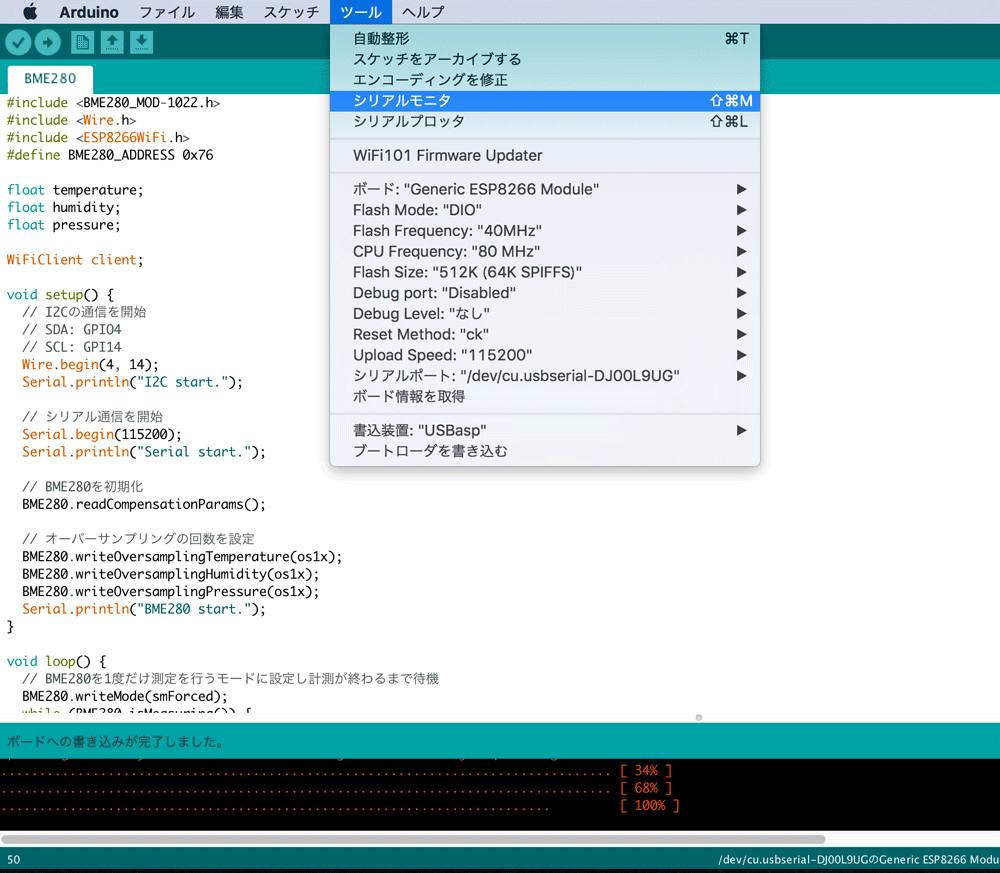
1秒ごとに値が出力される。
以上 Chapter2 温湿度・気圧センサ終了
応用
応用として出力された値をグラフ化する。
1,ThingSpeakのアカウントを作成
ThingSpeakとは、WiFIを通じてデータを保存・グラフ化できる便利サイトである。
まず、ThinkSpeakのアカウントを作成する。
下記URLより、Sign Upを行う。
https://thingspeak.com/
Sign Upが完了したら下記の画面が表示されるはず、
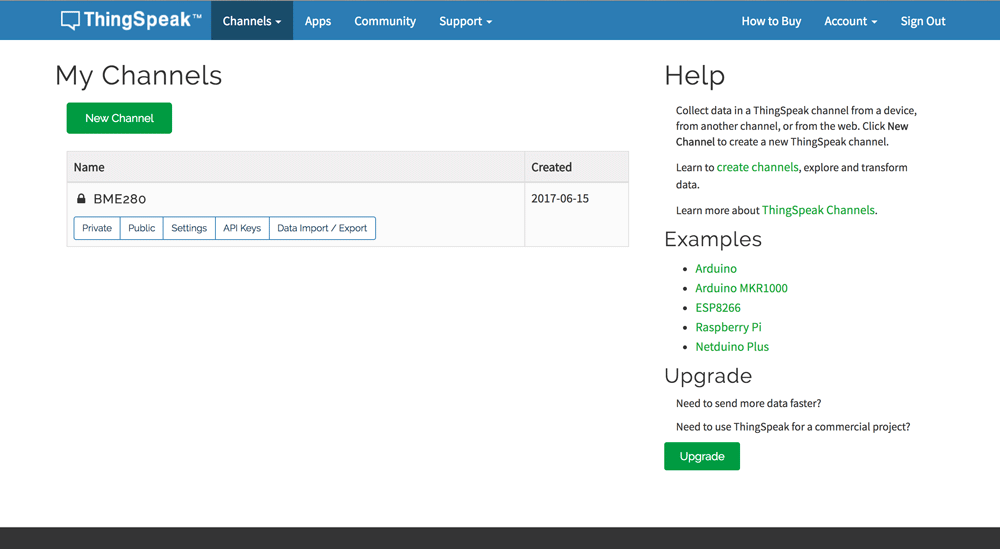
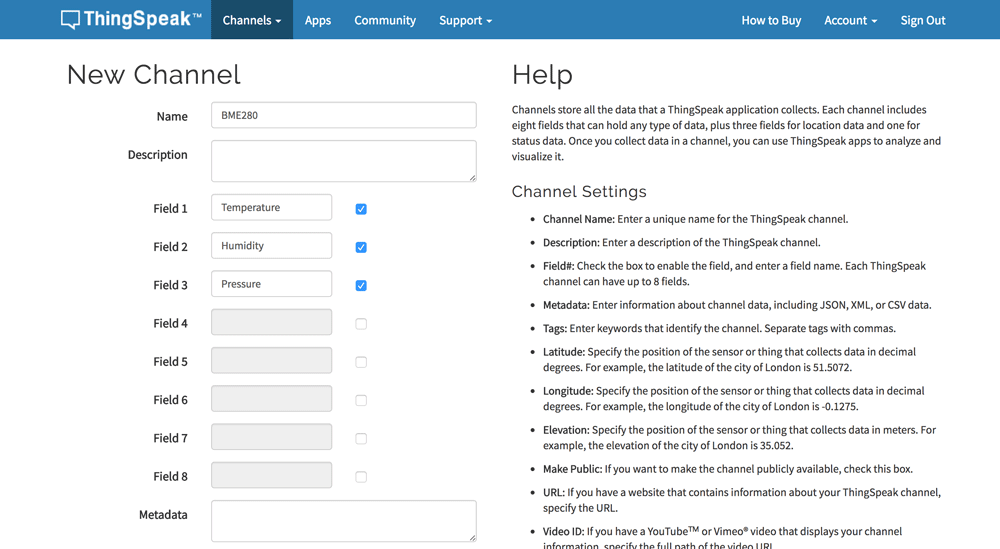
その後、New Channelを選択
名前をBME280などと設定
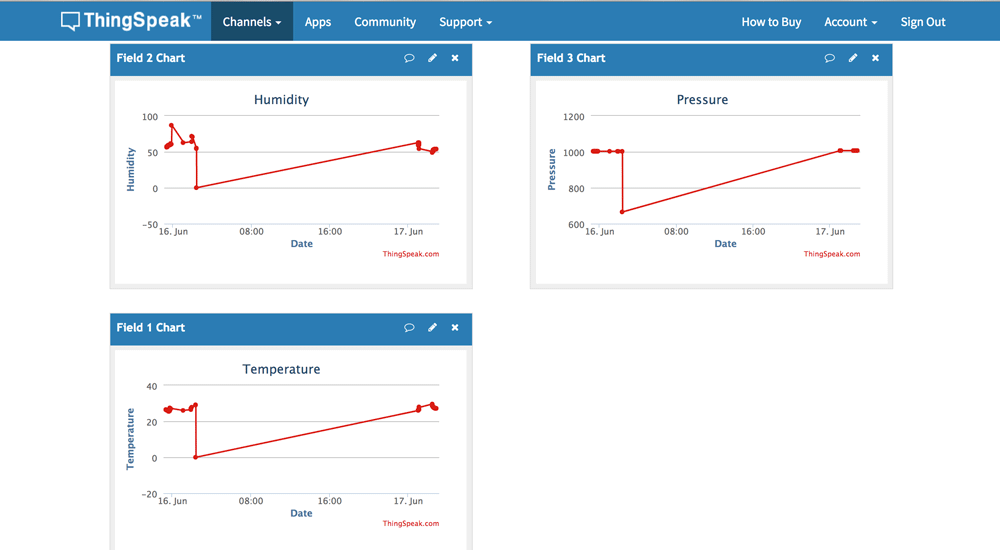
Fieldを3まで増やし、それぞれの名前をTemperature・Humidity・Pressureなどとする。
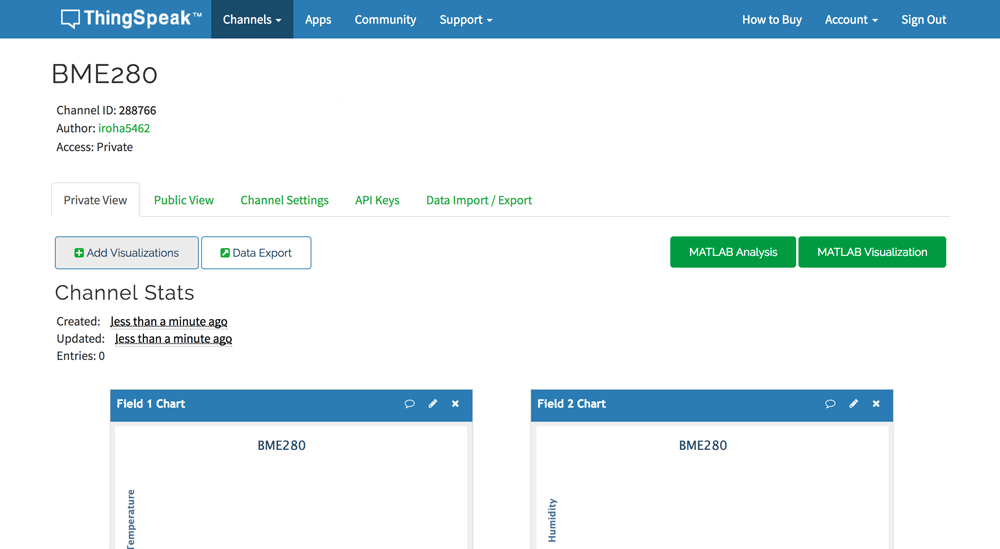
設定後、下へスクロールし Save Channel を押す。
下記の画面が表示されれば、設定は完了
2,スケッチを書き込む
応用ではPCと接続を必要とせず、WiFiを通してデータを出力しThingSpeakでグラフ化することを目指す。
スケッチは下記の通りである。
# include <BME280_MOD-1022.h>
# include <Wire.h>
# include <ESP8266WiFi.h>
# define BME280_ADDRESS 0x76

float temperature;
float humidity;
float pressure;

//ApiKeyを入力------------------------------------------------------------
String apiKey = "YYYYYYYYYYYYYY";
//WiFi名入力
const char* ssid = "XXXXXXXXXXXXXXX";
//WiFiのPasswoed入力
const char* password = "ZZZZZZZZZZZZZZZZ";
//-----------------------------------------------------------------------
const char* server = "api.thingspeak.com";

WiFiClient client;

void setup() {
  // I2Cの通信を開始
  // SDA: GPIO4
  // SCL: GPI14
  Wire.begin(4, 14);
  Serial.println("I2C start.");

  // シリアル通信を開始
  Serial.begin(115200);
  Serial.println("Serial start.");

  // BME280を初期化
  BME280.readCompensationParams();

  // オーバーサンプリングの回数を設定
  BME280.writeOversamplingTemperature(os1x);
  BME280.writeOversamplingHumidity(os1x);
  BME280.writeOversamplingPressure(os1x);
  Serial.println("BME280 start.");

  //WiFI設定
  WiFi.begin(ssid, password);
  while (WiFi.status() != WL_CONNECTED) {
  delay(500);
  }

  temperature = 0.0;
  humidity = 0.0;
  pressure = 0.0;
}

void loop() {
  if (client.connect(server,80)) {
  // BME280を1度だけ測定を行うモードに設定し計測が終わるまで待機
    BME280.writeMode(smForced);
    while (BME280.isMeasuring()) {
      delay(1000);
    }

  // BME280から測定値を読み取る
    BME280.readMeasurements();
    temperature = BME280.getTemperature();
    humidity = BME280.getHumidity();
    pressure = BME280.getPressure();

  //ThingSpeakにデータを飛ばす
    String postStr = apiKey;
           postStr +="&field1=";
           postStr += String(temperature);
           postStr +="&field2=";
           postStr += String(humidity);
           postStr +="&field3=";
           postStr += String(pressure);
           postStr += "\r\n\r\n";

     client.print("POST /update HTTP/1.1\n");
     client.print("Host: api.thingspeak.com\n");
     client.print("Connection: close\n");
     client.print("X-THINGSPEAKAPIKEY: "+apiKey+"\n");
     client.print("Content-Type: application/x-www-form-urlencoded\n");
     client.print("Content-Length: ");
     client.print(postStr.length());
     client.print("\n\n");
     client.print(postStr);
     }
   client.stop();
   //1分ごとにグラフ化
   ESP.deepSleep(60 * 1000 * 1000 , WAKE_RF_DEFAULT);

  delay(1000);
}
上記の ApiKey と WiFi名 と WiFi Password を入力する必要がある。
3,ApiKeyの入力
ApiKeyはThingSpeakとの接続のためのKeyである。
ThingSpeakのサイトに行き、先ほど作成した BME280 のChannelに行く。
ApiKeyのタブを選択し、Write API Keyの下に載っているKeyをコピーする。
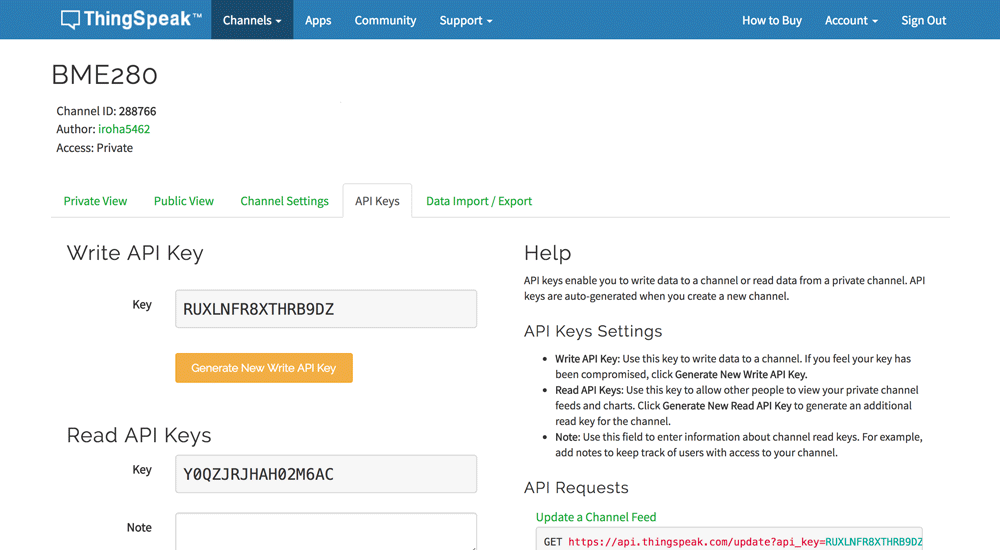
コピーしたものを、ArduinoのスケッチのApiKey入力部分の ""で挟まれた部分に挿入する。
4,WiFiの入力
WiFiに接続することでPCとの接続を必要とせず、電源とさえ繋いでいればデータを出力する。
WiFi名は、WiFi接続する際に表示される名前である。
WiFi Passwordは事前に設定してあるか、WiFiルーターに記載されているものを参照。
以上をWiFi名及びWiFi Password入力部分の""で挟まれた部分に挿入する。
5,書き込む
以上の作業を行ったスケッチをマイコンボードに書き込む。
書き込む前にリセットを行うことを忘れずに!!
書き込みに成功したことを確認したら、ThingSpeakのサイトに行き、出力された点が表示されることを確認する。時間が経つにつれ出力された点が増え、線グラフが表示される。
以上 Chapter2 温湿度・気圧センサ 応用 終了