node-auth-server
Authorization Server by node
reffrences
source code
Getting Stated
install mongoDB(mac)
# install
brew install mongodb

# mongoDB auto start
ln -sfv /usr/local/opt/mongodb/*.plist ~/Library/LaunchAgents
launchctl load ~/Library/LaunchAgents/homebrew.mxcl.mongodb.plist
install mongoDB(Linux with yum)
- make repository file
[mongodb]
name=MongoDB Repository
baseurl=http://downloads-distro.mongodb.org/repo/redhat/os/x86_64/
gpgcheck=0
enabled=1
- install and run
sudo yum install -y mongodb-org
sudo chkconfig mongod on
sudo service mongod start
install node(mac)(if not installed)
brew install node
npm install -g n
n stable
install node(Linux)(if not installed)
yum install nodejs npm --enablerepo=epel
npm install -g n
n stable
install global node modules
npm install -g node-inspector gulp nodemon pm2
how to debug application
git clone ...
cd node-auth-server
npm install
gulp
how to run application
export NODE_ENV=production
pm2 start server.js --name="node-auth-server" --watch
Functions
- User Authentification by id/pass
- basic authenticate/form authenticate
- Application Authorization by clientid/clientsecret
- OAuth2.0 grant code flow
- Management page for User/Role/Client and so on.
Tutorial
first setting by Management view
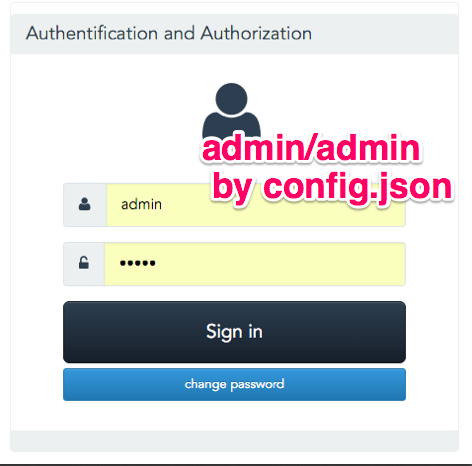
- http://localhost:9999/
- Default User
- username: admin
- password: admin
default user is defined config/*.json
regist client
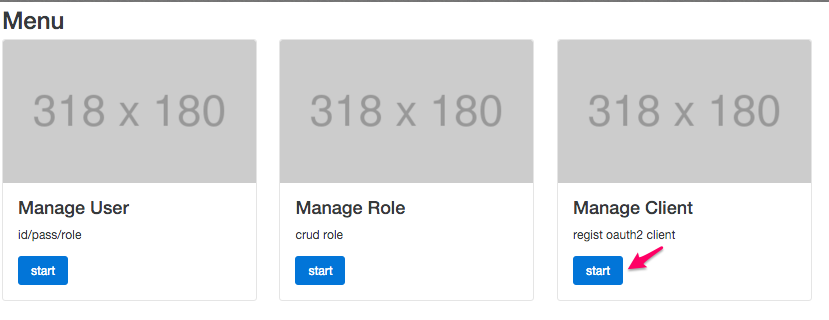
- for regist oauth2 client, select 'Manage Client' from Menu first.
- click add button
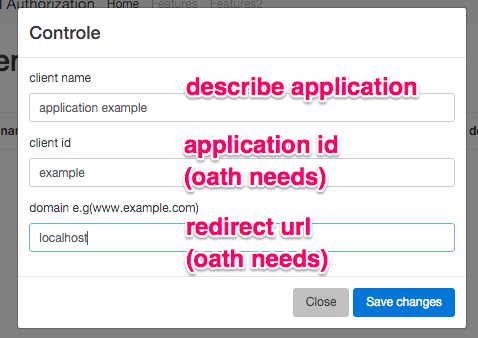
- regist client.
- we suppose set your hostname which callback after authorization to domain(redirect url)
- after client registed, application secret is shown. please note this for oauth connection.
Get Oauth Code
-
After registed client, you can get Access Token by web api.
-
first, you have to get oauth2 code.
-
open browser and input following url.
http://localhost:9999/api/oauth2/authorize?client_id=example&response_type=code&redirect_uri=http://localhost:9999&scope=username role fullName email phone image
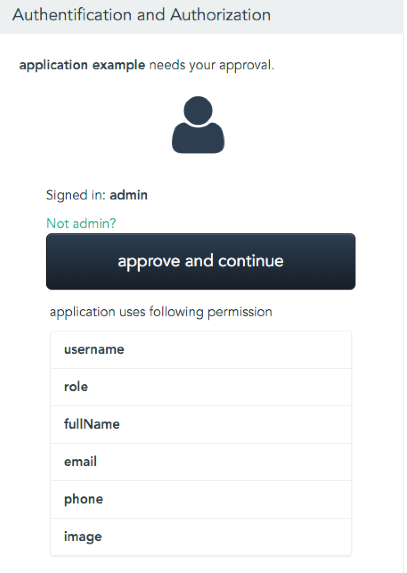
- authorization page opened, click 'aoorove and continue'
- see url bar in your browser.
- url includes oauth code like http://localhost:9999/code=mf7IOpFpY8kb6g5B
- note the code
Exchange Oauth code to accessToken
-
please open postman.
-
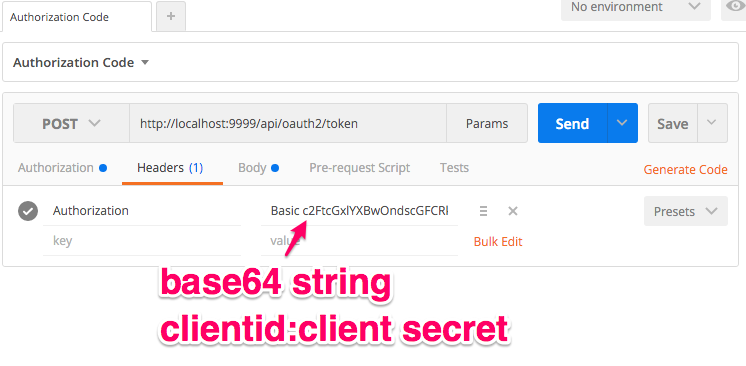
url: /api/oauth2/token
-
method: POST
-
header:
- Authorization: Basic [converted base64 string 'clientid:client secret']
-
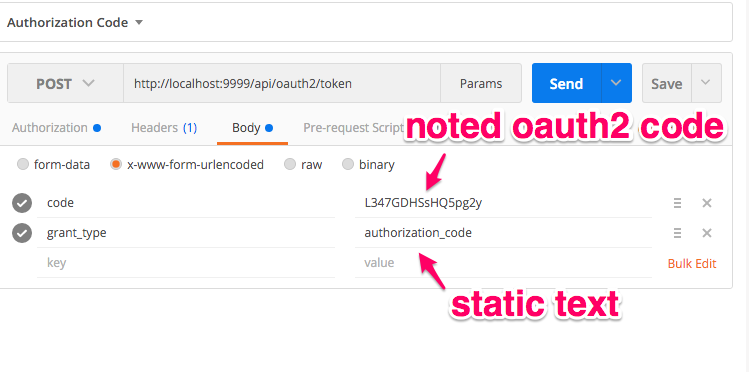
body
- code: mf7IOpFpY8kb6g5B
set OAuthCode - you noted a little while ago
- grant_type: authorization_code
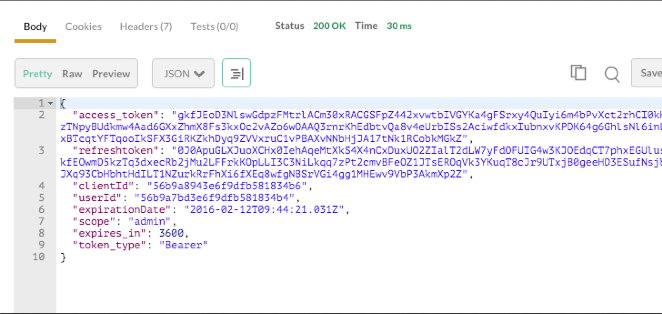
- if ok, return access token by json
please note that, OAuth Code is One-Time useage.
if you try again, go back browser and re get Oauth code.
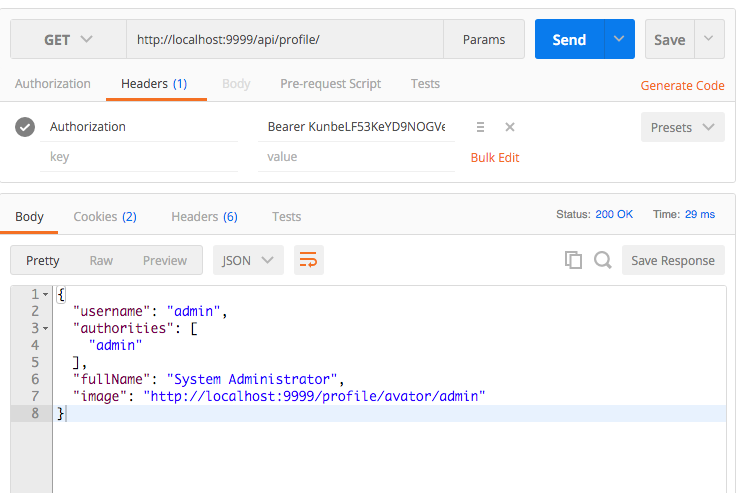
Get Profile Information by accessToken
- url: /api/profile
- method: GET
- header
- Authorization: Bearer
Grant Types
authorization_code
- see Tutorial
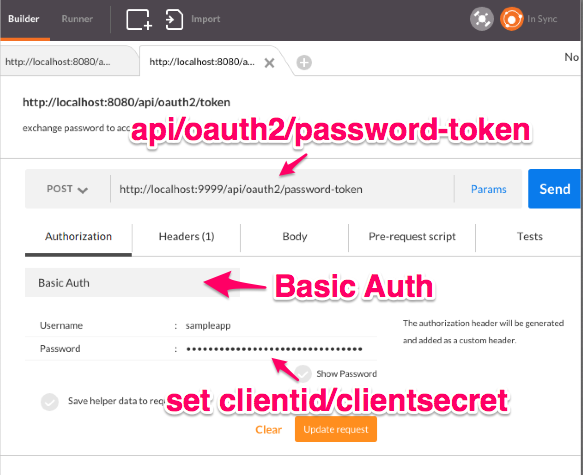
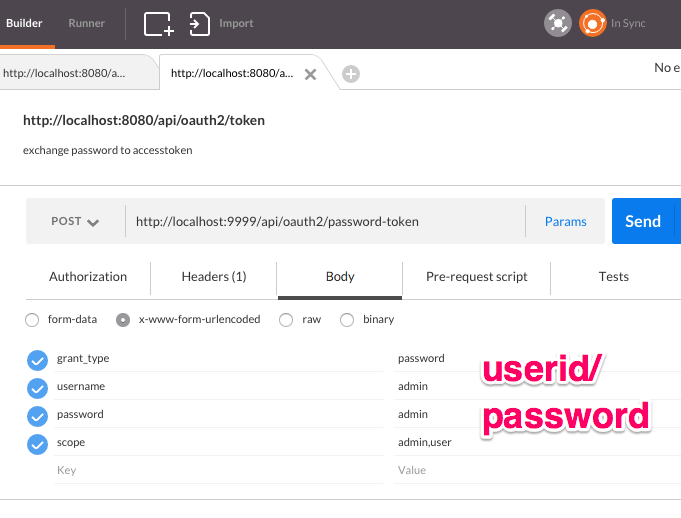
Resource Owner Password Credentials
Exchange username/password to AccessToken
- url: /api/oauth2/token
- method: POST
- header
- Authorization: Basic clientid:clientsecret
- body
- grant_type: password
- username: user id
- password: user password
- scope: scopes
Client Credentials
Exchange client_id/client_secret to AccessToken
- url: /api/oauth2/token
- method: POST
- header
- Authorization: Basic clientid:clientsecret
- body
- grant_type: client_credentials
- scope: username,role,fullName,email,phone
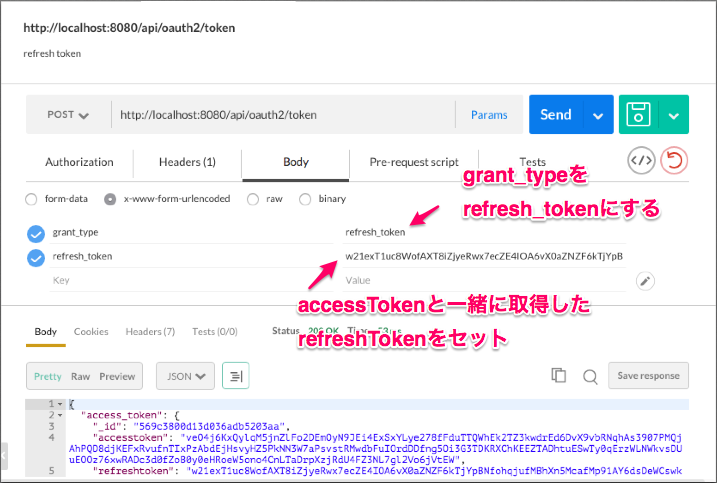
refresh token
- url: /api/oauth2/token
- method: POST
- header
- Authorization: Basic clientid:clientsecret
- body
- grant_type: refresh_token
- refresh_token: refresh token
APIs
add user
- url: /api/users
- method: POST
- header
- Authorization: Bearer
- body
- username: user id
- password: user password
- fullName: user full name
- roles: user roles(Array)
add client
- url: /api/clients
- method: POST
- header
- Authorization: Bearer
- body
- name: client(application) name
- id: client(application) id
- domain: client(application) domain e.g)hostname
