新ConoHaでNginxサーバーを立てる機会があったのでhttperfを使いチューニングしたパフォーマンス結果を書いておきます。
#新ConoHaでのNginxパフォーマンス
対象マシンスペック
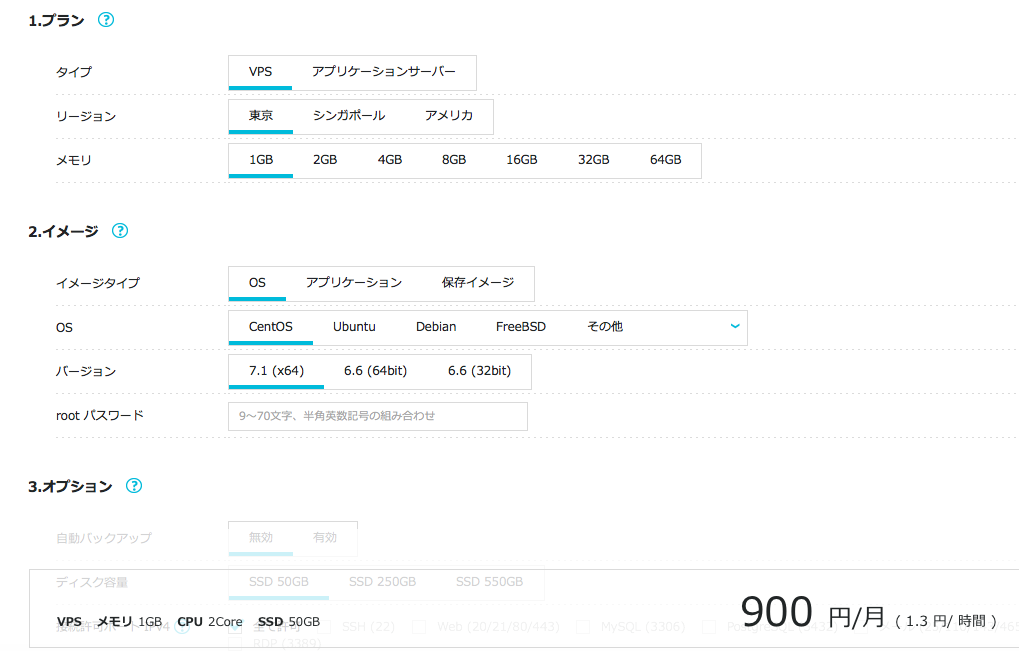
メモリ1G CPUコア2(月900円)のマシンを使います。
OSはCent6.6を選択。
/proc/cpuinfo は以下です
processor       : 0
vendor_id       : GenuineIntel
cpu family      : 6
model           : 63
model name      : Intel(R) Xeon(R) CPU E5-2660 v3 @ 2.60GHz
stepping        : 2
microcode       : 1
cpu MHz         : 2599.996
cache size      : 4096 KB
physical id     : 0
siblings        : 1
core id         : 0
cpu cores       : 1
apicid          : 0
initial apicid  : 0
fpu             : yes
fpu_exception   : yes
cpuid level     : 13
wp              : yes
flags           : fpu vme de pse tsc msr pae mce cx8 apic sep mtrr pge mca cmov pat pse36 clflush mmx fxsr sse sse2 ss syscall nx pdpe1gb rdtscp lm constant_tsc arch_perfmon rep_good unfair_spinlock pni pclmulqdq ssse3 fma cx16 pcid sse4_1 sse4_2 x2apic movbe popcnt tsc_deadline_timer aes xsave avx f16c rdrand hypervisor lahf_lm abm xsaveopt fsgsbase bmi1 avx2 smep bmi2 erms invpcid
bogomips        : 5199.99
clflush size    : 64
cache_alignment : 64
address sizes   : 46 bits physical, 48 bits virtual
power management:

processor       : 1
vendor_id       : GenuineIntel
cpu family      : 6
model           : 63
model name      : Intel(R) Xeon(R) CPU E5-2660 v3 @ 2.60GHz
stepping        : 2
microcode       : 1
cpu MHz         : 2599.996
cache size      : 4096 KB
physical id     : 1
siblings        : 1
core id         : 0
cpu cores       : 1
apicid          : 1
initial apicid  : 1
fpu             : yes
fpu_exception   : yes
cpuid level     : 13
wp              : yes
flags           : fpu vme de pse tsc msr pae mce cx8 apic sep mtrr pge mca cmov pat pse36 clflush mmx fxsr sse sse2 ss syscall nx pdpe1gb rdtscp lm constant_tsc arch_perfmon rep_good unfair_spinlock pni pclmulqdq ssse3 fma cx16 pcid sse4_1 sse4_2 x2apic movbe popcnt tsc_deadline_timer aes xsave avx f16c rdrand hypervisor lahf_lm abm xsaveopt fsgsbase bmi1 avx2 smep bmi2 erms invpcid
bogomips        : 5199.99
clflush size    : 64
cache_alignment : 64
address sizes   : 46 bits physical, 48 bits virtual
power management:
月900円とは言えXeon 2.60GHzが使えるのはいいです。
メモリが少ないのですがNginxでリクエストをさばくのには十分ですね。
HTTPベンチマーク方法
今回はhttperfを使用します。
yumで簡単にインストールできます。
実行方法は対象のLinuxインスタンスに対してグローバルIP経由でアクセスします。
httperf --server=対象のマシンのIP --port=80 --uri=/index.html --rate 5000 --num-conn 250000 --num-call 5 --timeout 5
だいたい50秒ぐらい。
ベンチマーク対象のファイル
今回はindex.htmlとし中身は4バイトの文字列を差し込んでいます。("WEB1"や"WEB2"などLBかました後に振り分け確認しやすいような文字列を入れておく)
ベースとなるnginx.conf
基本となるNginx.confはこのようになります
user  nginx;

## autoか1 今回はcoreが2のマシンなのでautoの場合自動的に2になる
worker_processes  auto;

error_log  /mnt/log/web/error.log warn;
pid        /var/run/nginx.pid;

#worker_rlimit_nofile  8192;

events {
    #use epoll;
    #multi_accept on;
    worker_connections  1024;
}

http {
    include       /etc/nginx/mime.types;
    default_type  application/octet-stream;

    access_log off;
    sendfile        on;
    #tcp_nopush     on;
    #tcp_nodelay    on;
    keepalive_timeout  65;
    server_tokens off;

    server {
        listen       80;
        access_log  off;

〜〜残りは略
Nginx.conf チューニングで変更する項目
| 項目 | 内容 |
|---|---|
| worker_processes | Nginxプロセスの数を指定する。autoの場合は自動的にCPUコア数になる |
| worker_rlimit_nofile | 1 プロセスあたりの最大ファイルディスクリプタ数で worker_connection の数倍が良いらしい |
| use epoll | Linuxのepollを使う |
| multi_accept | できるだけクライアントからのリクエストを受け取る |
| worker_connections | 一つのworkerプロセグが開ける最大コネクション数、CPUの性能によってこの値をチューニングする。今回は結果として1024が最適だと判明。 |
| tcp_nopush | このオプションを使うと、レスポンスヘッダとファイルの内容をまとめて送るようになり、少ないパケット数で効率良く送ることができます。デフォルトの設定値はoffです。 |
| tcp_nodelay | データをキャッシュしないで、どんどん送信させる、リアルタイムアプリに最適 |
上記の値をONにしたりOFFにしたり数値を変えながらチューニングしていく。
参考
http://qiita.com/iwai/items/1e29adbdd269380167d2
http://nodejs.osser.jp/server/nginx-max-performance/
http://heartbeats.jp/hbblog/2012/02/nginx03.html
ベンチマーク結果
Request rate/s(1秒間で処理できたリクエスト数)の降順でソート
| 設定 | Request rate/s | Errors: total |
|---|---|---|
| worker connection 1024/worker_processes 1 + tcp_nopush + tcp_nodelay + multi_accept + use poll | 24980.6 | 143 |
| worker connection 1024/worker_processes auto + tcp_nopush + tcp_nodelay | 24920.8 | 741 |
| worker connection 2048/worker_processes auto/worker_limit_file 8096 auto + tcp_nopush + tcp_nodelay + multi_accept + use poll | 24727.7 | 2588 |
| worker connection 1024/worker_processes auto + tcp_nopush + tcp_nodelay + multi_accept + use poll | 24538.7 | 0 |
| worker connection 1024/worker_processes auto + tcp_nopush + tcp_nodelay + multi_accept | 24512.7 | 900 |
| worker connection 1024/worker_processes auto + tcp_nopush | 23871.8 | 7754 |
| worker connection 1280/worker_limit_file 8096/core auto + tcp_nopush + tcp_nodelay + multi_accept + use poll | 23381.9 | 8695 |
| worker connection 1024/worker_processes auto | 17687.9 | 62488 |
| worker connection 1280 /worker_processes auto | 16571.5 | 74128 |
| worker connection 768/worker_processes auto | 16552.7 | 72782 |
httperfの結果からRequest rate/sとErrors: totalを抽出
結果からわかること
- 一番速度向上したのはtcp_nopushの項目
- tcp_nodelayも効果あり
- worker_processesはautoの場合今回は2となるが、速度が1に比べてめちゃくちゃ上がるとはいえない
- multi_accept onを加えた場合900個のエラーがあったがuse epollを加えるとエラーがなくなり速度も上がった。
- 今回のマシンスペックの場合はworker connectionは1024に留めておくのがよい
検証結果より得たベストなnginx.conf
上記の表のエラーが0の設定に決定。
user  nginx;
worker_processes  auto;

error_log  /mnt/log/web/error.log warn;
pid        /var/run/nginx.pid;

#worker_rlimit_nofile  8192;

events {
    use epoll;
    multi_accept on;
    worker_connections  1024;
}

http {
    include       /etc/nginx/mime.types;
    default_type  application/octet-stream;

    access_log  /mnt/log/web/access.log  main;
    access_log off;

    sendfile        on;
    tcp_nopush     on;
    tcp_nodelay    on;

    keepalive_timeout  65;

    #gzip  on;
    server_tokens off;

    server {
        listen       80;
        access_log  off;
〜略
※ただし今回の場合は4バイトのindex.htmlを返すのにベストな設定であることに注意
※あなたが運営するサービスのNginxが返す一番多いリクエストURLでテストしチューニングするのが大事
※特にバックエンドにPlayFramerokやRailsなどが控えており、Nignxサーバーはリバースプロキシとしてしか機能していない場合のチューニングはまた別の結果になる可能性はある。
#新ConoHaのロードバランサーのパフォーマンス
お値段
新ConoHaのロードバランサーは一ヶ月、1000円です。
1ロードバランサー=1グローバルIPにつき1000円かかります。
対象LB構成
先ほどチューニングした結果のNginxの設定で起動したNginxサーバーを2台ロードバランサーに紐づけます。
Linuxインスタンス側での設定
ロードバランサーがDSR方式なので2台のLinuxに以下の設定が必要
iptables -t nat -A PREROUTING -d LBのグローバルIP -j REDIRECT
うまくいったら、iptables設定ファイルに記述しておく
ロードバランサーに対してhttperfを実行
root@hoge]# httperf --server=XXX.XXX.XXX.XXX --port=80 --uri=/index.html --rate 5000 --num-conn 250000 --num-call 5 --timeout 5
httperf --timeout=5 --client=0/1 --server=XXX.XXX.XXX.XXX --port=80 --uri=/index.html --rate=5000 --send-buffer=4096 --recv-buffer=16384 --num-conns=250000 --num-calls=5
httperf: warning: open file limit > FD_SETSIZE; limiting max. # of open files to FD_SETSIZE
Maximum connect burst length: 11

Total: connections 250000 requests 1250000 replies 1250000 test-duration 50.010 s

Connection rate: 4999.0 conn/s (0.2 ms/conn, <=315 concurrent connections)
Connection time [ms]: min 1.1 avg 3.8 max 1005.2 median 2.5 stddev 8.7
Connection time [ms]: connect 0.6
Connection length [replies/conn]: 5.000

Request rate: 24994.9 req/s (0.0 ms/req)
Request size [B]: 73.0

Reply rate [replies/s]: min 24978.5 avg 24994.7 max 25010.1 stddev 8.5 (10 samples)
Reply time [ms]: response 0.6 transfer 0.0
Reply size [B]: header 230.0 content 5.0 footer 0.0 (total 235.0)
Reply status: 1xx=0 2xx=1250000 3xx=0 4xx=0 5xx=0

CPU time [s]: user 8.71 system 41.28 (user 17.4% system 82.5% total 100.0%)
Net I/O: 7518.0 KB/s (61.6*10^6 bps)

Errors: total 0 client-timo 0 socket-timo 0 connrefused 0 connreset 0
Errors: fd-unavail 0 addrunavail 0 ftab-full 0 other 0
LBの結果
Request rate: 24994.9 req/s
Errors: total 0
WEBインスタンス単体の結果
Request rate: 24538.7 req/s
Errors: total 0
なのでロードバランサーをかましても性能劣化はなく処理速度も(誤差の範囲ですが)上がっています。
今回はWEBサーバー自体の処理がほとんどないためLBをかましても性能向上は殆ど無いですがWEBサーバーの処理が高くなってきたらロードバランサーの効果が更に向上するでしょう。
少なくとも今回の結果でConoHaのLBを使った場合、リクエスト処理の劣化がないことは確認されました。
新ConoHaロードバランサーを使ってみての所感
- ConoHaのロードバランサーは処理劣化はないのがわかった。
- 月1000円とメモリ1Gのインスタンス月900円よりは高いので自前でNginxでロードバランサーしたほうが効率的かもしれないので検証の必要はあり
- ConoHaロードバランサーの動きが完全にブラックボックスでログも見れないためLinuxインスタンス側で設定をミスっている場合、トラブルシューティングがかなり厳しいので慣れるまで時間がかかる。
- ・・のでロードバランサーのログは見れるようにしてほしい!!まじで
