動作環境
Analog Discovery 2 (以下AD2) on Windows 8.1 pro (64bit)
python on Raspberry Pi2 + raspbian
セットアップ
http://qiita.com/hotchpotch/items/8a6fe6b8b0026ac6218e
の回路のDTR, RTSの H/L 制御をRPi2のGPIOで行う。
BYOPで作っていたPi2とESP8266の通信用ケーブルを流用して以下のように結線した。
- Pi2:Pin# 08 <-> AD2:Scope1 Positive
- Pi2:Pin# 06 <-> AD2:Scope1 Negative
- Pin# 06はGND
- Pi2:Pin# 10 <-> AD2:Scope2 Positive
- Pi2:Pin# 34 <-> AD2:Scope2 Negative
- Pin# 34はGND
code
上記の接続状態で以下のスクリプトを走らせる。
rtsdtr.py
import time
import RPi.GPIO as GPIO

GPIO.setmode(GPIO.BOARD)
kPinRTS = 8
kPinDTR = 10
GPIO.setup(kPinRTS, GPIO.OUT)
GPIO.setup(kPinDTR, GPIO.OUT)

while(True):
    time.sleep(2.0)    #sec
    print "hello"
    GPIO.output(kPinDTR, False)
    GPIO.output(kPinRTS, True)
    time.sleep(0.05) #sec
    GPIO.output(kPinDTR, True)
    GPIO.output(kPinRTS, False)
    time.sleep(0.05) #sec
    GPIO.output(kPinDTR, False)
    time.sleep(0.05) #sec
結果
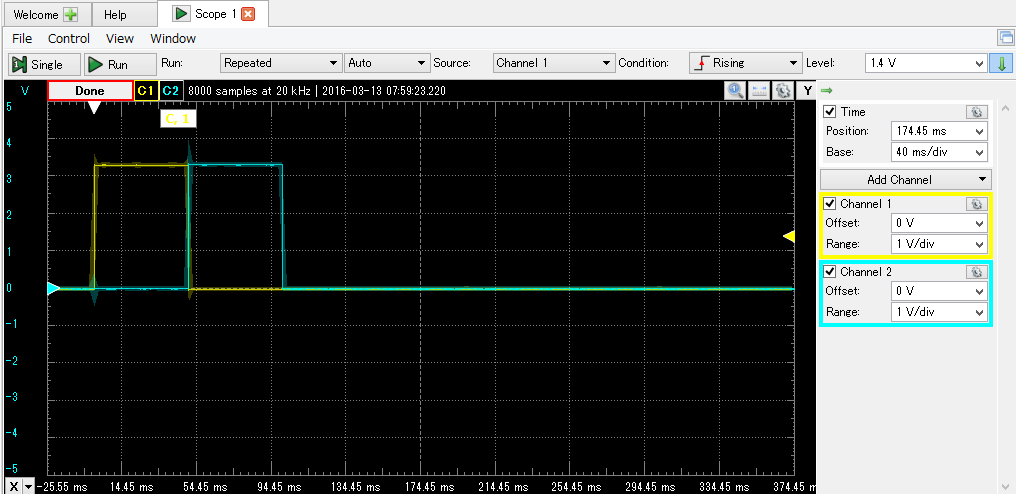
矩形の幅は50.16ms程度。
これを使って ESP8266 Auto FDTI Programの回路の結果を見てみる。
